Installation
FITTING THE HOB
Unpack the hob from the carton.
Remove the bag containing the sealing tape, fixing brackets and screws. Fit the sealing tape around the edge of the
Lower the hob into the worktop ensuring the mains lead is fed into the base unit and is not trapped under the flanges.
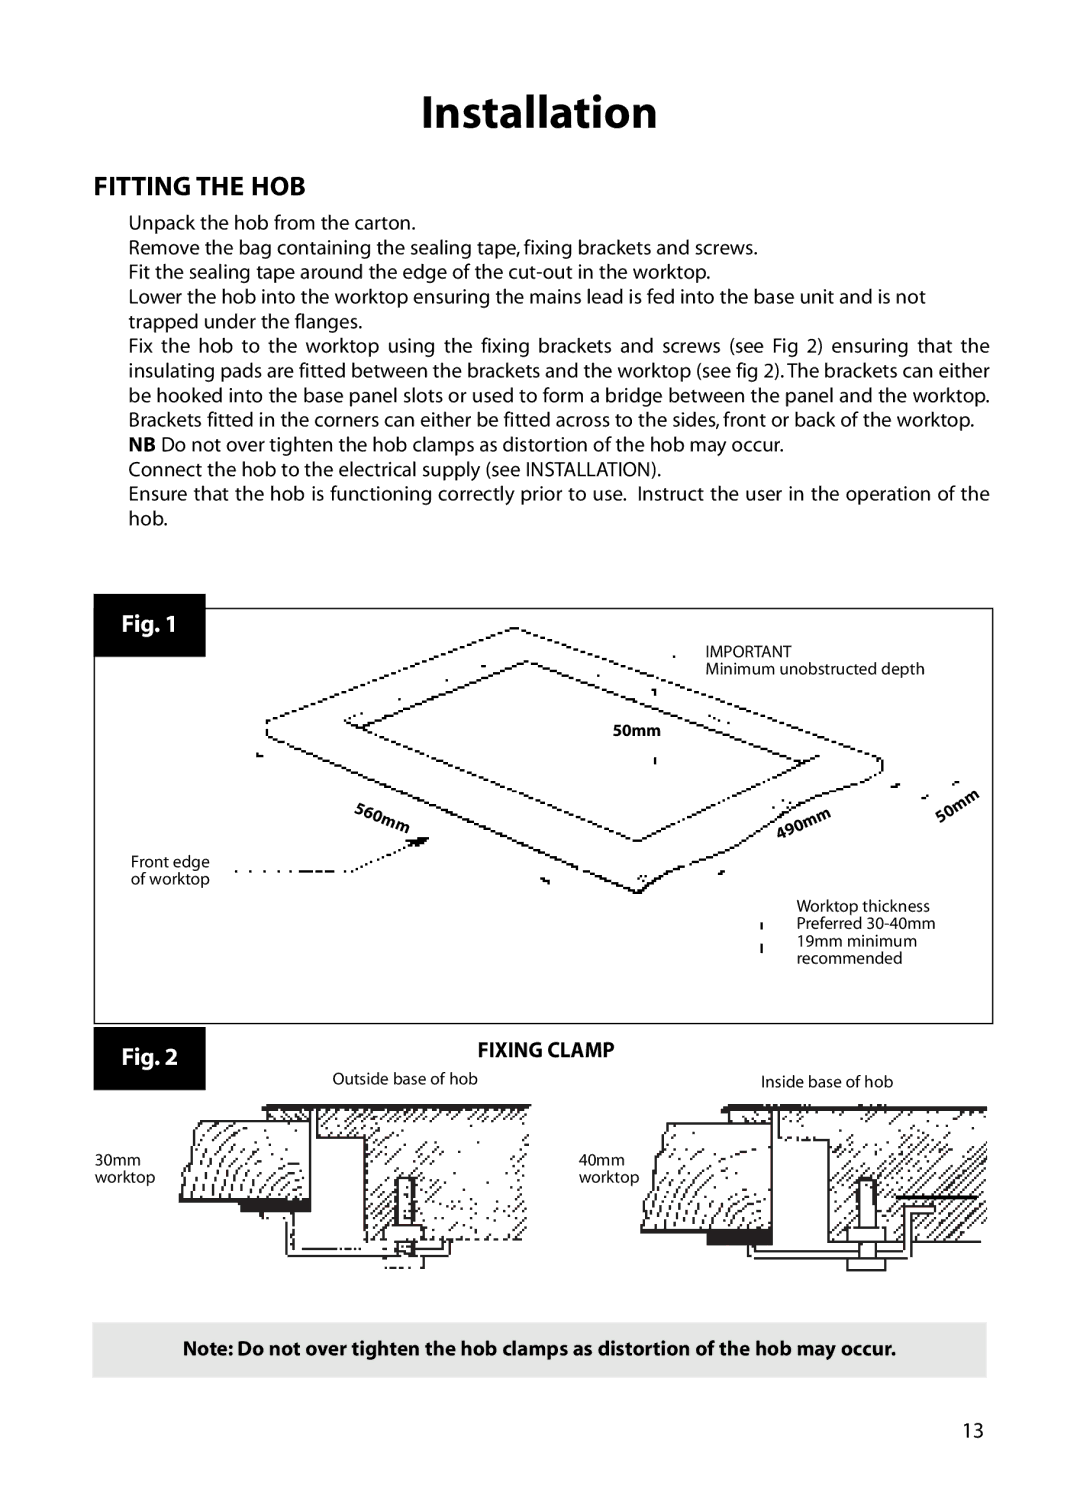
Fix the hob to the worktop using the fixing brackets and screws (see Fig 2) ensuring that the insulating pads are fitted between the brackets and the worktop (see fig 2). The brackets can either be hooked into the base panel slots or used to form a bridge between the panel and the worktop. Brackets fitted in the corners can either be fitted across to the sides, front or back of the worktop.
NB Do not over tighten the hob clamps as distortion of the hob may occur. Connect the hob to the electrical supply (see INSTALLATION).
Ensure that the hob is functioning correctly prior to use. Instruct the user in the operation of the hob.
Fig. 1
560mm
Front edge of worktop
IMPORTANT
Minimum unobstructed depth
50mm
490mm | 50mm |
|
Worktop thickness Preferred
Fig. 2 | Outside base of hob | FIXING CLAMP |
| Inside base of hob | |
30mm | 40mm | |
worktop | worktop | |
Note: Do not over tighten the hob clamps as distortion of the hob may occur.
13