Using the freezer to its full potential
•Do not
•Fresh food that needs to be frozen must not come into contact with food that has already been defrosted. Fresh food must be stored above the grill in the freezer compartment and if possible be in direct contact with the walls (side and rear), where the temperature drops below
•Do not place glass bottles which contain liquids, and which are corked or hermetically sealed in the freezer because they could break.
•The maximum quantity of food that may be frozen daily is indicated on the plate containing the technical properties located on the bottom left side of the refrigerator compartment (for example: Kg/24h: 4)
!Do not open the door during freezing.
!If there is a power cut or malfunction, do not open the freezer door. This will help maintain the temperature inside the freezer, ensuring that foods are conserved for at least 9
!If the room temperature drops below 14°C for an extended period of time, the ideal temperature will not be reached in the freezer compartment and food preservation will be reduced.
Fast Freeze switch
The appliance is fitted with a manual "Fast Freezer" switch.
When loading fresh food to freeze switch "Fast Freeze" on.
To set "Fast Freeze" ON,
press the switch to "I"
This switch activates intensive cooling to
ensure that required temperatures are reached quickly.
So when the fresh food is
frozen return the switch to its OFF position, "0". Note: for Energy Saving ensure that "Fast Freeze" is switched off after 24 hours.
For the refrigerator to operate properly the "Fast Freeze" button must be ON when room temperature is 16°C or lower.
Ice tray |
| |
GB | ||
The fact that they are situated on the top part of the freezer | ||
| ||
drawers ensures greater cleanliness: the ice no longer comes |
| |
into contact with the food placed inside the freezer |
| |
compartment; furthermore, the dripping of the water during |
| |
filling is avoided (a lid to cover up the hole after filling with |
| |
water is also provided). |
|
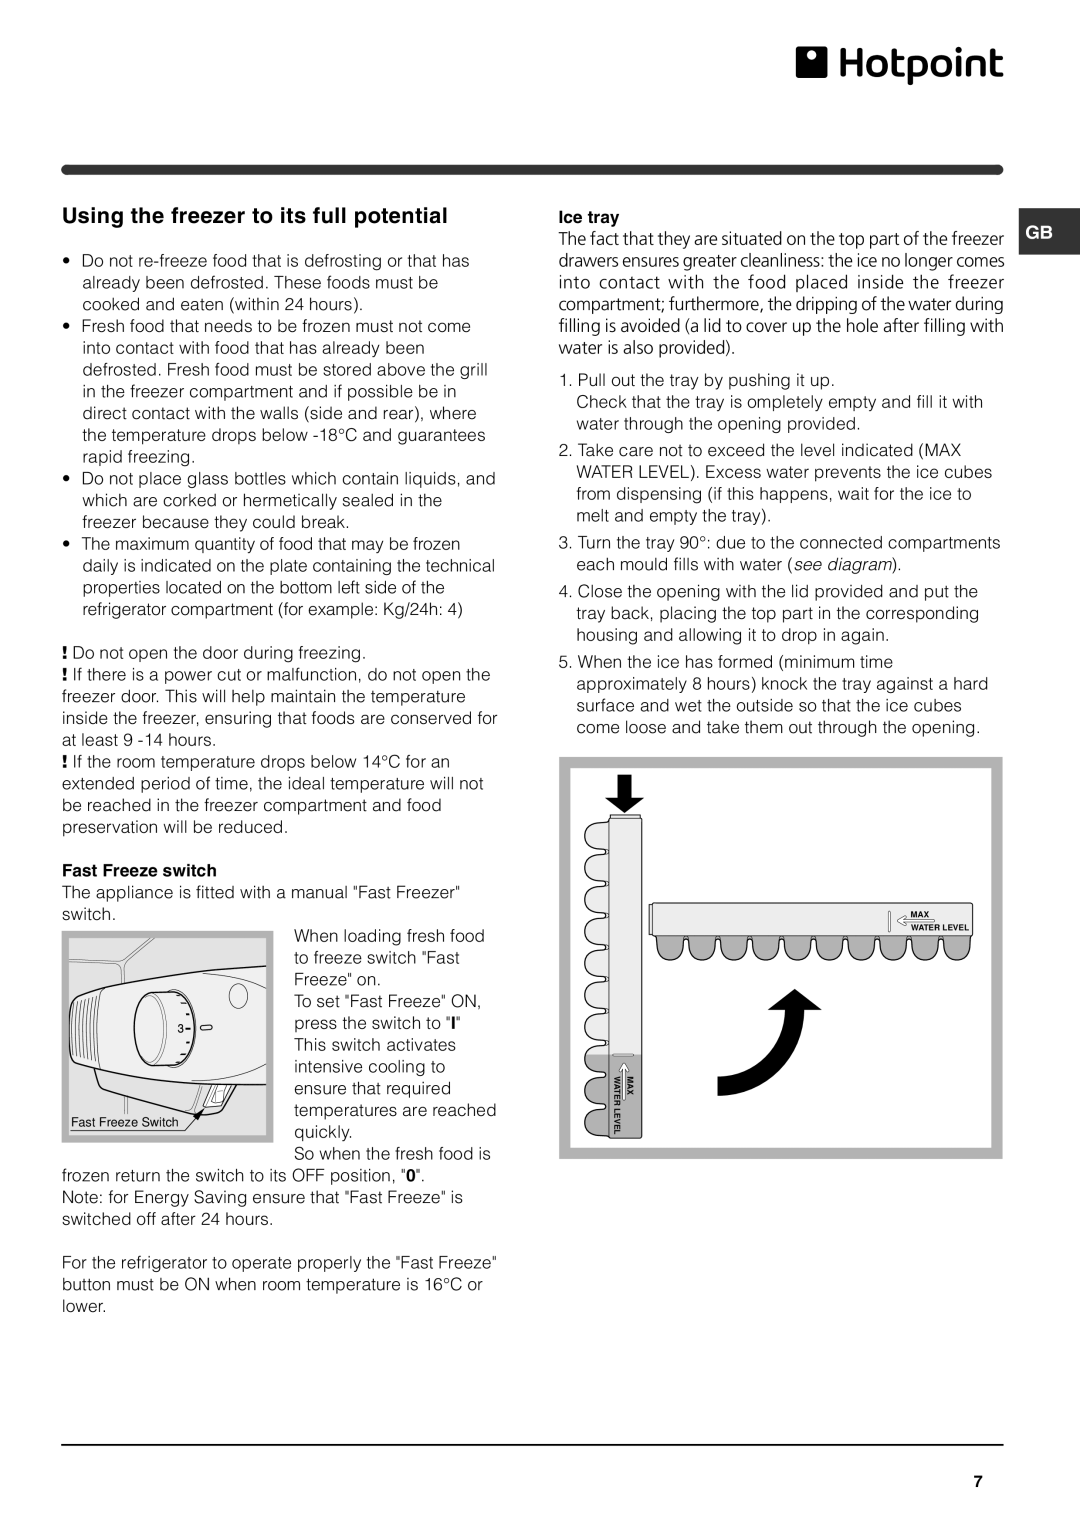
1.Pull out the tray by pushing it up.
Check that the tray is ompletely empty and fill it with water through the opening provided.
2.Take care not to exceed the level indicated (MAX WATER LEVEL). Excess water prevents the ice cubes from dispensing (if this happens, wait for the ice to melt and empty the tray).
3.Turn the tray 90°: due to the connected compartments each mould fills with water (see diagram).
4.Close the opening with the lid provided and put the tray back, placing the top part in the corresponding housing and allowing it to drop in again.
5.When the ice has formed (minimum time approximately 8 hours) knock the tray against a hard surface and wet the outside so that the ice cubes come loose and take them out through the opening.
MAX
WATER LEVEL
WATER | MAX |
LEVEL |
|
7