DIMM Installation Guide
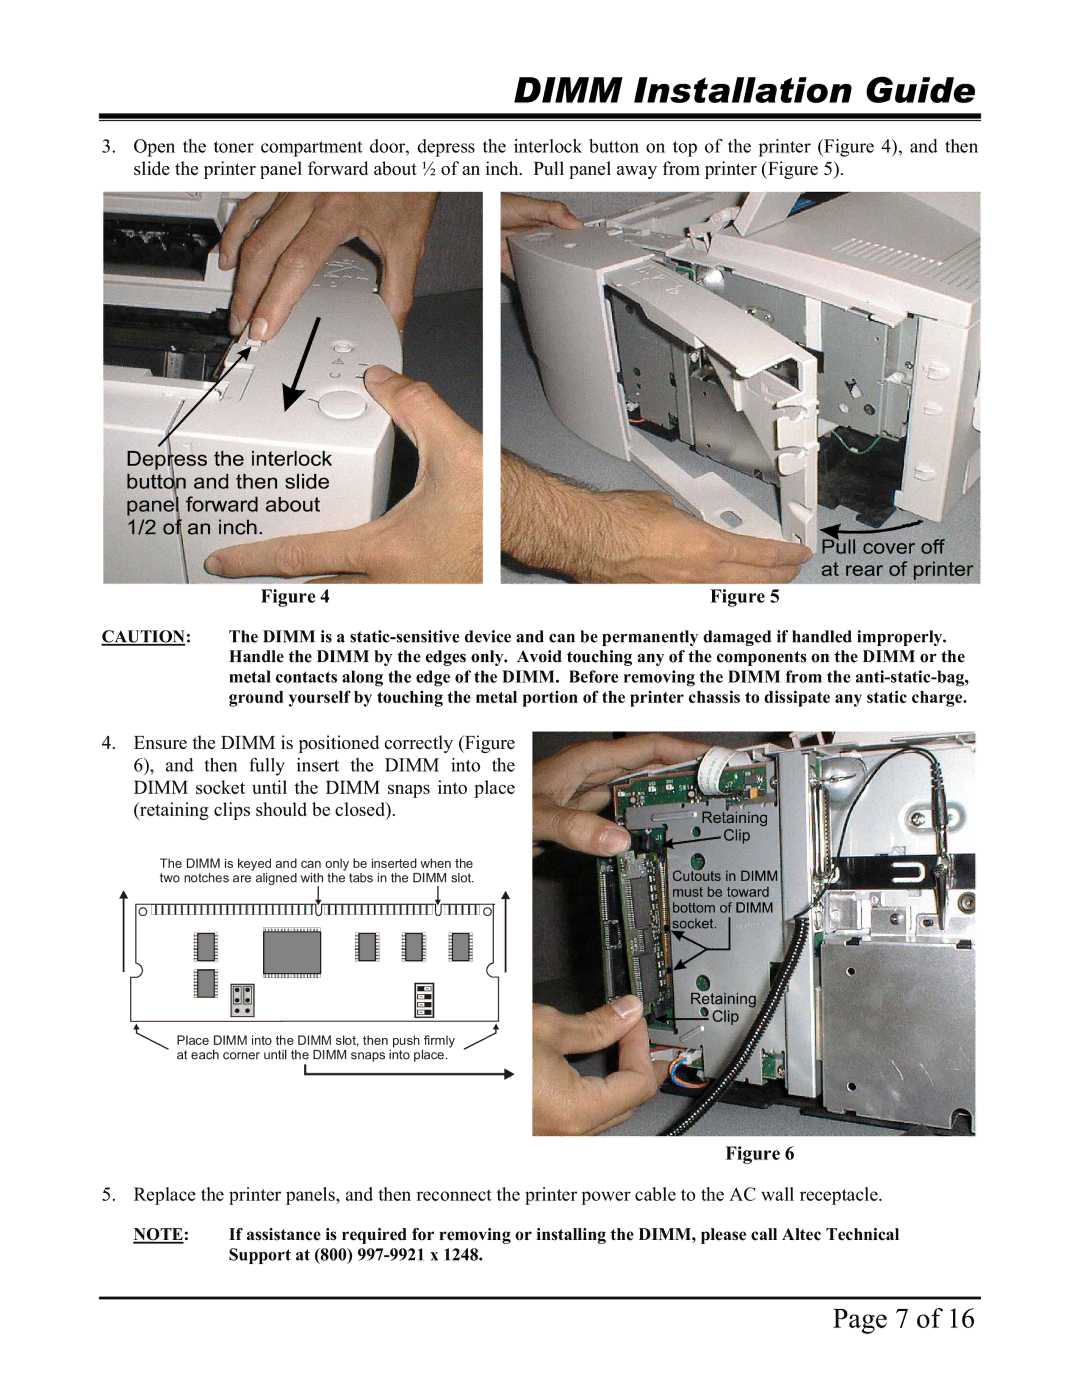
3.Open the toner compartment door, depress the interlock button on top of the printer (Figure 4), and then slide the printer panel forward about ½ of an inch. Pull panel away from printer (Figure 5).
Figure 4 | Figure 5 |
CAUTION: The DIMM is a
4.Ensure the DIMM is positioned correctly (Figure 6), and then fully insert the DIMM into the DIMM socket until the DIMM snaps into place (retaining clips should be closed).
The DIMM is keyed and can only be inserted when the two notches are aligned with the tabs in the DIMM slot.
Place DIMM into the DIMM slot, then push firmly at each corner until the DIMM snaps into place.
Figure 6
5.Replace the printer panels, and then reconnect the printer power cable to the AC wall receptacle.
NOTE: If assistance is required for removing or installing the DIMM, please call Altec Technical Support at (800)
Page 7 of 16
