5510, 5510xi, 5510v, 5505 specifications
The HP 5505, 5510v, 5510xi, and 5510 series printers are part of HP's line of versatile all-in-one inkjet printers designed to meet various printing needs, whether at home or in small offices. These models offer a combination of features, technologies, and performance tailored for users seeking efficient printing solutions.One of the standout features of the HP 5505 and its variants is their high-quality printing capability. These printers leverage HP's advanced ink technology, which produces vibrant colors and sharp text, ideal for both documents and photos. The printers support resolutions up to 4800 x 1200 optimized DPI, ensuring that each print comes out crisp and professional.
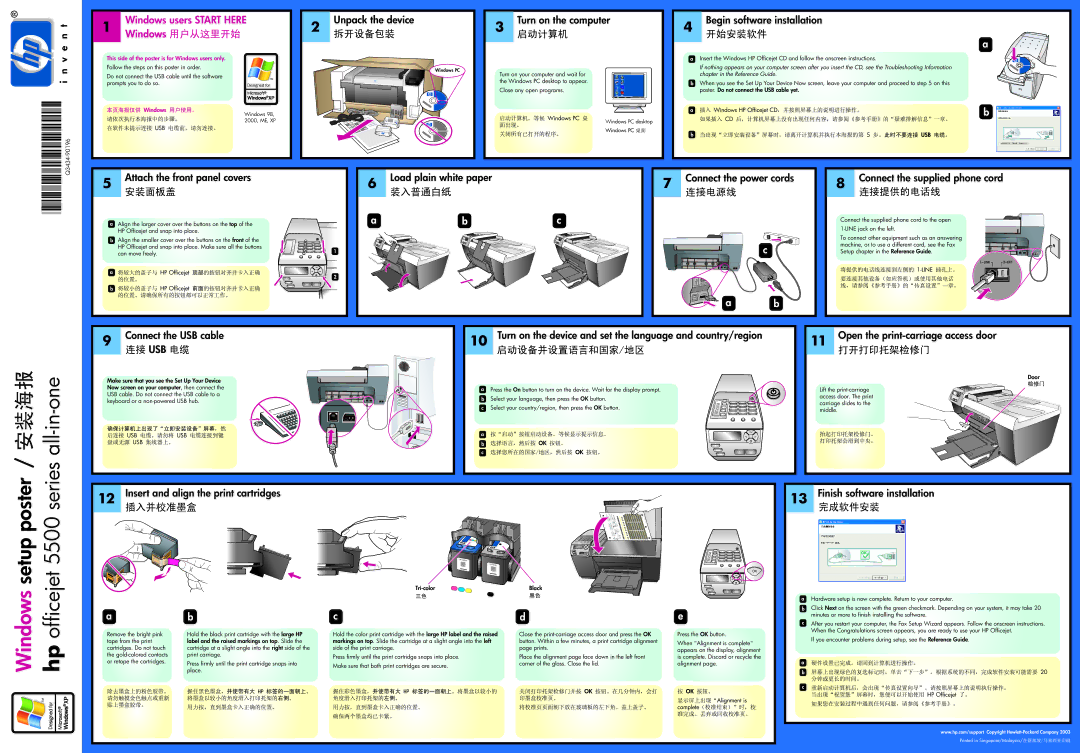
In addition to printing, the HP 5505 series excels in multifunctionality. These devices typically include scanning, copying, and even faxing capabilities. This multifunctional versatility makes it easier for users to manage tasks from one machine, reducing the need for multiple devices and saving space.
Connectivity is another highlight of these models. The HP 5505 and 5510 series printers provide USB, Ethernet, and wireless connectivity options, allowing users to print from various devices, including smartphones, tablets, and computers. The built-in wireless technology enables convenient printing from anywhere in the office or home without the need for cumbersome cables.
User-friendly interfaces are standard across the HP 5505 series. With intuitive control panels that may include color touchscreens, users can easily navigate through settings, check ink levels, and select print options. This streamlined user experience enhances productivity and simplifies operation.
When it comes to paper handling, these printers are designed for efficiency. They usually feature automatic duplex printing, allowing users to print on both sides of the paper, helping to reduce paper usage and costs. Additionally, the input trays can hold a significant amount of paper, catering to larger print jobs without frequent reloads.
Energy efficiency is another key characteristic of the HP 5505 and its related models. They often comply with ENERGY STAR standards, which means they consume less power without sacrificing performance, making them an eco-friendly choice for environmentally conscious users.
In summary, the HP 5505, 5510v, 5510xi, and 5510 printers are robust all-in-one solutions that deliver exceptional quality, multifunctionality, and convenient connectivity options. Their user-friendly features and energy-efficient design make them an appealing choice for home users and small businesses looking for reliable printing technology.