Connecting the Cables
1.Place the monitor in a convenient,
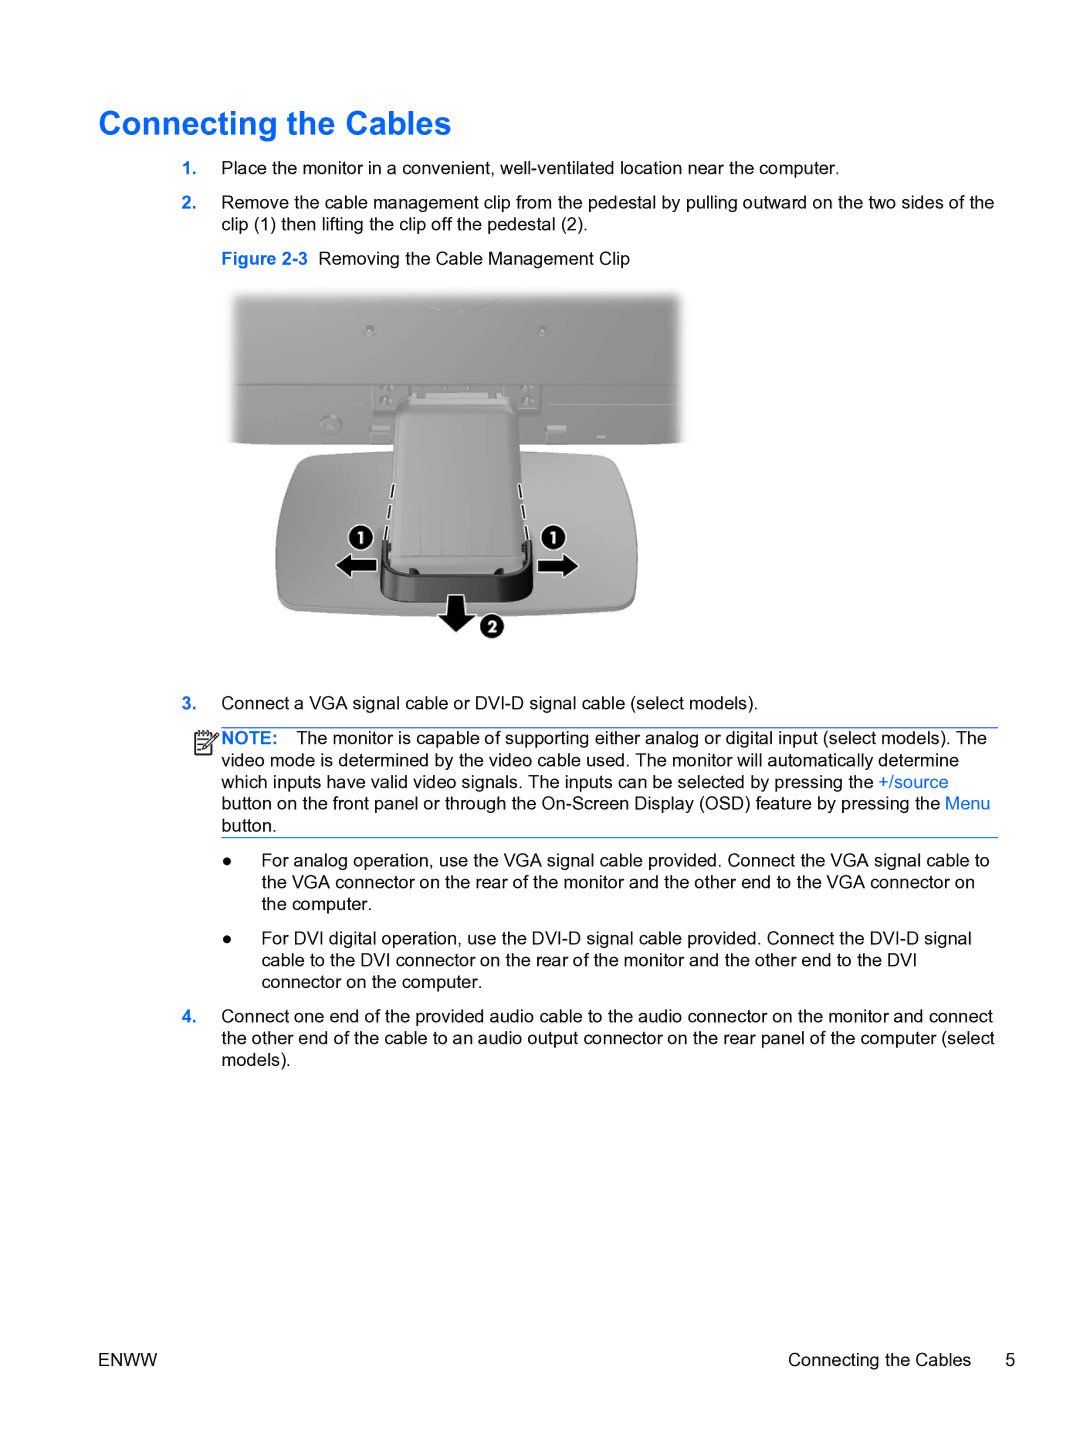
2.Remove the cable management clip from the pedestal by pulling outward on the two sides of the clip (1) then lifting the clip off the pedestal (2).
Figure 2-3 Removing the Cable Management Clip
3.Connect a VGA signal cable or DVI-D signal cable (select models).
![]()
![]()
![]()
![]() NOTE: The monitor is capable of supporting either analog or digital input (select models). The video mode is determined by the video cable used. The monitor will automatically determine which inputs have valid video signals. The inputs can be selected by pressing the +/source button on the front panel or through the
NOTE: The monitor is capable of supporting either analog or digital input (select models). The video mode is determined by the video cable used. The monitor will automatically determine which inputs have valid video signals. The inputs can be selected by pressing the +/source button on the front panel or through the
●For analog operation, use the VGA signal cable provided. Connect the VGA signal cable to the VGA connector on the rear of the monitor and the other end to the VGA connector on the computer.
●For DVI digital operation, use the DVI-D signal cable provided. Connect the DVI-D signal cable to the DVI connector on the rear of the monitor and the other end to the DVI connector on the computer.
4.Connect one end of the provided audio cable to the audio connector on the monitor and connect the other end of the cable to an audio output connector on the rear panel of the computer (select models).
ENWW | Connecting the Cables 5 |