Section 3 - Operation
3.1 Power Requirements
Caution! Be sure that the power supply is the same voltage as specified on the nameplate
With the chiller plugged in (before pressing the POWER ON button), the display responds by showing standby (....). If there is no response, check that the circuit breaker on the rear of the chiller is in the
ON position. An extension cord is not recommended.
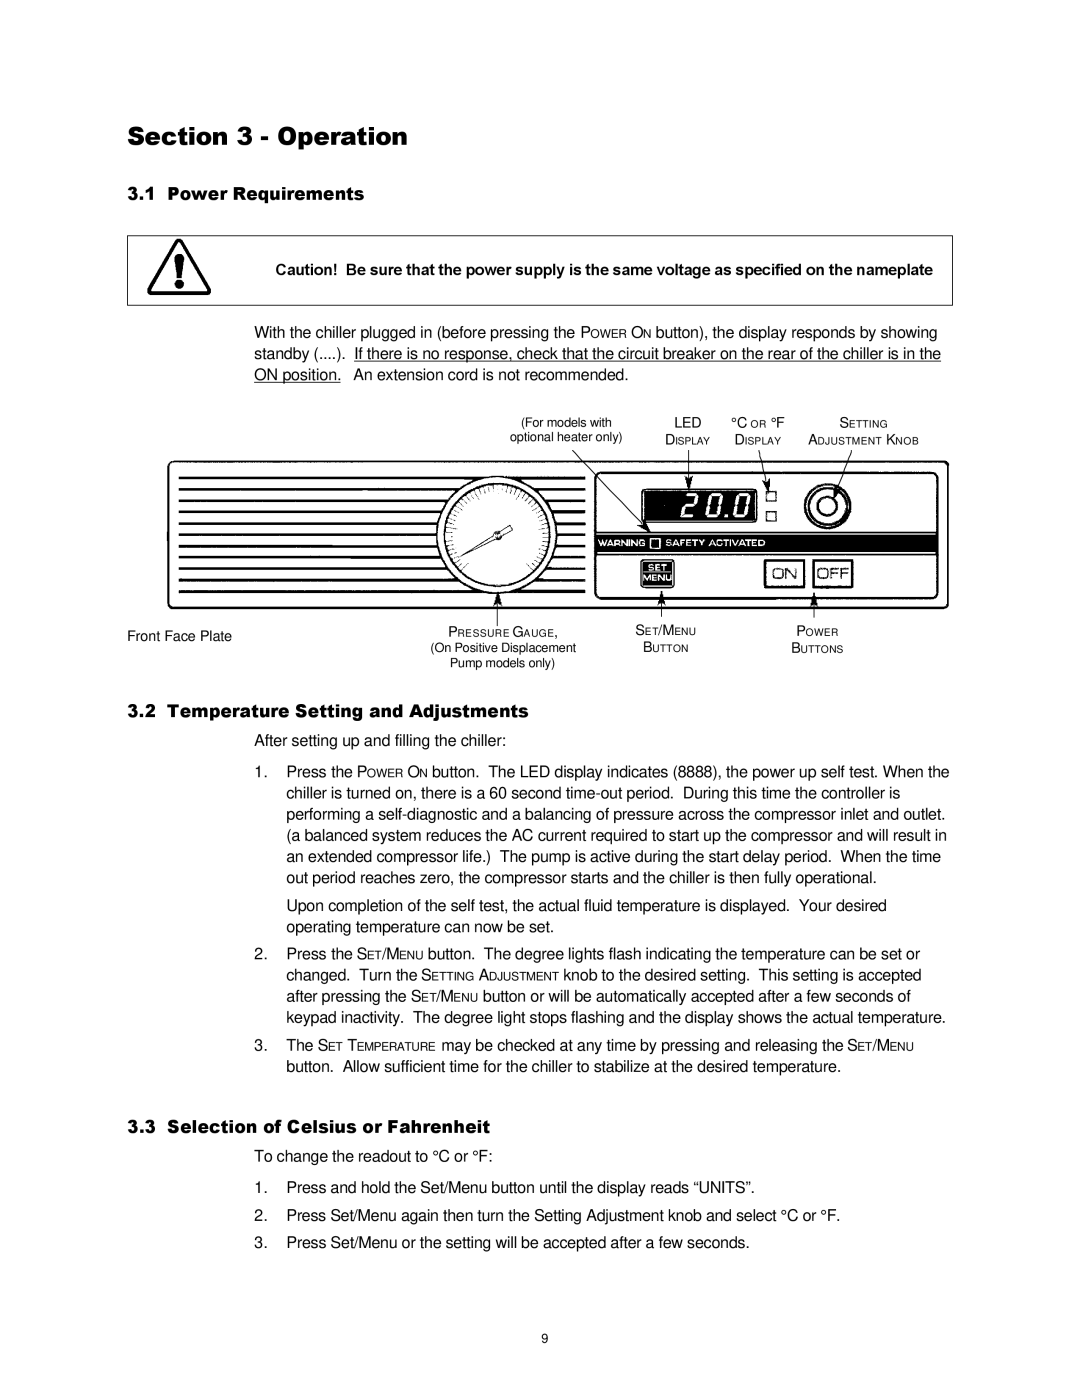
(For models with |
|
|
| LED | °C OR °F |
| SETTING | |||||||
optional heater only) |
|
|
| DISPLAY | DISPLAY | ADJUSTMENT KNOB | ||||||||
|
|
|
|
|
|
|
|
|
|
|
|
|
|
|
|
|
|
|
|
|
|
|
|
|
|
|
|
|
|
|
|
|
|
|
|
|
|
|
|
|
|
|
|
|
|
|
|
|
|
|
|
|
|
|
|
|
|
|
|
|
|
|
|
|
|
|
|
|
|
|
|
|
|
|
|
|
|
|
|
|
|
|
|
|
|
|
|
|
|
|
|
|
|
|
|
|
|
|
|
|
|
|
| |
Front Face Plate | PRESSURE |
|
| GAUGE, | SET/MENU | POWER | ||||||||
| ||||||||||||||
(On Positive Displacement | BUTTON | BUTTONS | ||||||||||||
| ||||||||||||||
| Pump models only) |
|
|
|
|
|
|
|
| |||||
3.2Temperature Setting and Adjustments
After setting up and filling the chiller:
1.Press the POWER ON button. The LED display indicates (8888), the power up self test. When the chiller is turned on, there is a 60 second
Upon completion of the self test, the actual fluid temperature is displayed. Your desired operating temperature can now be set.
2.Press the SET/MENU button. The degree lights flash indicating the temperature can be set or changed. Turn the SETTING ADJUSTMENT knob to the desired setting. This setting is accepted after pressing the SET/MENU button or will be automatically accepted after a few seconds of keypad inactivity. The degree light stops flashing and the display shows the actual temperature.
3.The SET TEMPERATURE may be checked at any time by pressing and releasing the SET/MENU button. Allow sufficient time for the chiller to stabilize at the desired temperature.
3.3Selection of Celsius or Fahrenheit
To change the readout to °C or °F:
1.Press and hold the Set/Menu button until the display reads “UNITS”.
2.Press Set/Menu again then turn the Setting Adjustment knob and select °C or °F.
3.Press Set/Menu or the setting will be accepted after a few seconds.
9