SR2172NX, SR2175X specifications
The HP SR5213HK, SR5030NX, SR2172NX, SR2168HM, and SR5218HK are part of Hewlett-Packard's versatile lineup of desktop PCs designed to cater to a wide range of computing needs. These models incorporate a host of features, technologies, and characteristics that make them suitable for both everyday use and specific tasks.The SR5213HK is known for its balanced performance, featuring an AMD Athlon processor and ample RAM. This combination delivers efficient multitasking capabilities, making it ideal for both home and office environments. The system includes integrated graphics, which supports casual gaming and multimedia activities. Furthermore, the SR5213HK comes equipped with a range of connectivity options, including USB ports and an HDMI output for connecting to external displays.
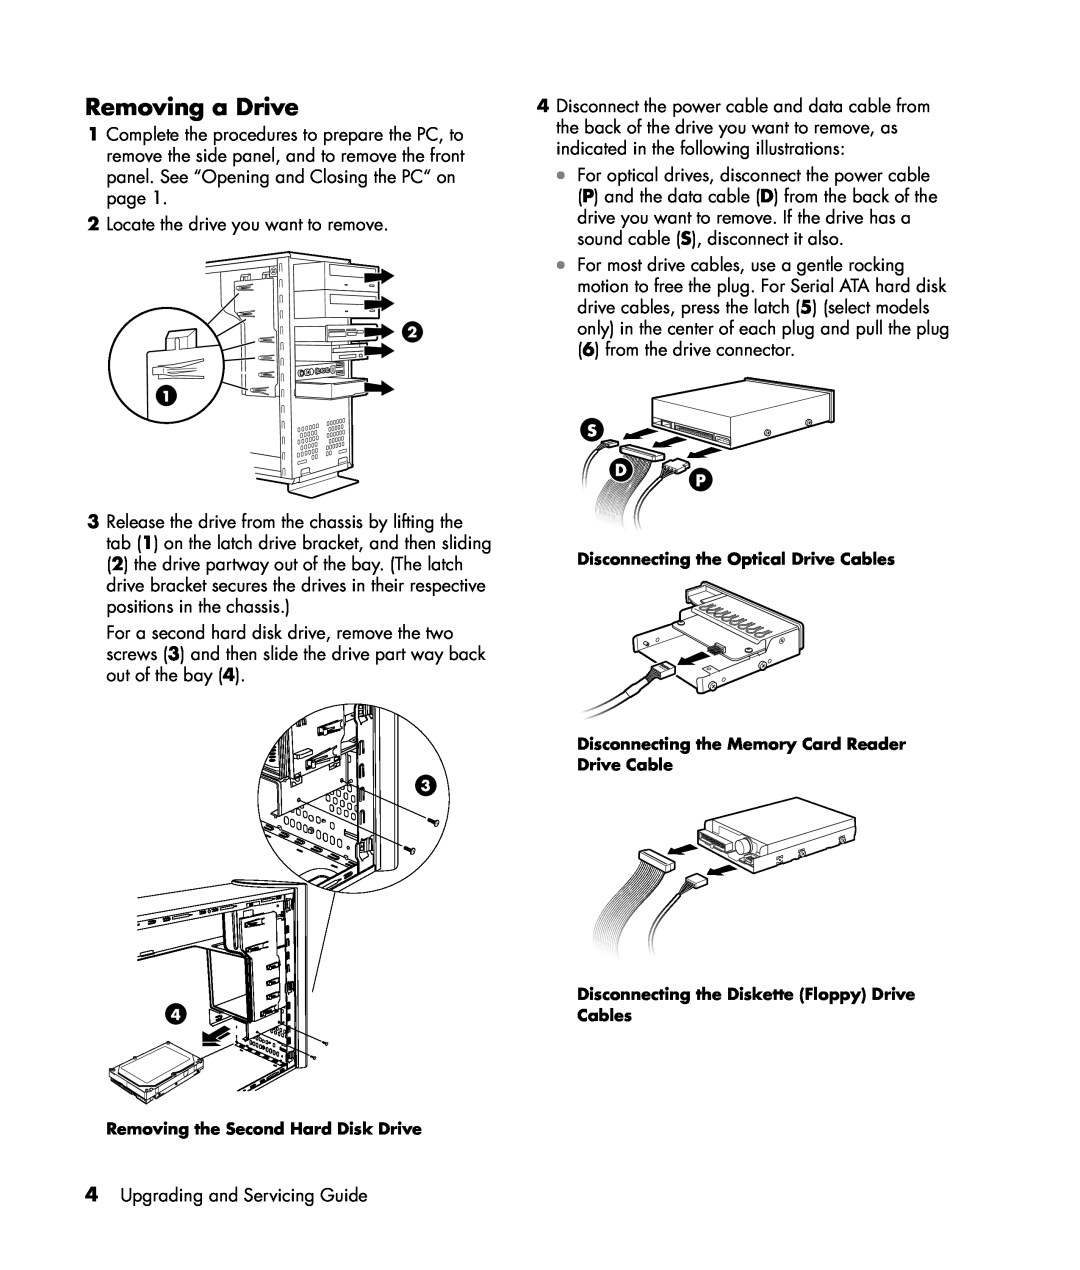
In contrast, the SR5030NX is a performance-driven model that caters to more intensive computing needs. It boasts a powerful Intel Core processor, which enhances processing speed and efficiency. The SR5030NX also features a dedicated graphics card, enabling it to handle graphic-intensive applications, such as video editing and gaming, with ease. The large hard drive capacity serves to store large files and applications, while additional RAM improves overall performance.
The SR2172NX is designed for users who prioritize value and reliability. It comes with a robust AMD processor and sufficient RAM to tackle daily tasks like web browsing, document editing, and streaming media. Its straightforward design and user-friendly interface make it an excellent choice for families and students.
The SR2168HM features a compact design, making it an excellent option for users with limited space. This model boasts decent specifications, including an energy-efficient processor and integrated graphics, making it suitable for everyday computing tasks. The system is also equipped with multiple USB ports for connecting peripherals and external devices.
Lastly, the SR5218HK stands out for its versatility and expandability. This model is designed to grow with the user's needs, featuring ample slots for RAM upgrades and storage expansions. With an efficient processor and adequate dedicated graphics, the SR5218HK is well-suited for various applications, from office work to light gaming and media consumption.
In summary, the HP SR5213HK, SR5030NX, SR2172NX, SR2168HM, and SR5218HK deliver a range of capabilities suited to various user needs. With their combination of reliable performance, efficient designs, and connectivity options, these desktops provide solid computing experiences for both personal and professional applications.