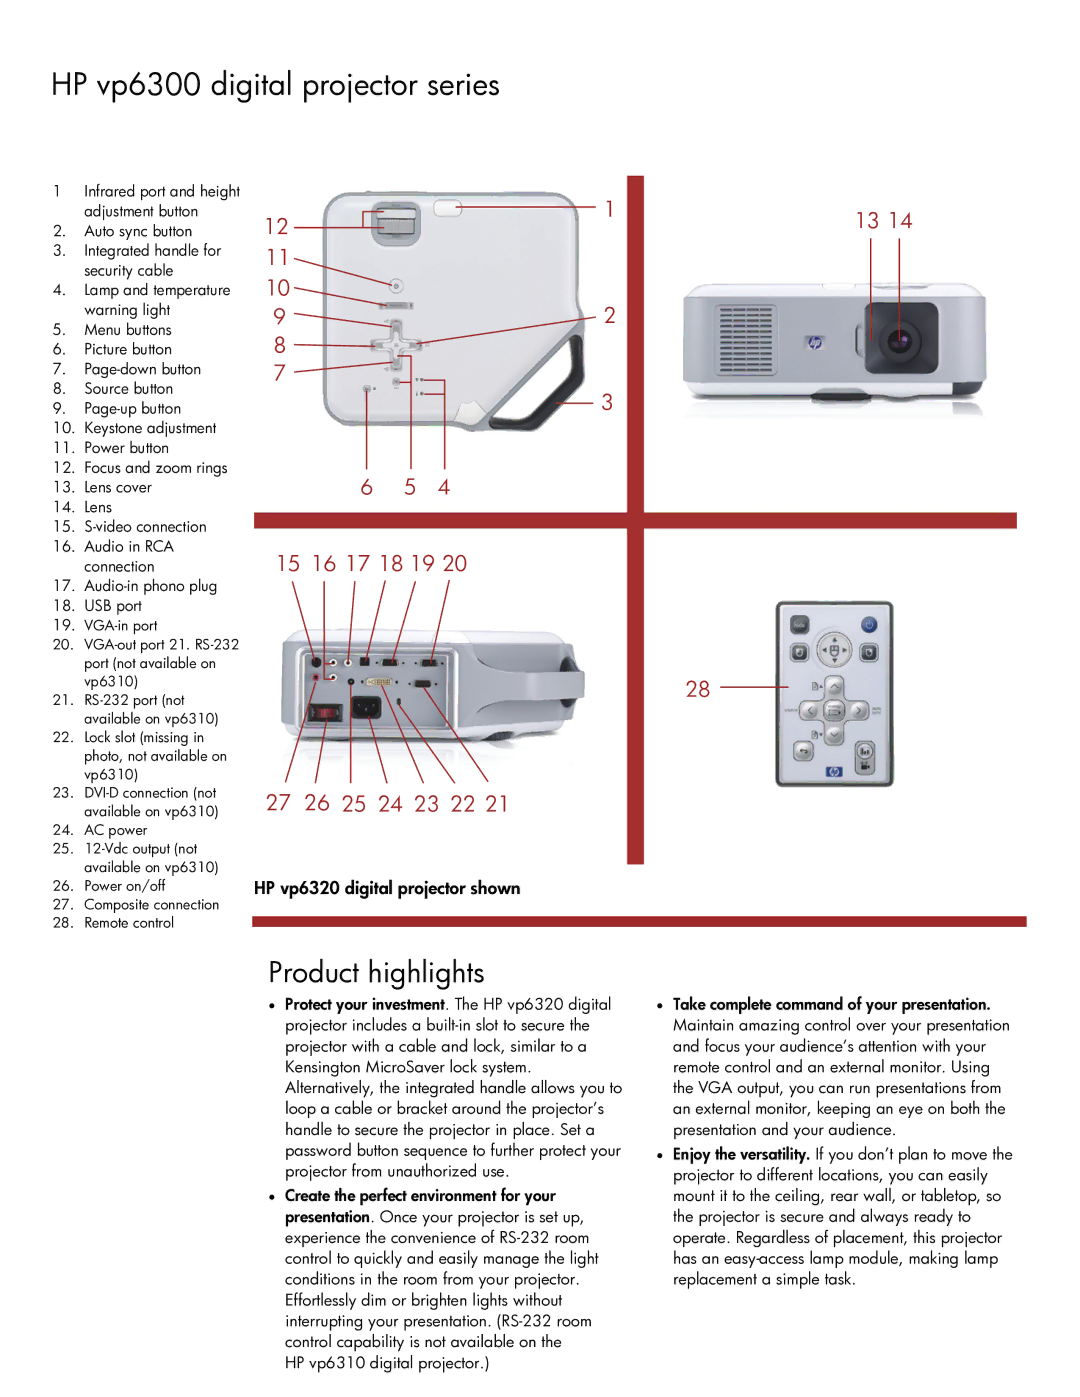
HP vp6300 digital projector series
1 Infrared port and height adjustment button
2.Auto sync button
3.Integrated handle for security cable
4.Lamp and temperature warning light
5.Menu buttons
6.Picture button
7.
8.Source button
9.
10.Keystone adjustment
11.Power button
12.Focus and zoom rings
13.Lens cover
14.Lens
15.
16.Audio in RCA connection
17.
18.USB port
19.
20.
21.
22.Lock slot (missing in photo, not available on vp6310)
23.
24.AC power
25.
26.Power on/off
27.Composite connection
28.Remote control
12
11
10
9
8
7 ![]()
65 4
15 16 17 18 19 20
27 26 25 24 23 22 21
HP vp6320 digital projector shown
1 | 13 14 |
|
2
3
28
Product highlights
•Protect your investment. The HP vp6320 digital projector includes a
•Create the perfect environment for your presentation. Once your projector is set up, experience the convenience of
HP vp6310 digital projector.)
•Take complete command of your presentation. Maintain amazing control over your presentation and focus your audience’s attention with your remote control and an external monitor. Using the VGA output, you can run presentations from an external monitor, keeping an eye on both the presentation and your audience.
•Enjoy the versatility. If you don’t plan to move the projector to different locations, you can easily mount it to the ceiling, rear wall, or tabletop, so the projector is secure and always ready to operate. Regardless of placement, this projector has an