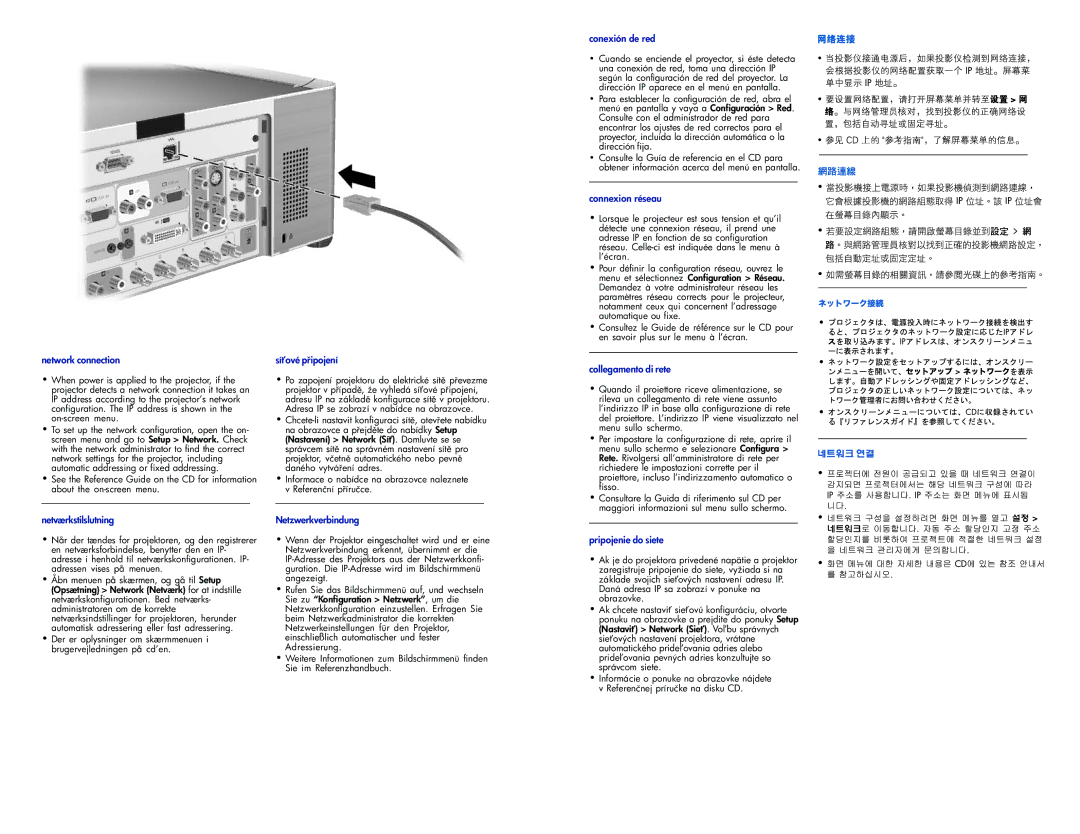
network connection

When power is applied to the projector, if the projector detects a network connection it takes an IP address according to the projector’s network configuration. The IP address is shown in the on-screen menu.

To set up the network configuration, open the on- screen menu and go to Setup > Network. Check with the network administrator to find the correct network settings for the projector, including automatic addressing or fixed addressing.

See the Reference Guide on the CD for information about the on-screen menu.

netværkstilslutning

Når der tændes for projektoren, og den registrerer en netværksforbindelse, benytter den en IP- adresse i henhold til netværkskonfigurationen. IP- adressen vises på menuen.

Åbn menuen på skærmen, og gå til Setup (Opsætning) > Network (Netværk) for at indstille netværkskonfigurationen. Bed netværks- administratoren om de korrekte netværksindstillinger for projektoren, herunder automatisk adressering eller fast adressering.

Der er oplysninger om skærmmenuen i brugervejledningen på cd’en.

Po zapojení projektoru do elektrické sítvezme projektor v p

adresu IP na základ

Adresa IP se zobrazí v nabídce na obrazovce.

Chcete-li nastavit konfiguraci sít

na obrazovce a p

Setup

(Nastavení) > Network (Sí

. Domluvte se se

správcem sít


projektor, včetntomatického nebo pevn daného vytvá

Informace o nabídce na obrazovce naleznete v Referenční p

Netzwerkverbindung

Wenn der Projektor eingeschaltet wird und er eine Netzwerkverbindung erkennt, übernimmt er die IP-Adresse des Projektors aus der Netzwerkkonfi- guration. Die IP-Adresse wird im Bildschirmmenü angezeigt.

Rufen Sie das Bildschirmmenü auf, und wechseln Sie zu “Konfiguration > Netzwerk”, um die Netzwerkkonfiguration einzustellen. Erfragen Sie beim Netzwerkadministrator die korrekten Netzwerkeinstellungen für den Projektor, einschließlich automatischer und fester Adressierung.

Weitere Informationen zum Bildschirmmenü finden Sie im Referenzhandbuch.

conexión de red

Cuando se enciende el proyector, si éste detecta una conexión de red, toma una dirección IP según la configuración de red del proyector. La dirección IP aparece en el menú en pantalla.

Para establecer la configuración de red, abra el menú en pantalla y vaya a Configuración > Red. Consulte con el administrador de red para encontrar los ajustes de red correctos para el proyector, incluida la dirección automática o la dirección fija.

Consulte la Guía de referencia en el CD para obtener información acerca del menú en pantalla.

connexion réseau

Lorsque le projecteur est sous tension et qu’il détecte une connexion réseau, il prend une adresse IP en fonction de sa configuration réseau. Celle-ci est indiquée dans le menu à l’écran.

Pour définir la configuration réseau, ouvrez le menu et sélectionnez Configuration > Réseau. Demandez à votre administrateur réseau les paramètres réseau corrects pour le projecteur, notamment ceux qui concernent l’adressage automatique ou fixe.

Consultez le Guide de référence sur le CD pour en savoir plus sur le menu à l’écran.

collegamento di rete

Quando il proiettore riceve alimentazione, se rileva un collegamento di rete viene assunto l’indirizzo IP in base alla configurazione di rete del proiettore. L’indirizzo IP viene visualizzato nel menu sullo schermo.

Per impostare la configurazione di rete, aprire il menu sullo schermo e selezionare Configura > Rete. Rivolgersi all’amministratore di rete per richiedere le impostazioni corrette per il proiettore, incluso l’indirizzamento automatico o fisso.

Consultare la Guida di riferimento sul CD per maggiori informazioni sul menu sullo schermo.

pripojenie do siete

Ak je do projektora privedené napätie a projektor zaregistruje pripojenie do siete, vyžiada si na základe svojich sievých nastavení adresu IP. Daná adresa IP sa zobrazí v ponuke na obrazovke.

Ak chcete nastavi

ponuku na obrazovke a prejdite do ponuky Setup

(Nastavitwork (Sie

. Vosprávnych

sie


automatického pride


pride


správcom siete.


Informácie o ponuke na obrazovke nájdete v Referenčnej príručke na disku CD.

Page 7
Image 7
HP xp8010, xp8020 manual Network connection, Netværkstilslutning, Netzwerkverbindung, Conexión de red, Connexion réseau

xp8010, xp8020 specifications

The HP MP3135w, XP8020, MP3135, MP3130, and XP8010 are part of a series of multifunction printers that cater to a diverse range of printing needs, from home offices to larger business environments. Each model showcases unique features, advanced technologies, and robust characteristics that set them apart in the competitive printing market.

The HP MP3135w is known for its wireless connectivity, making it easy for users to print from a variety of devices, including smartphones and tablets. This model supports mobile printing protocols such as AirPrint and Google Cloud Print, enhancing convenience for users who require flexibility in their printing tasks. It boasts a compact design without compromising output quality. The MP3135w is equipped with a reliable printing engine, capable of producing sharp text and intricate graphics with a resolution that ensures professional-quality printouts.

The XP8020 stands out with its all-in-one capabilities, offering printing, scanning, copying, and in some iterations, faxing. This multifunctionality makes it ideal for small businesses or home offices where space is limited. It features touchscreen navigation, simplifying operation and enhancing user experience. The XP8020 also supports high-volume printing, benefiting businesses with significant output demands and quick turnaround times.

The MP3135 and MP3130 share commonalities in their design and printing technologies. Both models utilize inkjet technology, providing vibrant color and precise text quality. They are designed for ease of setup and maintenance, with user-friendly interfaces that allow for effortless operation. Furthermore, they incorporate energy-efficient technologies, such as automatic duplex printing, which saves paper and reduces overall costs.

Lastly, the XP8010 is recognized for its fast print speeds, particularly for high-volume tasks. This model is well-suited for environments that require quick turnaround and efficiency. With features like borderless printing, the XP8010 allows users to create stunning photos and marketing materials with edge-to-edge color.

In summary, the HP MP3135w, XP8020, MP3135, MP3130, and XP8010 are versatile printing solutions that cater to a range of users, from casual home users to professional environments. Their combination of connectivity options, multifunction capabilities, and efficient printing technologies make them a valuable asset for those looking to enhance their productivity and print quality.