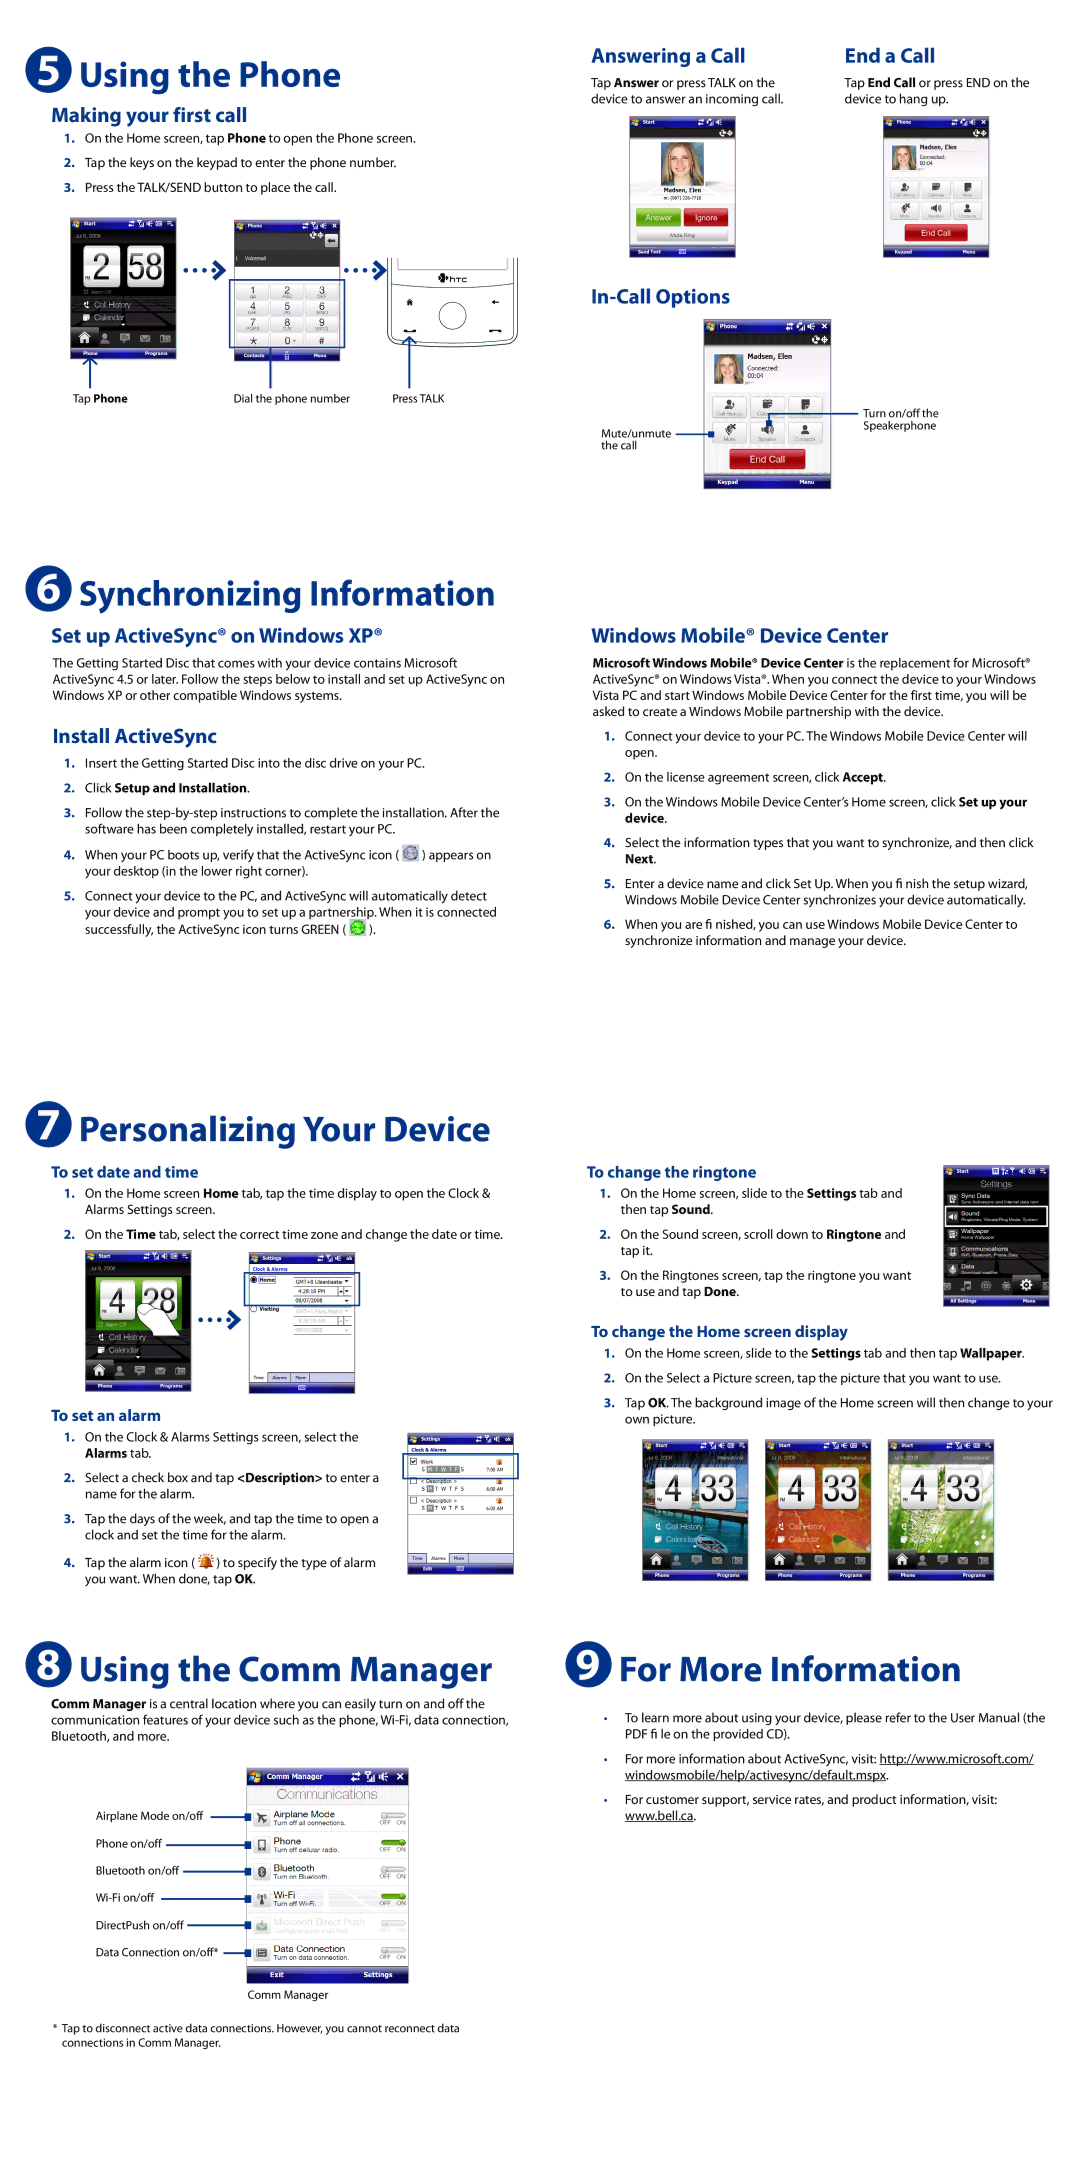
5 Using the Phone
Making your first call
1.On the Home screen, tap Phone to open the Phone screen.
2.Tap the keys on the keypad to enter the phone number.
3.Press the TALK/SEND button to place the call.
Tap Phone | Dial the phone number | Press TALK |
Answering a Call
Tap Answer or press TALK on the device to answer an incoming call.
In-Call Options
End a Call
Tap End Call or press END on the device to hang up.
Mute/unmute ![]() the call
the call
Turn on/off the Speakerphone
6 Synchronizing Information
Set up ActiveSync® on Windows XP®
The Getting Started Disc that comes with your device contains Microsoft ActiveSync 4.5 or later. Follow the steps below to install and set up ActiveSync on Windows XP or other compatible Windows systems.
Install ActiveSync
1.Insert the Getting Started Disc into the disc drive on your PC.
2.Click Setup and Installation.
3.Follow the
4.When your PC boots up, verify that the ActiveSync icon ( ![]() ) appears on your desktop (in the lower right corner).
) appears on your desktop (in the lower right corner).
5.Connect your device to the PC, and ActiveSync will automatically detect
your device and prompt you to set up a partnership. When it is connected successfully, the ActiveSync icon turns GREEN ( ![]() ).
).
Windows Mobile® Device Center
Microsoft Windows Mobile® Device Center is the replacement for Microsoft® ActiveSync® on Windows Vista®. When you connect the device to your Windows Vista PC and start Windows Mobile Device Center for the first time, you will be asked to create a Windows Mobile partnership with the device.
1.Connect your device to your PC. The Windows Mobile Device Center will open.
2.On the license agreement screen, click Accept.
3.On the Windows Mobile Device Center’s Home screen, click Set up your device.
4.Select the information types that you want to synchronize, and then click Next.
5.Enter a device name and click Set Up. When you fi nish the setup wizard, Windows Mobile Device Center synchronizes your device automatically.
6.When you are fi nished, you can use Windows Mobile Device Center to synchronize information and manage your device.
7 Personalizing Your Device
To set date and time
1.On the Home screen Home tab, tap the time display to open the Clock & Alarms Settings screen.
2.On the Time tab, select the correct time zone and change the date or time.
To set an alarm
1.On the Clock & Alarms Settings screen, select the Alarms tab.
2.Select a check box and tap <Description> to enter a name for the alarm.
3.Tap the days of the week, and tap the time to open a clock and set the time for the alarm.
4.Tap the alarm icon (![]() ) to specify the type of alarm you want. When done, tap OK.
) to specify the type of alarm you want. When done, tap OK.
To change the ringtone
1.On the Home screen, slide to the Settings tab and
then tap Sound.
2.On the Sound screen, scroll down to Ringtone and tap it.
3.On the Ringtones screen, tap the ringtone you want to use and tap Done.
To change the Home screen display
1.On the Home screen, slide to the Settings tab and then tap Wallpaper.
2.On the Select a Picture screen, tap the picture that you want to use.
3.Tap OK. The background image of the Home screen will then change to your own picture.
8 Using the Comm Manager
Comm Manager is a central location where you can easily turn on and off the communication features of your device such as the phone,
Airplane Mode on/off
Phone on/off
Bluetooth on/off ![]()
DirectPush on/off ![]()
Data Connection on/off* ![]()
Comm Manager
*Tap to disconnect active data connections. However, you cannot reconnect data connections in Comm Manager.
9 For More Information
•To learn more about using your device, please refer to the User Manual (the PDF fi le on the provided CD).
•For more information about ActiveSync, visit: http://www.microsoft.com/ windowsmobile/help/activesync/default.mspx.
•For customer support, service rates, and product information, visit: www.bell.ca.