
141, 136 specifications
The Husqvarna 141 and 136 chainsaws are remarkable tools designed for both homeowners and forestry professionals, offering reliable performance and ease of use. These models are particularly well-suited for light to moderate cutting tasks, making them ideal for trimming bushes, felling small trees, and cutting firewood.One of the key features of the Husqvarna 141 and 136 is their lightweight design, which facilitates effortless maneuverability. Weighing in at around 10.5 pounds, these chainsaws are easy to handle for extended periods, reducing fatigue during prolonged use. This is especially beneficial for users who may not have extensive experience with chainsaws.
Another highlight of these models is the powerful engine. The Husqvarna 141 is equipped with a 40cc engine, while the 136 features a slightly smaller 35cc engine. Both engines utilize a two-stroke design that maximizes performance and efficiency. The X-Torq technology integrated into these models minimizes harmful emissions and enhances fuel efficiency, making them environmentally friendly options in the market.
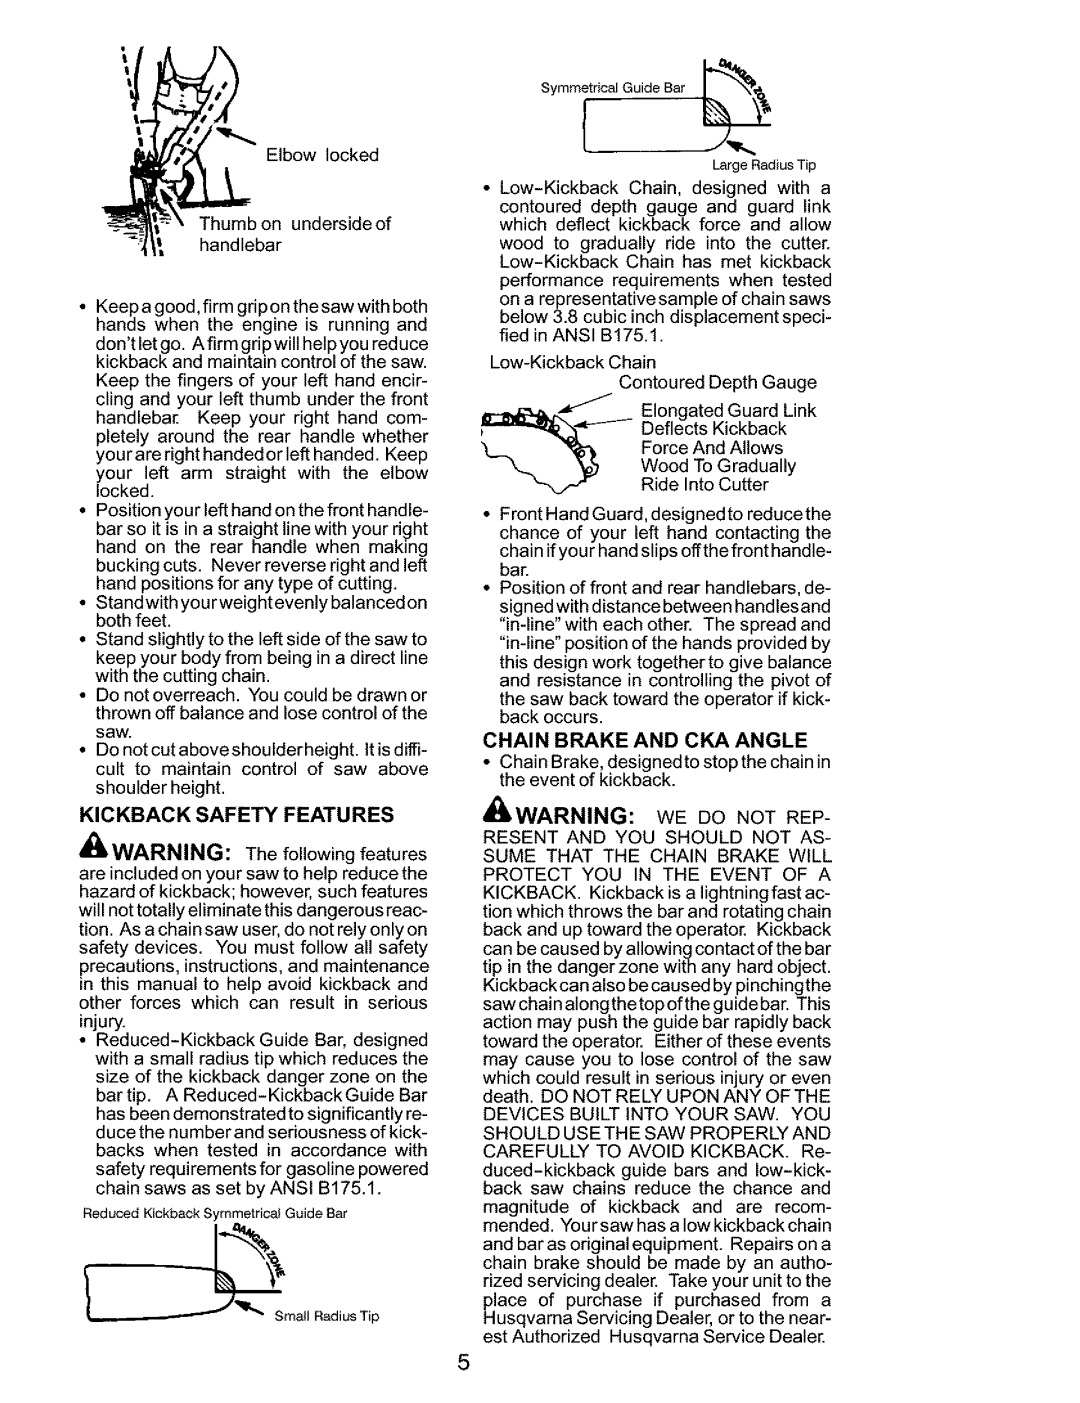
In terms of safety features, both chainsaws come with a chain brake that is activated in the event of kickback, providing an extra layer of protection for the operator. The anti-vibration technology significantly reduces vibrations, allowing for more comfortable operation and limiting operator fatigue.
The easy-start system is another practical feature of the Husqvarna 141 and 136. This system helps users start the chainsaw with minimal effort, ensuring that you can get to work quickly without dealing with frustrating starting issues. Additionally, both models feature an adjustable oil pump that allows the user to control the amount of oil delivered to the chain, which ensures optimal lubrication and extends the life of the chainsaw.
Maintenance is straightforward with the Husqvarna 141 and 136, thanks to tool-less chain tensioning and a quick-release air filter. This design simplifies the process of adjusting the chain and cleaning the air filter, ensuring that the chainsaw remains in peak working condition.
In summary, the Husqvarna 141 and 136 chainsaws deliver a blend of lightweight design, powerful engines, advanced technologies, and essential safety features. These models are an excellent choice for those looking for a reliable and efficient tool for various cutting tasks around the home or for light commercial use.