Assembly
■BLOW PIPES
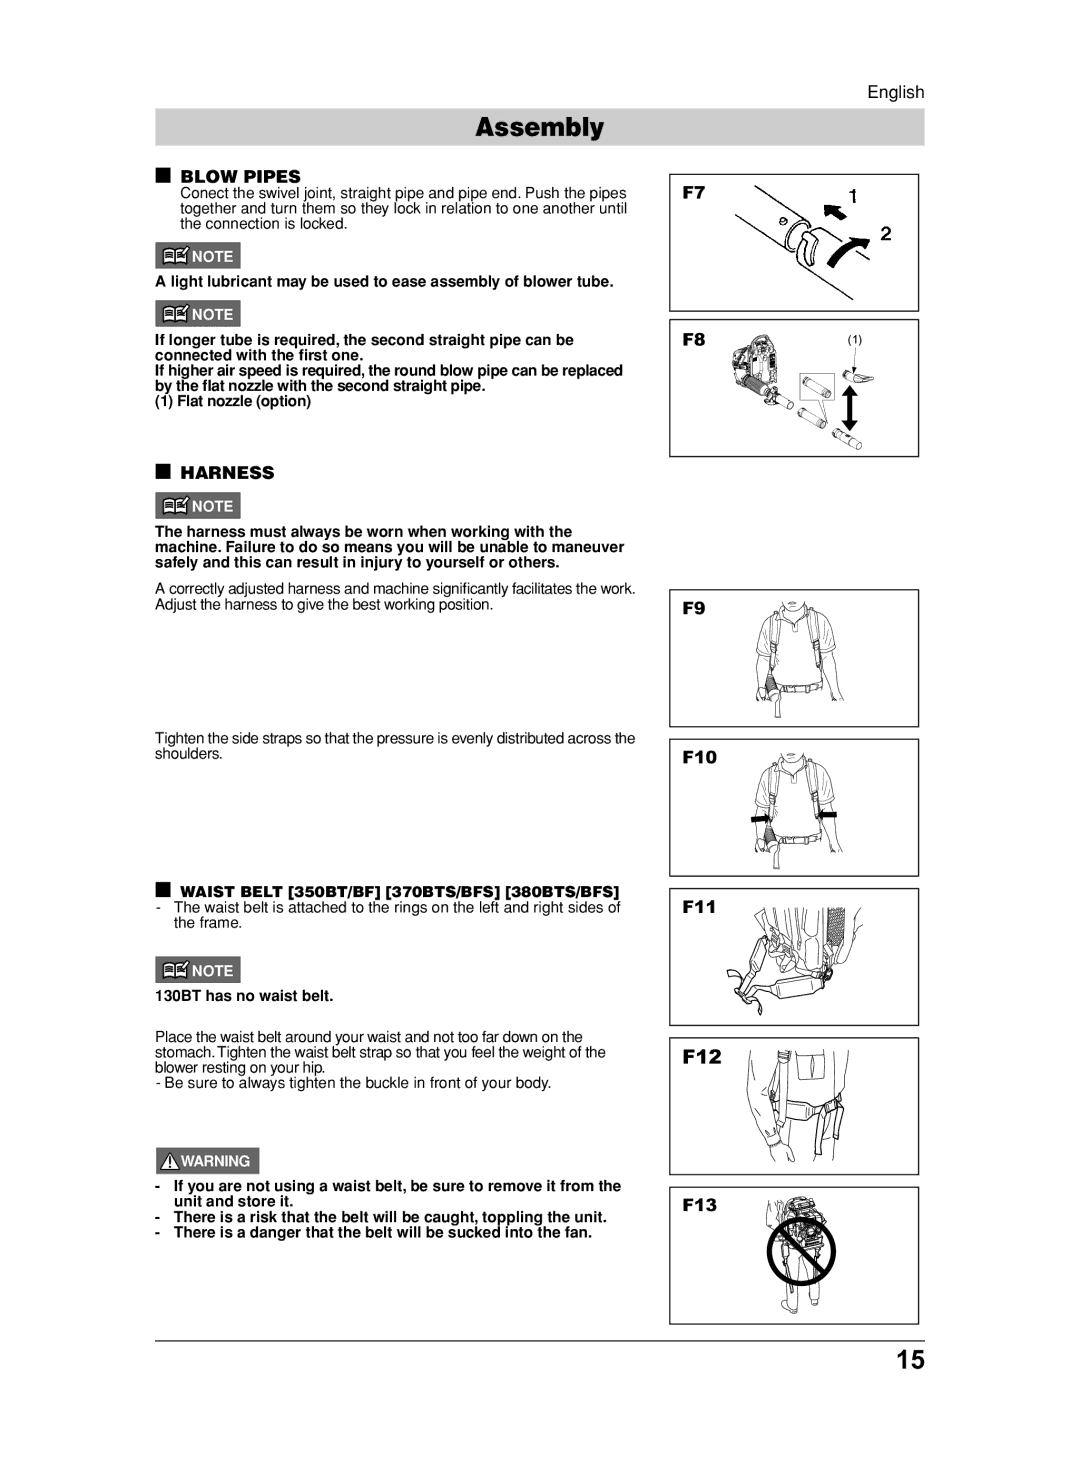
Conect the swivel joint, straight pipe and pipe end. Push the pipes together and turn them so they lock in relation to one another until the connection is locked.
![]() NOTE
NOTE
A light lubricant may be used to ease assembly of blower tube.
![]() NOTE
NOTE
If longer tube is required, the second straight pipe can be connected with the first one.
If higher air speed is required, the round blow pipe can be replaced by the flat nozzle with the second straight pipe.
(1) Flat nozzle (option)
■HARNESS
![]() NOTE
NOTE
The harness must always be worn when working with the machine. Failure to do so means you will be unable to maneuver safely and this can result in injury to yourself or others.
A correctly adjusted harness and machine significantly facilitates the work. Adjust the harness to give the best working position.
Tighten the side straps so that the pressure is evenly distributed across the shoulders.
■WAIST BELT [350BT/BF] [370BTS/BFS] [380BTS/BFS]
-The waist belt is attached to the rings on the left and right sides of the frame.
![]() NOTE
NOTE
130BT has no waist belt.
Place the waist belt around your waist and not too far down on the stomach. Tighten the waist belt strap so that you feel the weight of the blower resting on your hip.
-Be sure to always tighten the buckle in front of your body.
![]() WARNING
WARNING
-If you are not using a waist belt, be sure to remove it from the unit and store it.
-There is a risk that the belt will be caught, toppling the unit.
-There is a danger that the belt will be sucked into the fan.
English
F7
F8 | (1) |
F9
F10
F11
F12
F13
15