ASSEMBLY
4Turn the blade flange hub carefully so that it slides into one of the tracks in the pivot arm and lands in the correct position to be screwed fast.
5Press in the blade spindle into the cutting arm at the same time as the blade is rotated carefully. When the blade spindle can no longer be pressed in by hand it should be tightened using the supplied
WARNING! Exercise care when assembling
!the blade so that it does not risk becoming loose when cutting. Carelessness can result in serious personal injury or even death.
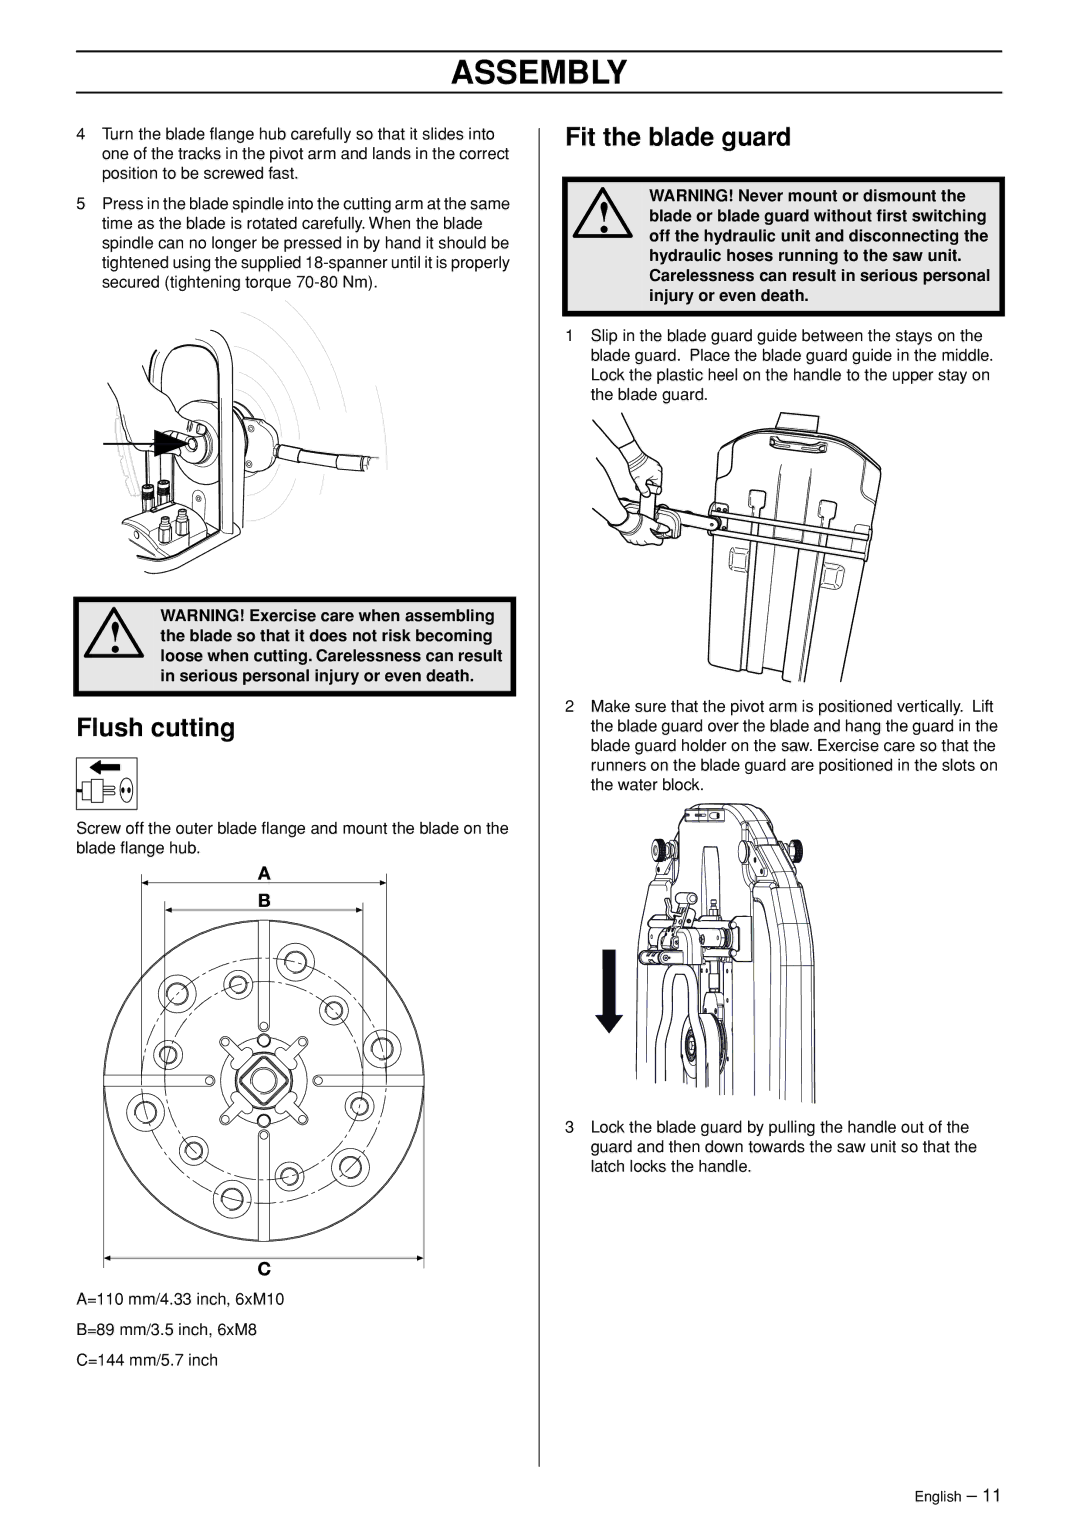
Flush cutting
Screw off the outer blade flange and mount the blade on the blade flange hub.
A=110 mm/4.33 inch, 6xM10
B=89 mm/3.5 inch, 6xM8
C=144 mm/5.7 inch
Fit the blade guard
WARNING! Never mount or dismount the
!blade or blade guard without first switching off the hydraulic unit and disconnecting the hydraulic hoses running to the saw unit.
Carelessness can result in serious personal injury or even death.
1Slip in the blade guard guide between the stays on the blade guard. Place the blade guard guide in the middle. Lock the plastic heel on the handle to the upper stay on the blade guard.
2Make sure that the pivot arm is positioned vertically. Lift the blade guard over the blade and hang the guard in the blade guard holder on the saw. Exercise care so that the runners on the blade guard are positioned in the slots on the water block.
3Lock the blade guard by pulling the handle out of the guard and then down towards the saw unit so that the latch locks the handle.
English – 11