SERVICE AND ADJUSTMENTS
TO REPLACE MOWER BLADE DRIVE BELT | • With a 1/2" breaker bar, shift the idler arm counter | ||||||
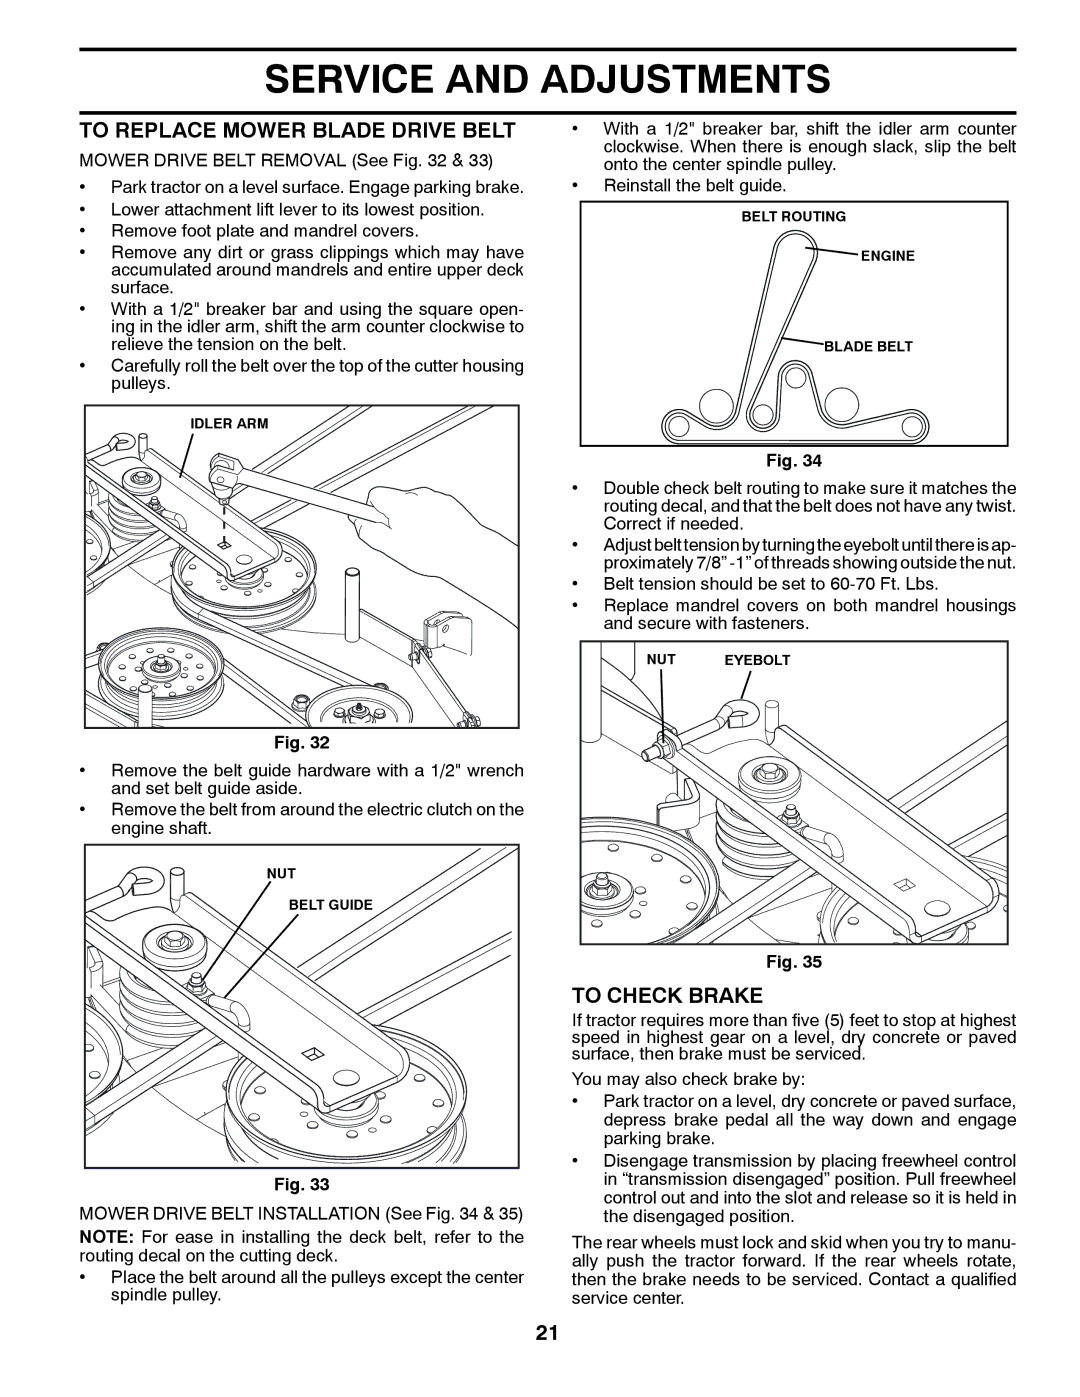
MOWER DRIVE BELT REMOVAL (See Fig. 32 & 33) |
| clockwise. When there is enough slack, slip the belt | |||||
| onto the center spindle pulley. | ||||||
• Park tractor on a level surface. Engage parking brake. | • Reinstall the belt guide. | ||||||
• Lower attachment lift lever to its lowest position. |
|
|
|
|
|
|
|
|
|
|
|
|
|
| |
|
| BELT ROUTING |
|
|
| ||
• Remove foot plate and mandrel covers. |
|
|
|
| |||
|
|
|
|
|
|
| |
• Remove any dirt or grass clippings which may have |
|
|
|
|
| ||
|
|
| ENGINE | ||||
accumulated around mandrels and entire upper deck |
|
|
|
|
|
|
|
|
|
|
|
|
|
| |
surface. |
|
|
|
|
|
|
|
•With a 1/2" breaker bar and using the square open- ing in the idler arm, shift the arm counter clockwise to
relieve the tension on the belt. | BLADE BELT |
•Carefully roll the belt over the top of the cutter housing
pulleys.
IDLER ARM |
|
| |
|
| Fig. 34 | |
| • Double check belt routing to make sure it matches the | ||
| routing decal, and that the belt does not have any twist. | ||
| Correct if needed. | ||
| • Adjust belt tension by turning the eyebolt until there is ap- | ||
| proximately 7/8” | ||
| • Belt tension should be set to | ||
| • Replace mandrel covers on both mandrel housings | ||
| and secure with fasteners. | ||
| NUT | EYEBOLT | |
Fig. 32 |
|
| |
• Remove the belt guide hardware with a 1/2" wrench |
|
| |
and set belt guide aside. |
|
| |
• Remove the belt from around the electric clutch on the |
|
| |
engine shaft. |
|
| |
NUT |
|
| |
BELT GUIDE |
|
| |
|
| Fig. 35 | |
| TO CHECK BRAKE | ||
| If tractor requires more than five (5) feet to stop at highest | ||
| speed in highest gear on a level, dry concrete or paved | ||
| surface, then brake must be serviced. | ||
| You may also check brake by: | ||
| • Park tractor on a level, dry concrete or paved surface, | ||
| depress brake pedal all the way down and engage | ||
| parking brake. |
| |
| • Disengage transmission by placing freewheel control | ||
Fig. 33 | in “transmission disengaged” position. Pull freewheel | ||
control out and into the slot and release so it is held in | |||
MOWER DRIVE BELT INSTALLATION (See Fig. 34 & 35) | |||
the disengaged position. | |||
NOTE: For ease in installing the deck belt, refer to the | The rear wheels must lock and skid when you try to manu- | ||
routing decal on the cutting deck. | ally push the tractor forward. If the rear wheels rotate, | ||
• Place the belt around all the pulleys except the center | then the brake needs to be serviced. Contact a qualified | ||
spindle pulley. | service center. |
| |
21
