Wide-Angle Adapter wide-angle lens

Closing the Housing


1.

Place housing face down in your


housing back


lap or on a flat surface.


2.

Check to see that there is an


o’ring on the housing back and


that it is clean and in its proper


3.

location.


Guide the back onto the housing.


The o’ring should touch the


o’ring


housing all the way around. There


should be an even gap all the way

housing


around between the housing and


4.

the housing back.


Lift the lid snaps so they are


extended and place the lid snap


housing back


into the hook on the housing


back.


5.

To close the housing push

even gap


down on the lid snaps until

all 4 sides


they snap into place . Lid


snaps on opposite sides of the


o’ring


housing should be closed at the


same time. Be sure they are down

housing


far enough to engage the lock.


Double check - Once the housing is closed, check the o’ring seal. Check the gap between the housing back and the housing, it should be even all the way around.

Look through the clear plastic back at the o’ring. You should see a darkened area where the o’ring is compressed against the housing back. If you do not see an even black compression seal all the way around the back, open the lid snaps, reseat the housing back and close the lid snaps. Visually check the seal again.

5

Lens Port

Treat the glass in the lens port as a camera lens. After use, rinse and gently dry the lens port to avoid water spotting. To clean use a mild soap solution or lens cleaner.

Do not use alcohol or window cleaner on the Lens Port.

The Lens Port will accept (2) Wide-Angle Adapters. The Wide- Angle Adapter #9306.80 which is required to mount the Inon UWL-150AD Bayonet style wide-angle lens. The Wide-Angle Adapter 9306.81is required to mount the following Wide-Angle Lenses, Inon UWL-100, Sea&Sea #58070 and Ep0que DCL-20 screw thread (67mm) style wide-angle lenses.

These lenses can be secured onto the Wide-Angle Adapter above or below water as they are designed to have water between the front of the port and the accessory lens. Make sure no air bubbles are trapped between the port and the accessory lens. Any vignetting that occurs can be eliminated by zooming the camera lens slightly. The camera’s built-in flash cannot be used with wide angle

lenses. The front of the lenses are so large they block the camera’s flash. To properly light subjects when using a wide angle lens an external strobe should be used. Due to the wide-angle of coverage of these lenses, the DS125 Substrobe is recommended or two DS50 Substrobes.

7

Checking Controls

Once the housing has been closed, push the controls back into place. Make sure they line up with the camera’s controls.

Turn Camera On

Turn the camera on and operate each of the housing controls to get a feel for using the camera in the housing. Take a few pictures above water with the camera in the housing.

Lubricants

1. Ikelite provides silicone lubricant withthe housing.We recommend you use only Ikelite lubricanton Ikelite productsas some other brands may cause the o’ring to swell and not seal properly.

2. Use only enough lubricant to lightly cover control shafts and o’rings. Wipe off any excess lubricant with a clean cloth. Lubricant is not a sealant, it is used to reduce friction. Excessive lubricant can collect sand and dirt which may interfere with proper sealing.

CAUTION

Never use spray lubricants as the propellant ingredient can cause the plastic housing to crack.

6

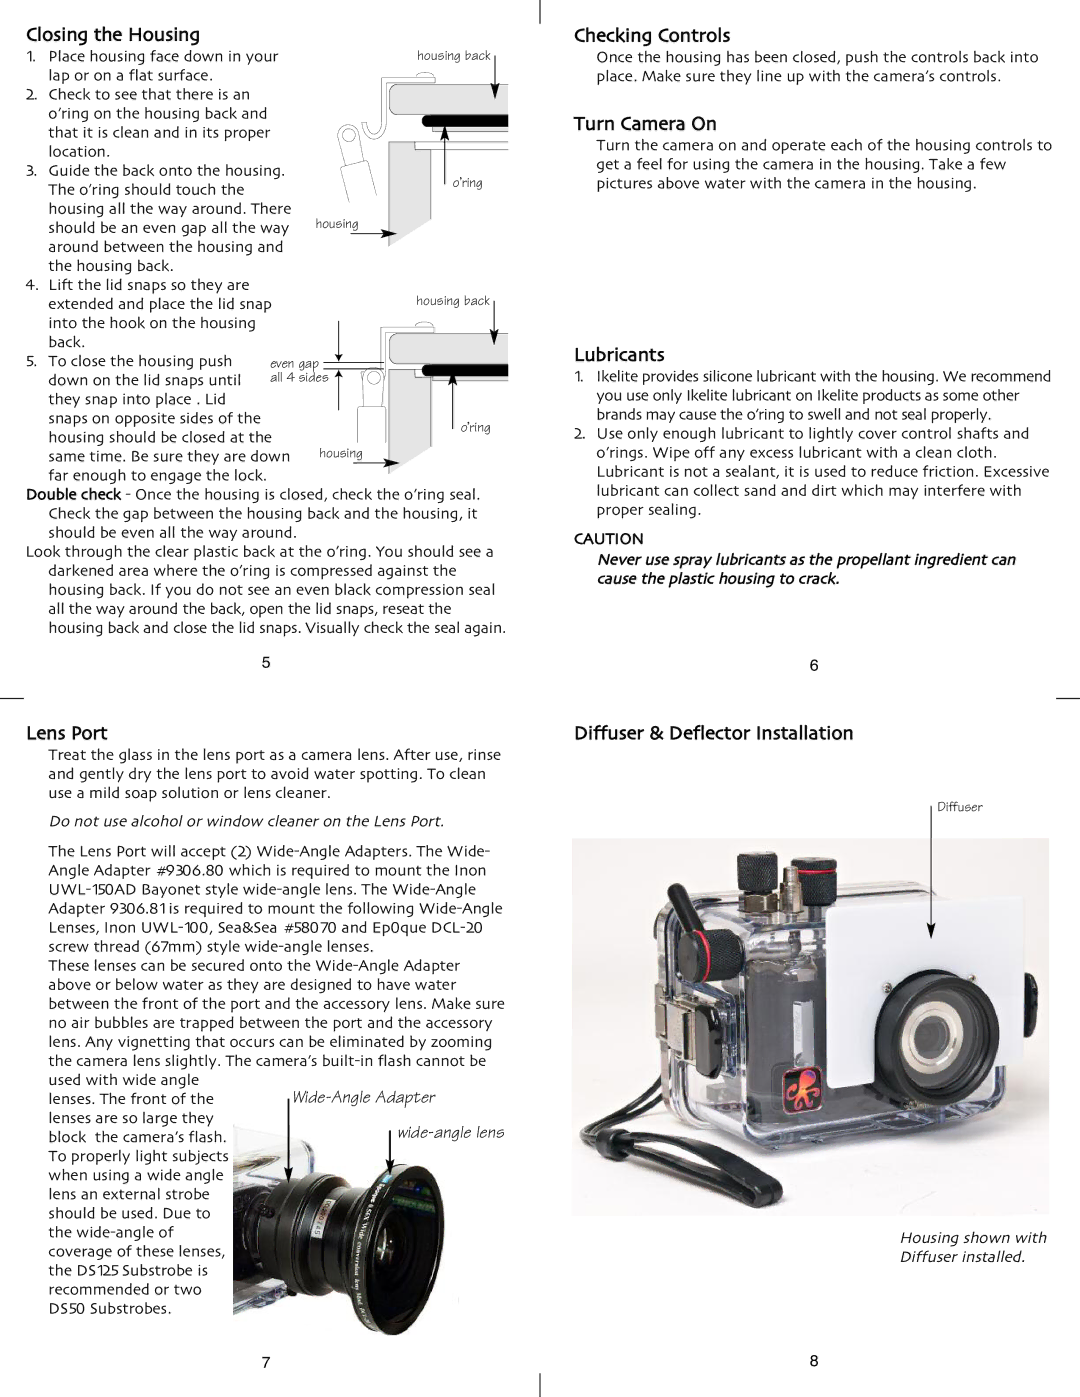
Diffuser & Deflector Installation

Diffuser

Housing shown with

Diffuser installed.

8

Page 2
Image 2
Ikelite E-900 instruction manual Closing the Housing, Checking Controls

E-900 specifications

The Ikelite E-900 is a premium underwater housing designed specifically for photographers who demand high-performance and durability during their dive adventures. Built for the Olympus E-900 camera, this housing offers exceptional functionality and reliability, making it a favorite among underwater enthusiasts and professionals alike.

One of the standout features of the Ikelite E-900 housing is its robust construction. Made from a high-quality polycarbonate material, it provides excellent resistance to impact and corrosion, ensuring long-term use even in the most challenging underwater conditions. The housing is rated for depths of up to 200 feet (60 meters), allowing divers to capture stunning images at great depths.

The Ikelite E-900 is equipped with an intuitive control layout that gives users quick access to all essential camera functions. The housing features precision-molded buttons, allowing for easy manipulation of settings like shutter speed, aperture, and exposure compensation. This ergonomic design minimizes the need for complicated adjustments while underwater, enhancing the overall shooting experience.

Furthermore, the housing supports the use of interchangeable lenses, providing photographers with the versatility to adapt to different shooting conditions. With an included lens port system, users can easily attach various macro and wide-angle lenses for more creative capture options. This feature significantly expands the photographer's toolkit in diverse underwater environments.

Another highlight of the Ikelite E-900 is its ability to work seamlessly with both manual and TTL (Through The Lens) flash systems. The housing is designed with built-in optical connectors, allowing for easy integration with Ikelite strobes and providing photographers with the ability to utilize powerful lighting setups underwater. This capability ensures well-lit compositions even in dimly lit environments.

Additionally, the housing's clear back panel offers an unobstructed view of the camera's LCD screen, which helps users navigate settings effortlessly while monitoring their framing. This transparency is particularly beneficial when checking for potential exposure issues or ensuring subjects are in focus.

The Ikelite E-900 blends advanced technology with user-friendly design, making it an excellent choice for adventure-seeking photographers. Its durable build, ease of use, and exceptional adaptability for underwater shooting make it a top contender in the underwater housing market. Whether on a casual snorkeling trip or an in-depth dive expedition, the Ikelite E-900 ensures that stunning memories are captured with clarity and precision.