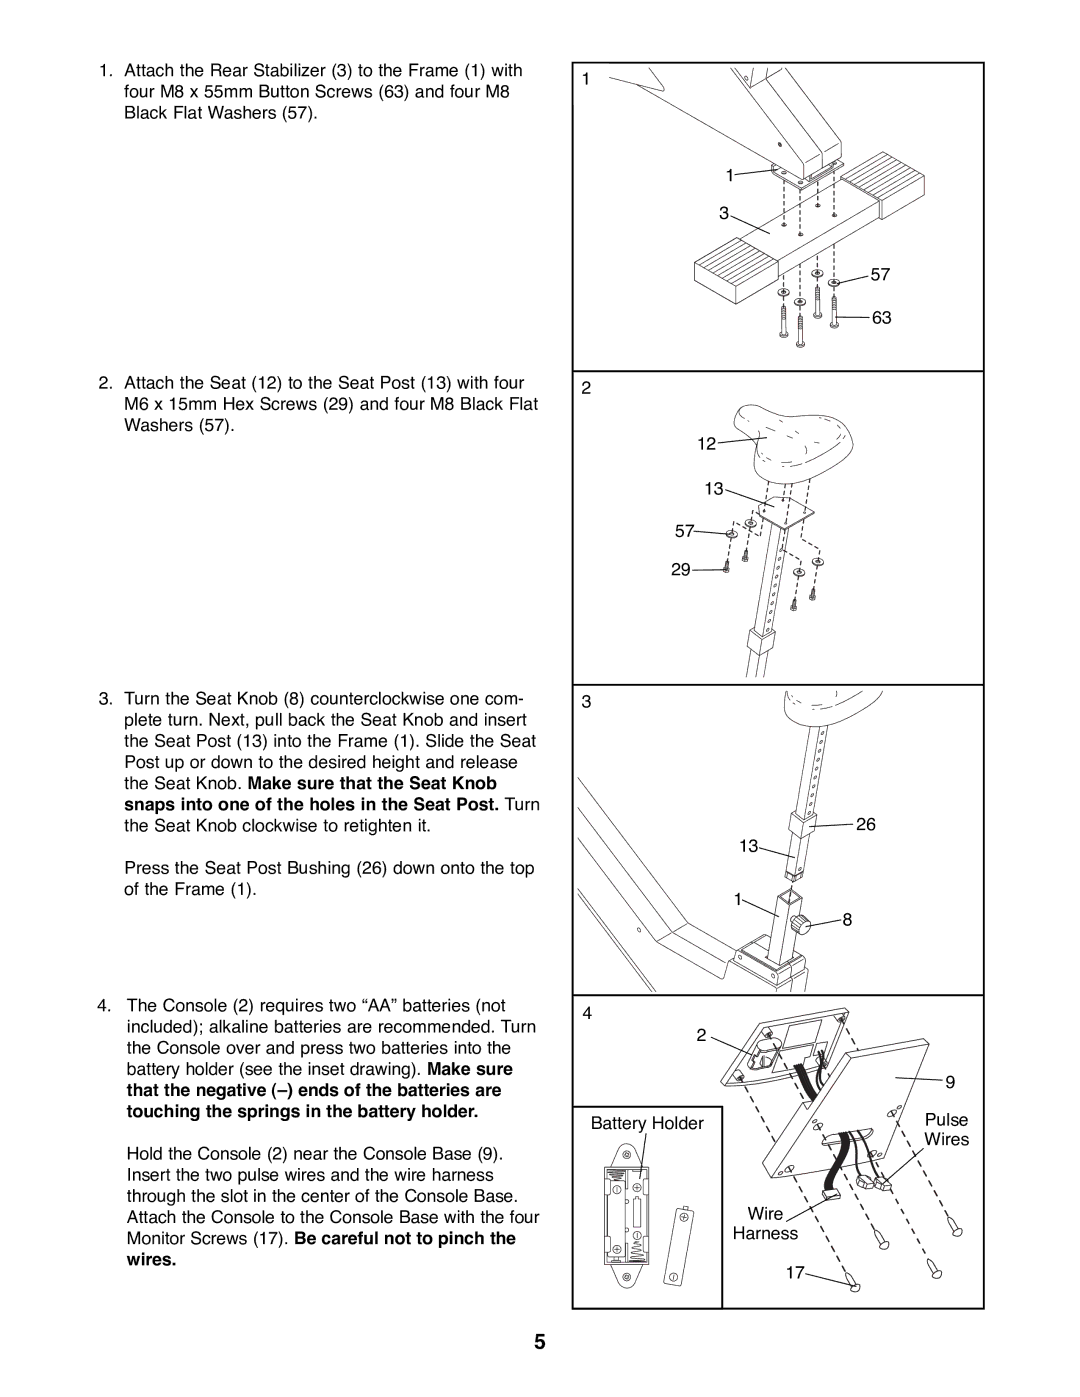
1.Attach the Rear Stabilizer (3) to the Frame (1) with four M8 x 55mm Button Screws (63) and four M8 Black Flat Washers (57).
2.Attach the Seat (12) to the Seat Post (13) with four M6 x 15mm Hex Screws (29) and four M8 Black Flat Washers (57).
3.Turn the Seat Knob (8) counterclockwise one com- plete turn. Next, pull back the Seat Knob and insert the Seat Post (13) into the Frame (1). Slide the Seat Post up or down to the desired height and release the Seat Knob. Make sure that the Seat Knob snaps into one of the holes in the Seat Post. Turn the Seat Knob clockwise to retighten it.
Press the Seat Post Bushing (26) down onto the top of the Frame (1).
4.The Console (2) requires two ÒAAÓ batteries (not included); alkaline batteries are recommended. Turn the Console over and press two batteries into the battery holder (see the inset drawing). Make sure that the negative (Ð) ends of the batteries are touching the springs in the battery holder.
Hold the Console (2) near the Console Base (9). Insert the two pulse wires and the wire harness through the slot in the center of the Console Base. Attach the Console to the Console Base with the four Monitor Screws (17). Be careful not to pinch the wires.
5
1 |
|
1 |
|
3 |
|
| 57 |
| 63 |
2 |
|
12 |
|
13 |
|
57 |
|
29 |
|
3 |
|
| 26 |
13 |
|
1 |
|
| 8 |
4 |
|
2 |
|
| 9 |
Battery Holder | Pulse |
| Wires |
Wire |
|
Harness |
|
17 |
|