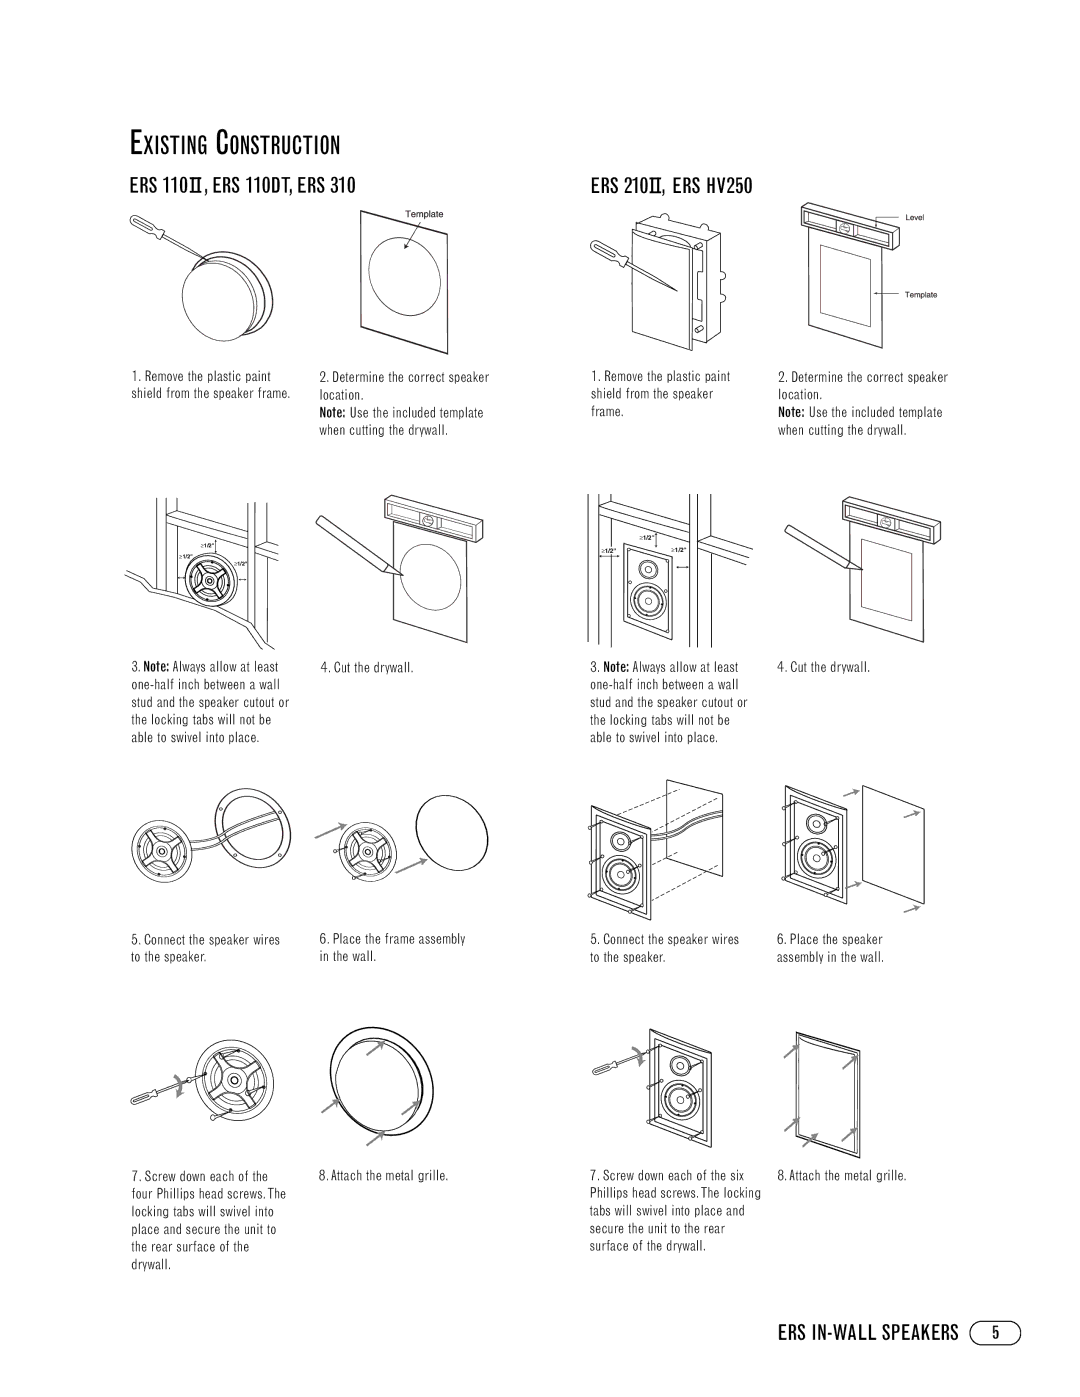
EXISTING CONSTRUCTION
|
|
|
|
|
|
ERS 110II, | ERS 110DT, ERS 310 | ERS 210II, | ERS HV250 | ||
|
|
| |||
1. Remove the plastic paint | 2. Determine the correct speaker |
shield from the speaker frame. | location. |
| Note: Use the included template |
| when cutting the drywall. |
≥1/2"
≥1/2"
≥1/2"
1. Remove the plastic paint | 2. Determine the correct speaker |
shield from the speaker | location. |
frame. | Note: Use the included template |
| when cutting the drywall. |
≥1/2"
≥1/2" | ≥1/2" |
3.Note: Always allow at least
5.Connect the speaker wires to the speaker.
7.Screw down each of the four Phillips head screws. The locking tabs will swivel into place and secure the unit to the rear surface of the drywall.
4. Cut the drywall.
6.Place the frame assembly in the wall.
8. Attach the metal grille.
3. Note: Always allow at least | 4. Cut the drywall. |
| |
stud and the speaker cutout or |
|
the locking tabs will not be |
|
able to swivel into place. |
|
5. Connect the speaker wires | 6. Place the speaker |
to the speaker. | assembly in the wall. |
7. Screw down each of the six | 8. Attach the metal grille. |
Phillips head screws. The locking |
|
tabs will swivel into place and |
|
secure the unit to the rear |
|
surface of the drywall. |
|