Dual Channel DDR
![]() Channel A : DIMM1
Channel A : DIMM1
![]() Channel B : DIMM2
Channel B : DIMM2
If you want to operate the Dual Channel Technology, please note the following explanations due to the limitation of Intel chipset specifications.
1.If one DDR memory modules are installed: The Dual Channel Technolog cannot operate when one DDR memory modules are installed.
2.If two DDR memory modules are installed, please use memory of the same storage capacity in order to use dual channel memory and for BIOS to detect all the DDR memory modules.
1-5 Installation of Expansion Cards
You can install your expansion card by following the steps outlined below:
1.Read the related expansion card's instruction document before installing the expansion card into the computer.
2.Remove your computer's chassis cover, screws and slot bracket from the computer.
3.Press the expansion card firmly into expansion slot in motherboard.
4.Be sure the metal contacts on the card are indeed seated in the slot.
5.Replace the screw to secure the slot bracket of the expansion card.
6.Replace your computer's chassis cover.
7.Power on the computer, if necessary, setup BIOS utility of expansion card from BIOS.
8.Install related driver from the operating system.
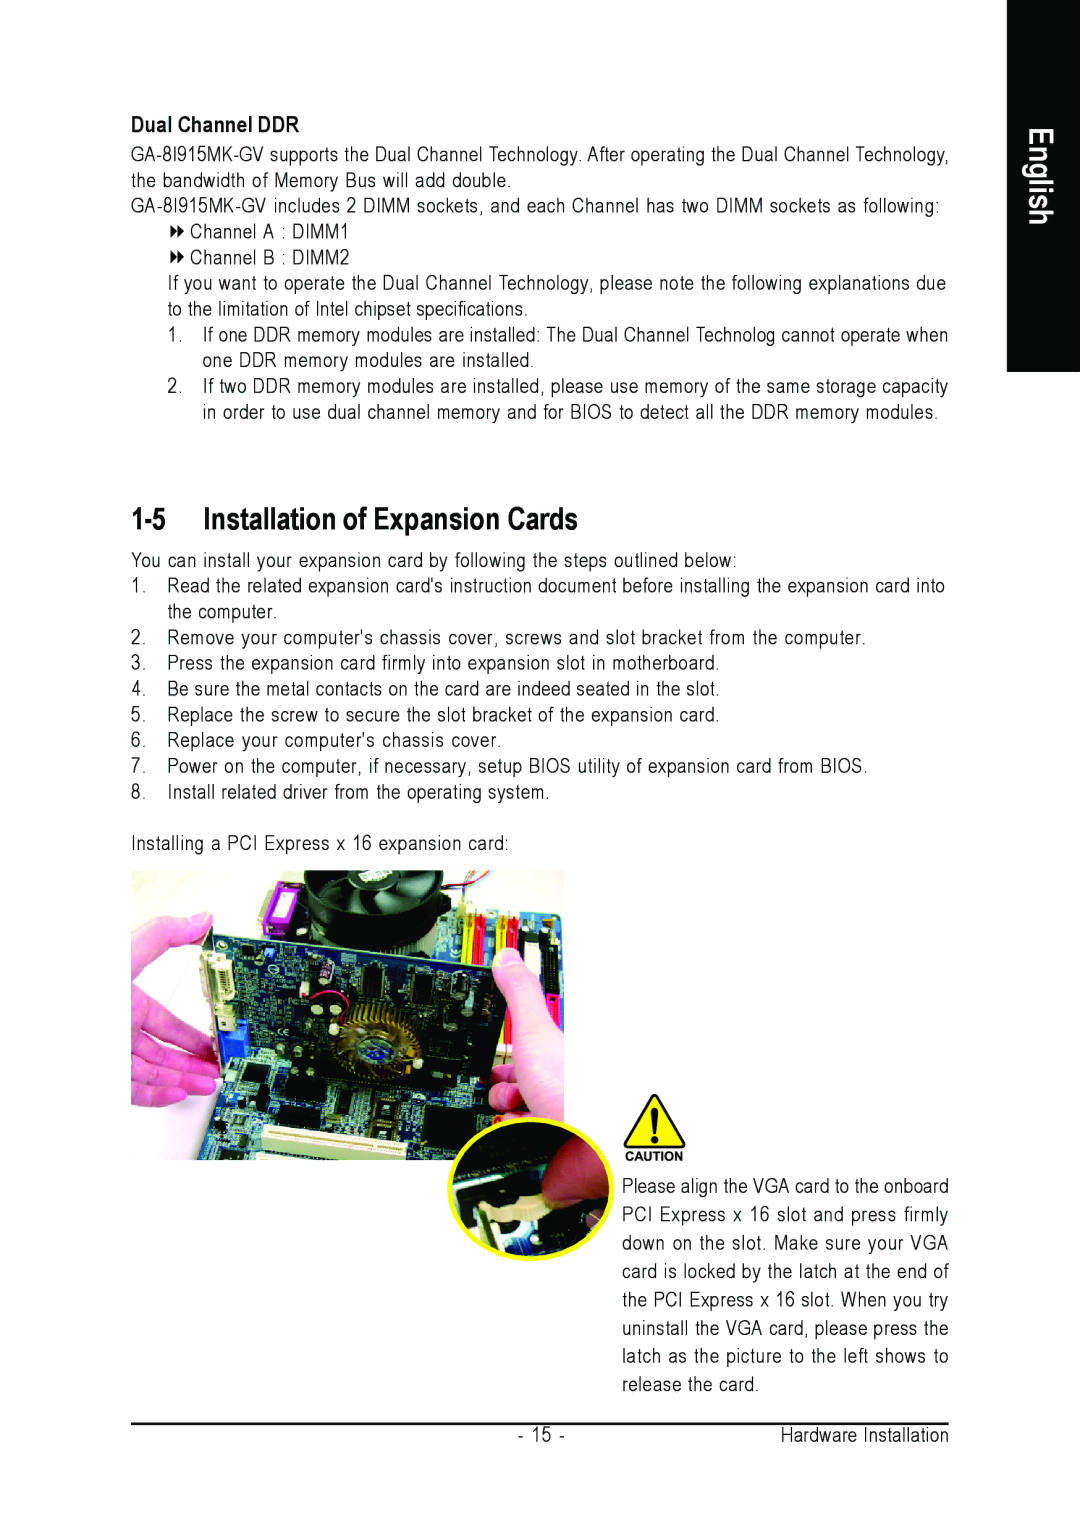
Installing a PCI Express x 16 expansion card:
Please align the VGA card to the onboard PCI Express x 16 slot and press firmly down on the slot. Make sure your VGA card is locked by the latch at the end of the PCI Express x 16 slot. When you try uninstall the VGA card, please press the latch as the picture to the left shows to release the card.
- 15 - | Hardware Installation |
English