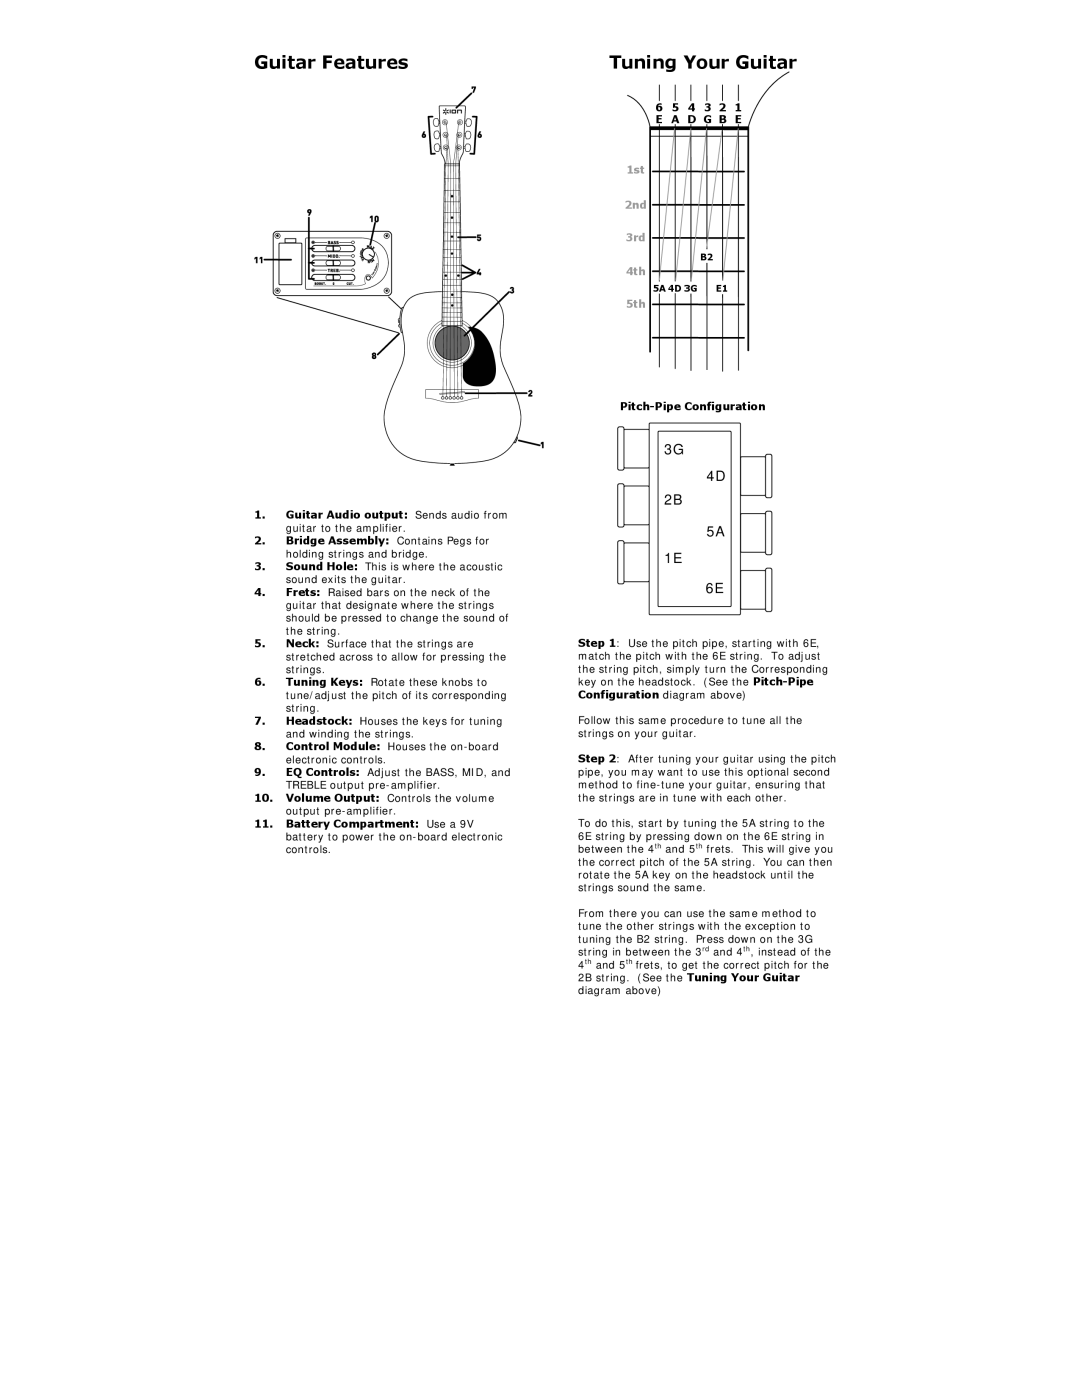
Guitar Features
1.Guitar Audio output: Sends audio from guitar to the amplifier.
2.Bridge Assembly: Contains Pegs for holding strings and bridge.
3.Sound Hole: This is where the acoustic sound exits the guitar.
4.Frets: Raised bars on the neck of the guitar that designate where the strings should be pressed to change the sound of the string.
5.Neck: Surface that the strings are stretched across to allow for pressing the strings.
6.Tuning Keys: Rotate these knobs to tune/adjust the pitch of its corresponding string.
7.Headstock: Houses the keys for tuning and winding the strings.
8.Control Module: Houses the
9.EQ Controls: Adjust the BASS, MID, and TREBLE output
10.Volume Output: Controls the volume output
11.Battery Compartment: Use a 9V battery to power the
Tuning Your Guitar
6 | 5 | 4 | 3 2 | 1 |
E A D G B E | ||||
1st |
|
|
|
|
2nd |
|
|
|
|
3rd |
|
|
|
|
|
|
| B2 |
|
4th |
|
|
|
|
5A 4D 3G | E1 |
| ||
5th |
|
|
|
|
Pitch-Pipe Configuration
3G3G
4D
4D
2B2B
5A
5A
1E1E
6E
6E
Step 1: Use the pitch pipe, starting with 6E, match the pitch with the 6E string. To adjust the string pitch, simply turn the Corresponding key on the headstock. (See the
Follow this same procedure to tune all the strings on your guitar.
Step 2: After tuning your guitar using the pitch pipe, you may want to use this optional second method to
To do this, start by tuning the 5A string to the 6E string by pressing down on the 6E string in between the 4th and 5th frets. This will give you the correct pitch of the 5A string. You can then rotate the 5A key on the headstock until the strings sound the same.
From there you can use the same method to tune the other strings with the exception to tuning the B2 string. Press down on the 3G string in between the 3rd and 4th, instead of the 4th and 5th frets, to get the correct pitch for the 2B string. (See the Tuning Your Guitar diagram above)