Install and use this eyepiece the same way you do with the Barlow lens. You cannot use the Barlow lens when using this eyepiece.

2.1.5.Focusing Telescope

After selecting the desired eyepiece, aim the telescope tube at a land-based target at least 200 yards away (e.g. A telephone pole or a building). Fully extend focuser drawtube by turning the focusing knob. Always start with a low power eyepiece.

While looking through selected eyepiece, slowly retract focuser drawtube by turning focusing knob until object comes into focus.

2.1.6.Aligning Finderscope:

The extended field of view (FOV) offered by the 5x24 mm finderscope (#2) makes it easier to aim at an object before viewing it through the main telescope tube with a higher magnification.

1). Remove the front lens cover from the telescope (#1). Select a low power eyepiece (20mm). Look through telescope and establish a well-defined target (see focusing telescope section). Tighten all locking knobs so that telescope’s aim is not disturbed.

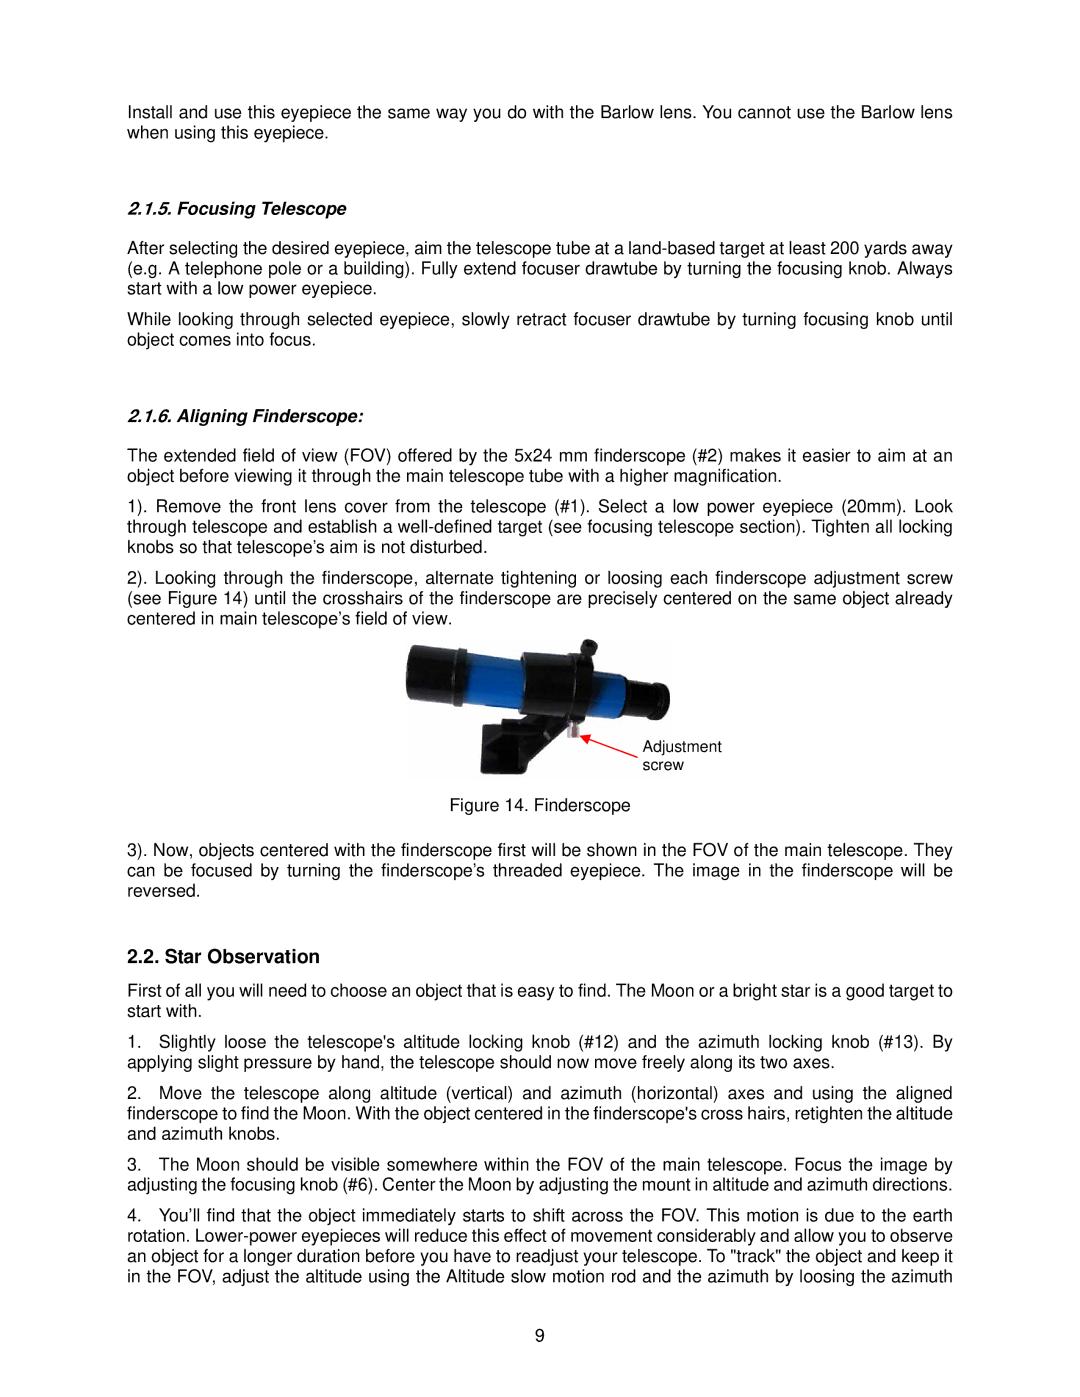
2). Looking through the finderscope, alternate tightening or loosing each finderscope adjustment screw (see Figure 14) until the crosshairs of the finderscope are precisely centered on the same object already centered in main telescope’s field of view.

Adjustment screw

Figure 14. Finderscope

3). Now, objects centered with the finderscope first will be shown in the FOV of the main telescope. They can be focused by turning the finderscope’s threaded eyepiece. The image in the finderscope will be reversed.

2.2. Star Observation

First of all you will need to choose an object that is easy to find. The Moon or a bright star is a good target to start with.

1.Slightly loose the telescope's altitude locking knob (#12) and the azimuth locking knob (#13). By applying slight pressure by hand, the telescope should now move freely along its two axes.

2.Move the telescope along altitude (vertical) and azimuth (horizontal) axes and using the aligned finderscope to find the Moon. With the object centered in the finderscope's cross hairs, retighten the altitude and azimuth knobs.

3.The Moon should be visible somewhere within the FOV of the main telescope. Focus the image by adjusting the focusing knob (#6). Center the Moon by adjusting the mount in altitude and azimuth directions.

4.You’ll find that the object immediately starts to shift across the FOV. This motion is due to the earth rotation. Lower-power eyepieces will reduce this effect of movement considerably and allow you to observe an object for a longer duration before you have to readjust your telescope. To "track" the object and keep it in the FOV, adjust the altitude using the Altitude slow motion rod and the azimuth by loosing the azimuth

9

Page 9
Image 9
iOptron 70AZ instruction manual Star Observation, Focusing Telescope, Aligning Finderscope

70AZ specifications

The iOptron 70AZ is a versatile and user-friendly telescope designed for amateur astronomers and families alike. Boasting a robust 70mm aperture, this telescope strikes an excellent balance between portability and performance, making it an ideal choice for both beginners and those with some experience in stargazing.

One of the main features of the iOptron 70AZ is its impressive optics, equipped with fully coated glass lenses. This enhancement reduces light loss and ensures that users get bright, clear images of celestial objects. The telescope's focal ratio of f/10 provides an ideal balance for observing both the planets and a range of deep-sky objects, granting users the flexibility to explore various astronomical phenomena.

The adjustable altazimuth mount is a significant highlight of the iOptron 70AZ. It allows for smooth and easy tracking of celestial objects as they move across the night sky, making it simple for users to locate and follow objects without hassle. The mount is also lightweight yet sturdy, providing a stable platform for observations while ensuring ease of transport.

Another attractive characteristic of the iOptron 70AZ is its uncomplicated setup process, which can be completed in minutes. This is particularly beneficial for families looking to introduce children to astronomy or beginners who may feel overwhelmed by more complex models. Combined with a user-friendly design, the telescope comes with an adjustable tripod that makes it straightforward to achieve the perfect viewing height.

Additionally, the iOptron 70AZ includes two eyepieces, a 20mm for low magnification views and a 4mm for higher magnification. This allows for a wide range of viewing options, from expansive star fields to detailed observations of the Moon and planets. Furthermore, the telescope is equipped with a red dot finder, which simplifies star locating by providing a point of reference against the night sky.

The compact and portable design of the iOptron 70AZ allows users to easily take it on trips or to darker locations away from city lights, enhancing the stargazing experience. With its combination of optics, mount stability, ease of use, and transportability, the iOptron 70AZ stands as an excellent choice for anyone eager to explore the wonders of the universe.