Quick Setup
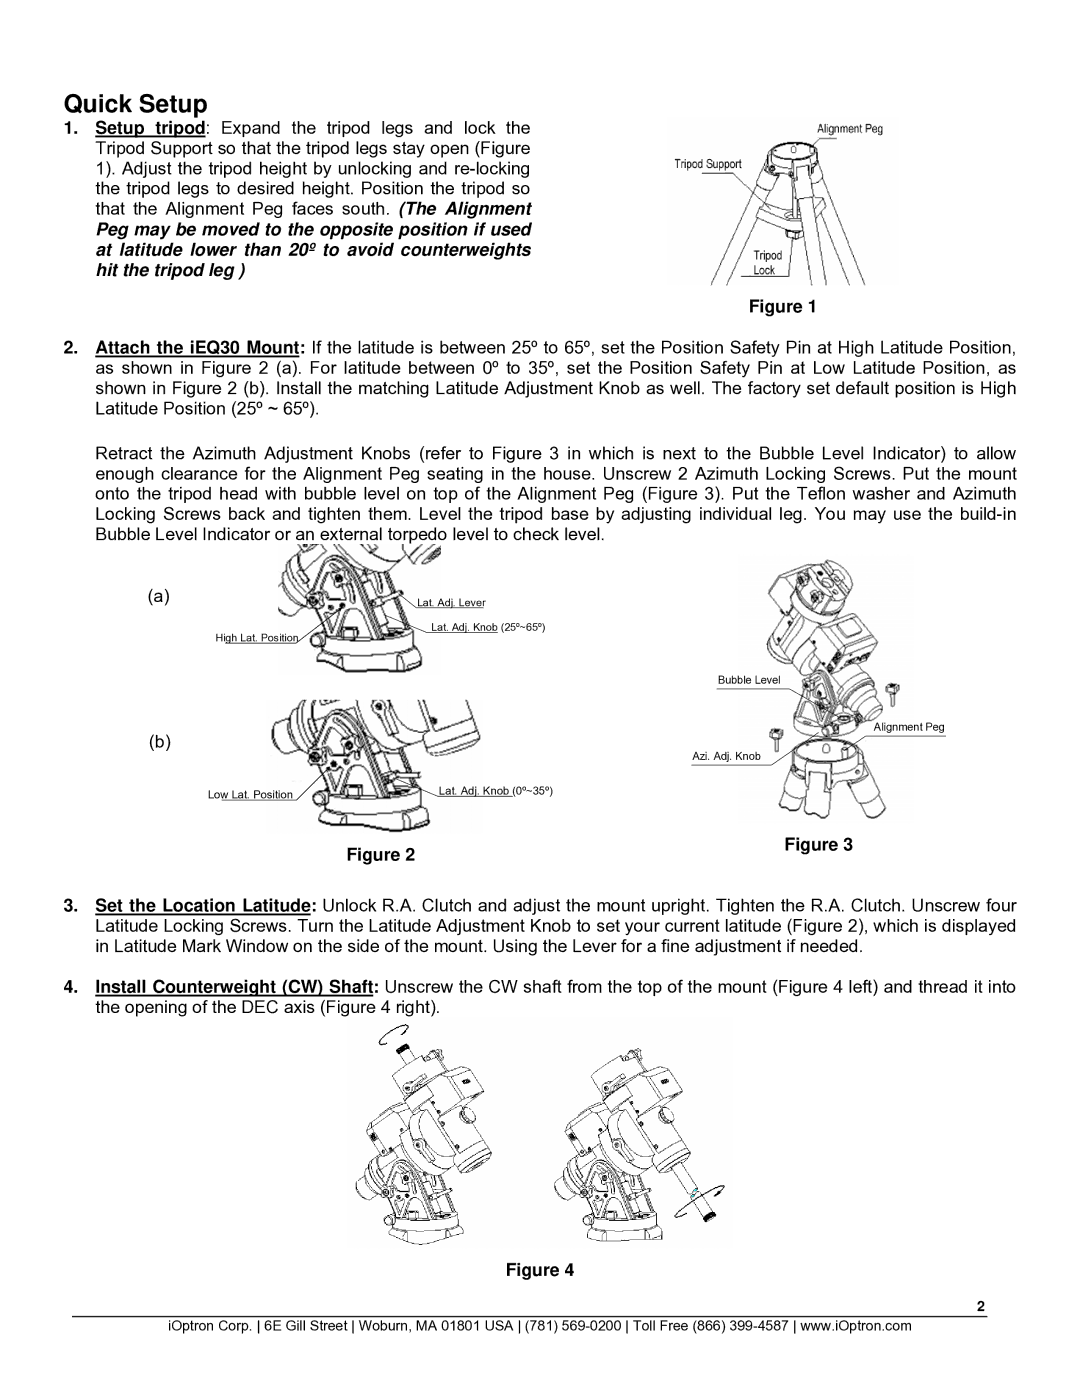
1.Setup tripod: Expand the tripod legs and lock the Tripod Support so that the tripod legs stay open (Figure 1). Adjust the tripod height by unlocking and
Peg may be moved to the opposite position if used at latitude lower than 20º to avoid counterweights hit the tripod leg )
Figure 1
2.Attach the iEQ30 Mount: If the latitude is between 25º to 65º, set the Position Safety Pin at High Latitude Position, as shown in Figure 2 (a). For latitude between 0º to 35º, set the Position Safety Pin at Low Latitude Position, as shown in Figure 2 (b). Install the matching Latitude Adjustment Knob as well. The factory set default position is High Latitude Position (25º ~ 65º).
Retract the Azimuth Adjustment Knobs (refer to Figure 3 in which is next to the Bubble Level Indicator) to allow enough clearance for the Alignment Peg seating in the house. Unscrew 2 Azimuth Locking Screws. Put the mount onto the tripod head with bubble level on top of the Alignment Peg (Figure 3). Put the Teflon washer and Azimuth Locking Screws back and tighten them. Level the tripod base by adjusting individual leg. You may use the
(a) | Lat. Adj. Lever |
Lat. Adj. Knob (25º~65º)
High Lat. Position
Bubble Level
Alignment Peg
(b)
| Azi. Adj. Knob |
Low Lat. Position | Lat. Adj. Knob (0º~35º) |
|
Figure 2 | Figure 3 |
|
3.Set the Location Latitude: Unlock R.A. Clutch and adjust the mount upright. Tighten the R.A. Clutch. Unscrew four Latitude Locking Screws. Turn the Latitude Adjustment Knob to set your current latitude (Figure 2), which is displayed in Latitude Mark Window on the side of the mount. Using the Lever for a fine adjustment if needed.
4.Install Counterweight (CW) Shaft: Unscrew the CW shaft from the top of the mount (Figure 4 left) and thread it into the opening of the DEC axis (Figure 4 right).
Figure 4
2
iOptron Corp. 6E Gill Street Woburn, MA 01801 USA (781)