
L830, L880, L810, LC1, L890 specifications
JBL is renowned for its high-quality audio products, and its speaker models such as the L890, L810, LC1, L830, and L880 exemplify this commitment to excellence. Each model brings unique features and technologies that cater to different listening environments and preferences.Starting with the JBL L890, this floor-standing speaker utilizes a sophisticated two-and-a-half-way design, incorporating a high-performance 8-inch woofer along with dual 5.25-inch midranges. This configuration ensures a wide frequency range and rich, detailed sound reproduction. The L890 is also equipped with a 1-inch titanium-laminate tweeter, allowing for crystal-clear highs. Its stylish design includes a beautifully crafted cabinet that helps to minimize resonance, enhancing the overall audio experience.
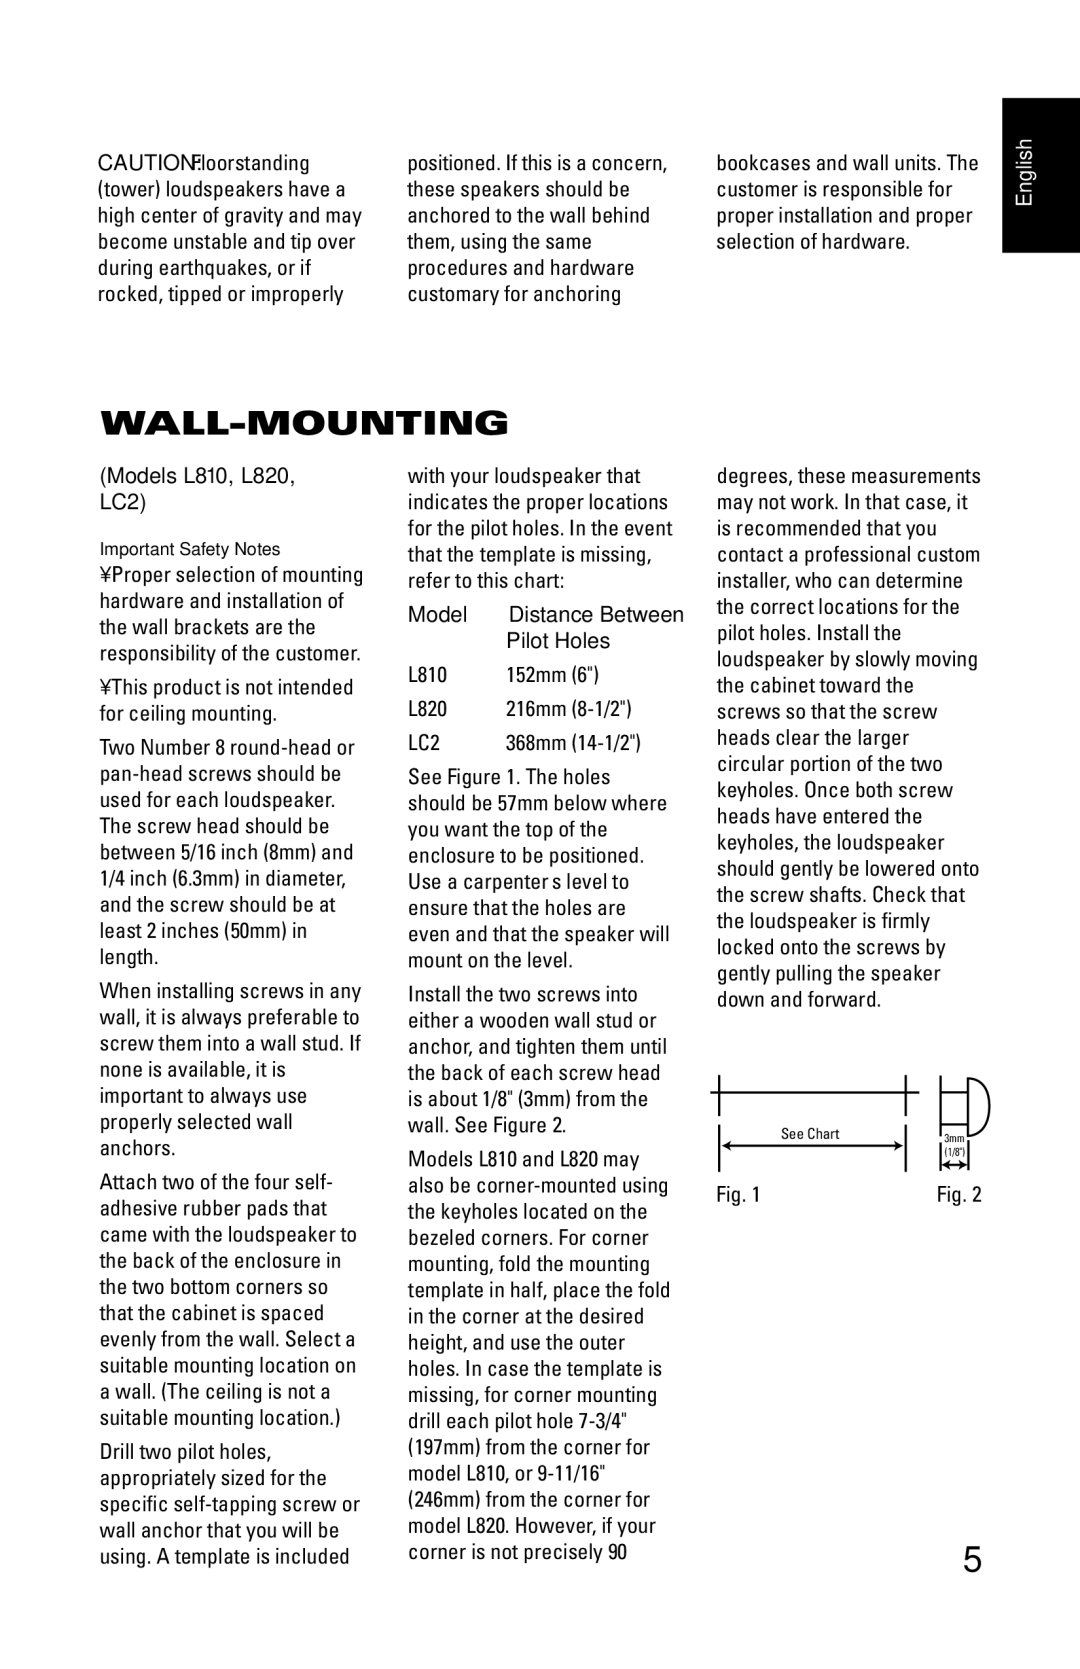
The JBL L810 stands out as a versatile bookshelf speaker, equally adept at delivering punchy bass and clear treble. It features a similar 8-inch woofer paired with a 5.25-inch midrange and the renowned 1-inch tweeter. Its compact size makes it suitable for smaller spaces while still providing an expansive soundstage. The L810 is engineered to perform well in diverse environments, making it an excellent choice for both music lovers and home theater enthusiasts.
In contrast, the JBL LC1 serves as a dedicated center channel speaker designed to complement the L-Series lineup. Its dual 5.25-inch woofers and a 1-inch tweeter ensure dialogue clarity and dynamic range during movie or TV viewing. This makes the LC1 an essential component for any home theater system, enhancing the overall cinematic experience with its precise sound reproduction.
The JBL L830 is another bookshelf model that emphasizes versatility and performance. This speaker combines an 8-inch low-frequency driver with a refined 1-inch tweeter, ensuring an extended frequency response and exceptional clarity. The L830's sleek design allows it to fit seamlessly into any décor, while its high-efficiency drivers make it easy to drive with various audio equipment.
Lastly, the JBL L880 is a larger floor-standing model designed for audiophiles seeking maximum impact and fidelity. This speaker incorporates dual 8-inch woofers, a dedicated midrange driver, and a 1-inch tweeter, resulting in a robust sound profile that delivers deep bass and shimmering highs. The L880's advanced cabinet design minimizes distortion and resonance, ensuring an immersive listening experience across a variety of music genres.
In summary, the JBL L-Series speakers, including the L890, L810, LC1, L830, and L880, represent a fusion of innovative technologies and aesthetic appeal. Each model is crafted to deliver exceptional sound quality, making them a solid choice for both casual listeners and audio enthusiasts. Whether for music or home theater, these speakers offer outstanding performance and reliability that JBL is known for.