INSTALLATION6
INSTALLATION
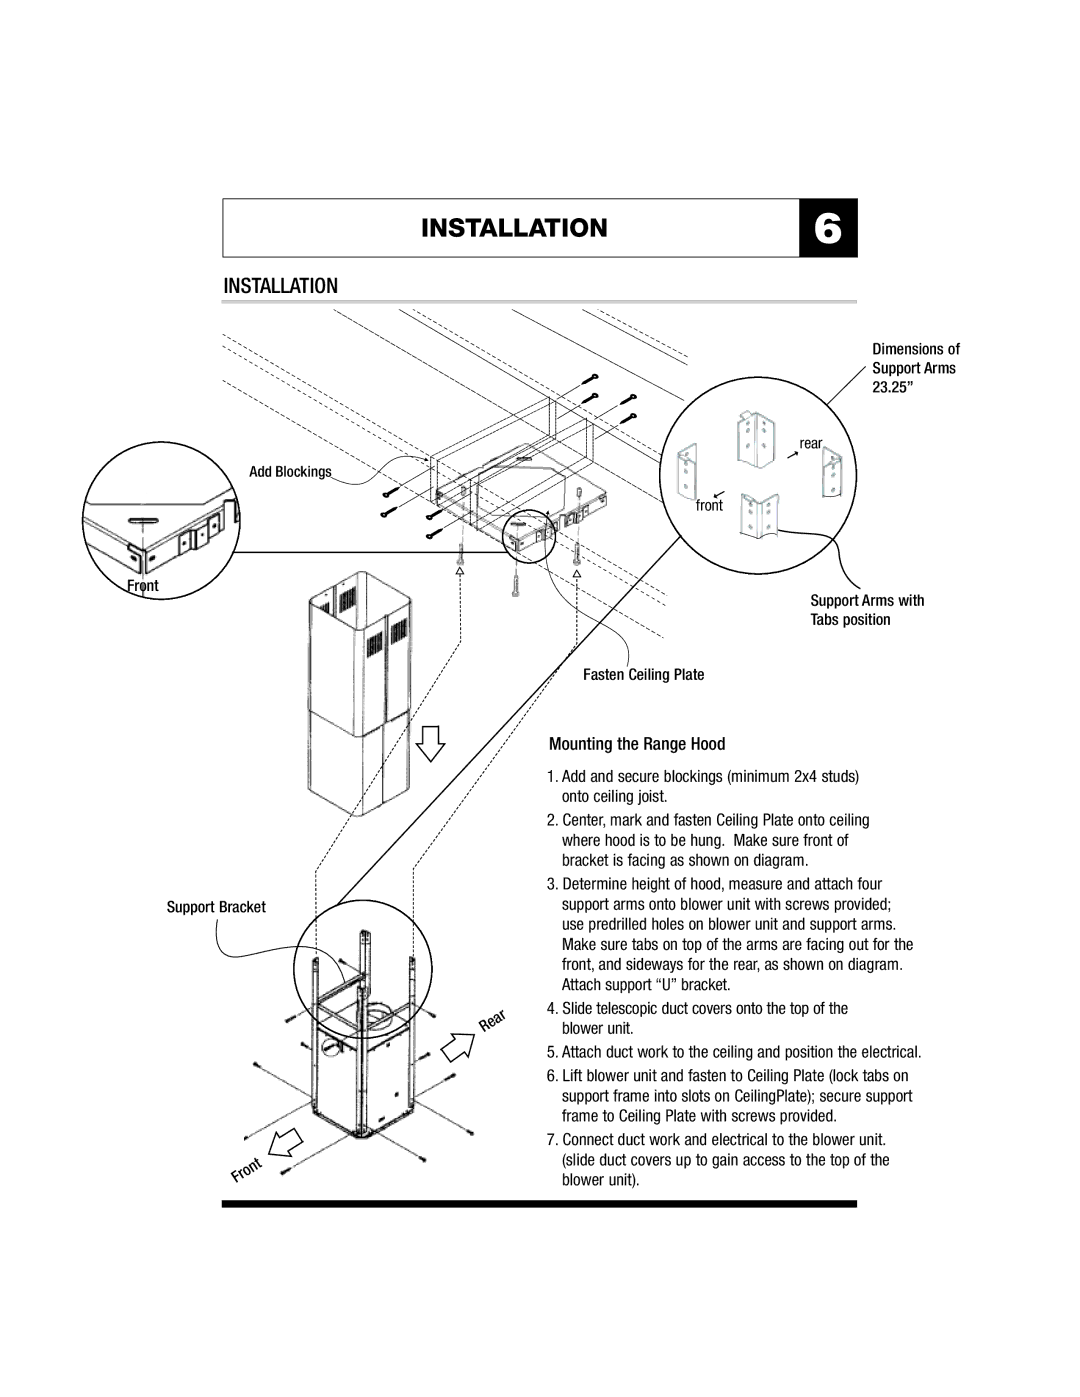
Add Blockings![]()
Front
Support Bracket
Rear
Front
Dimensions of Support Arms 23.25”
rear
front
Support Arms with
Tabs position
Fasten Ceiling Plate
Fasten Support Frame
Mounting the Range Hood
1.Add and secure blockings (minimum 2x4 studs) onto ceiling joist.
2.Center, mark and fasten Ceiling Plate onto ceiling where hood is to be hung. Make sure front of bracket is facing as shown on diagram.
3.Determine height of hood, measure and attach four support arms onto blower unit with screws provided; use predrilled holes on blower unit and support arms. Make sure tabs on top of the arms are facing out for the front, and sideways for the rear, as shown on diagram. Attach support “U” bracket.
4.Slide telescopic duct covers onto the top of the blower unit.
5.Attach duct work to the ceiling and position the electrical.
6.Lift blower unit and fasten to Ceiling Plate (lock tabs on support frame into slots on CeilingPlate); secure support frame to Ceiling Plate with screws provided.
7.Connect duct work and electrical to the blower unit. (slide duct covers up to gain access to the top of the blower unit).