INSTALLATION GUIDE:
1.1 Precautions:
1.This unit should be installed by a qualified service technician.
2.This product is designed to operate with a 12V DC, negative ground battery system.
3.Disconnect the ground wire from the battery terminal prior to connecting the unit to the electrical system.
4.The wiring from some other products or accessories might bear similar color code as this product; however, they might be of other function. Please refer to the electrical connection diagrams of this product prior to installing to avoid improper connection.
5.Use proper installation and fastening materials to prevent electrical damage to the unit.
6.Only supplied accessories should be used to avoid damage to the unit during installation.
7.Ensure that the display monitor is suitably installed at a location, such that it will not obstruct the rear view mirror and/or the air condition vents.
8.Do not install screws over the plane surface, which may affect monitor eject or retract function.
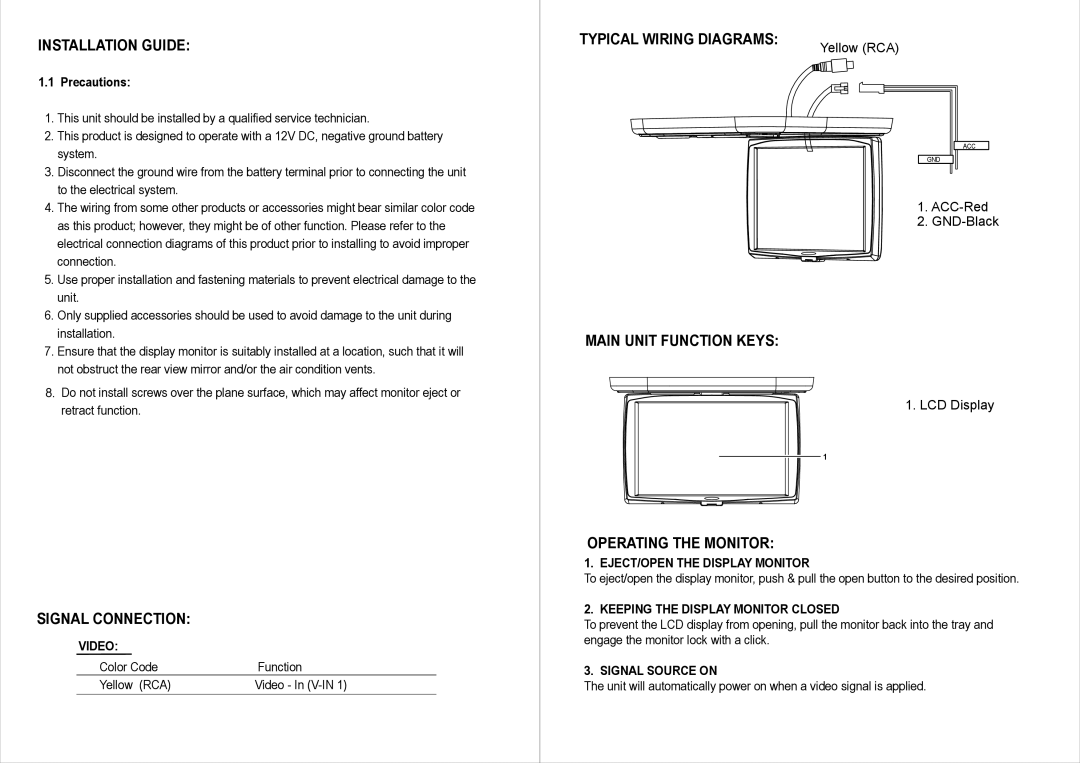
TYPICAL WIRING DIAGRAMS: | Yellow (RCA) |
|
ACC
GND
1.
2.
MAIN UNIT FUNCTION KEYS:
1. LCD Display
1
SIGNAL CONNECTION:
VIDEO: |
|
Color Code | Function |
Yellow (RCA) | Video - In |
OPERATING THE MONITOR:
1. EJECT/OPEN THE DISPLAY MONITOR
To eject/open the display monitor, push & pull the open button to the desired position.
2. KEEPING THE DISPLAY MONITOR CLOSED
To prevent the LCD display from opening, pull the monitor back into the tray and engage the monitor lock with a click.
3. SIGNAL SOURCE ON
The unit will automatically power on when a video signal is applied.