
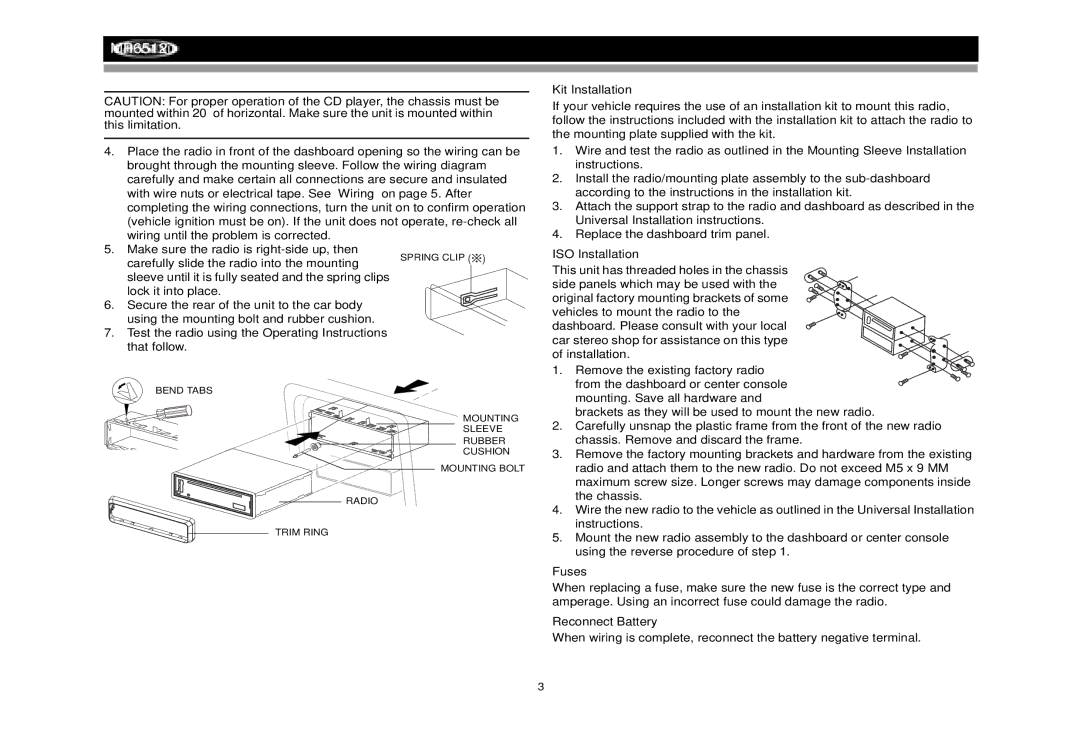
MP6512i specifications
The Jensen MP6512i is a versatile and highly regarded car stereo receiver, designed to enhance the audio experience in vehicles while incorporating modern technology and user-friendly features. With its sleek design and array of functionalities, the MP6512i appeals to both casual listeners and audiophiles alike.One of the standout features of the Jensen MP6512i is its compatibility with various media formats. It supports CD playback, which is essential for those who still enjoy physical music collections. Additionally, the unit accommodates MP3 and WMA files, making it easy for users to enjoy their favorite tracks stored on USB drives or CDs. The front USB port and auxiliary input offer flexible connectivity options, allowing users to connect their devices seamlessly.
The Jensen MP6512i also integrates Bluetooth technology, enabling hands-free calling and wireless audio streaming. This feature allows drivers to answer calls and play music from their smartphones without the hassle of tangled wires or distractions while driving. The Bluetooth functionality ensures a safer and more enjoyable driving experience.
This car stereo receiver features a vivid 7-color illuminated display, which enhances visibility and adds a touch of style to any vehicle interior. The customizable illumination allows users to match the stereo’s display to their vehicle’s interior lighting, creating a cohesive look while driving at night.
To cater to different audio preferences, the Jensen MP6512i includes a built-in equalizer with various presets that allow users to adjust the sound profile to their liking. This feature helps tailor the listening experience to suit different genres of music or personal taste, whether it’s booming bass or crystal-clear highs.
Moreover, the unit has a power output of 4 x 75 watts, producing ample sound to fill the car’s interior. Its single DIN design ensures easy installation in various vehicles, making it an accessible upgrade for many drivers.
In terms of user convenience, the Jensen MP6512i comes equipped with a remote control, allowing drivers to manage their music and calls without taking their hands off the wheel. This focuses on functionality and safety, crucial for any modern car audio system.
In summary, the Jensen MP6512i combines functionality, advanced technology, and user-centric features, making it a popular choice for those looking to elevate their in-car audio experience. With its broad media compatibility, Bluetooth capabilities, customizable display, and robust sound output, this car stereo receiver stands out in the competitive automotive audio market.