
HD600/4 specifications
JL Audio's HD600/4 amplifier stands as a testament to the brand's dedication to quality and performance in the realm of car audio. Renowned for delivering powerful, clean sound, this amplifier is designed to meet the needs of audiophiles and casual listeners alike. With a compact design and impressive specifications, the HD600/4 is a four-channel amplifier that provides robust power to enhance your listening experience.One of the standout features of the HD600/4 is its high-efficiency Class D topology. This technology allows the amplifier to produce more power while consuming less energy, resulting in a cooler operating temperature and less strain on your vehicle’s electrical system. The efficient design also means that the HD600/4 can deliver an astounding 75 watts RMS per channel at 4 ohms, and even more power when configured at lower impedances. This ensures clear and dynamic audio reproduction across a wide range of sources, from music to voice.
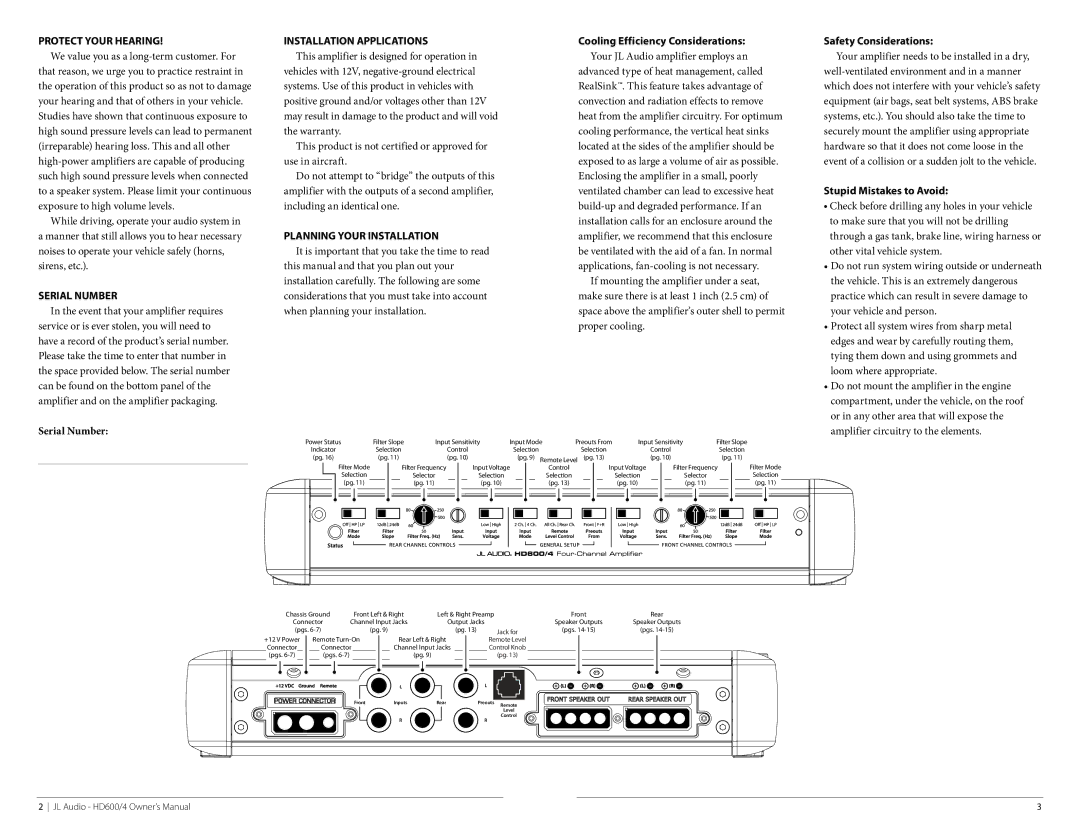
The HD600/4 also incorporates JL Audio's advanced signal processing capabilities. With adjustable crossover settings, users can precisely tailor the sound to match their specific requirements. The built-in high-pass and low-pass filters allow for easy integration with subwoofers and other speakers, ensuring a seamless audio experience regardless of the setup. Additionally, the amplifier features a line/ speaker level input, making it versatile enough to work with various audio sources.
Durability is another hallmark of the HD600/4. Constructed with high-quality materials, it features a robust aluminum chassis that not only enhances aesthetic appeal but also provides effective heat dissipation. The amplifier's design includes thoughtful engineering features such as a variable gain control per channel and advanced protection circuitry that safeguards against overheating and short circuiting.
The sleek and compact design of the HD600/4 makes it easier for installation in various vehicle types without sacrificing valuable space. With a mounting depth of just over 6 inches, it can fit into tight spaces, making it an attractive option for those seeking high-performance audio without the bulk of traditional amplifiers.
In conclusion, the JL Audio HD600/4 embodies high-quality engineering, power efficiency, and adaptability. Its combination of advanced technologies, user-friendly features, and robust build quality make it a top choice for car audio enthusiasts looking to elevate their listening experience to new heights. With the HD600/4, users can expect nothing less than the exceptional audio performance that JL Audio is known for.