I n s t a l l a t i o n G u i d e
for the
SB-N-370/10W3v3
SKU#94480
2008+
If you choose to perform the installation yourself, it is absolutely vital that the Stealthbox® be properly mounted to the vehicle according to these instructions. Failure to mount the enclosure properly presents two problems:
1)The
2)A loose enclosure presents a serious safety hazard in the event of a collision or sudden deceleration.
INSTALLATION D I F F I C U LT Y:
1OUT OF
5
Estimated TIME:
1 HOUR
Thank you for choosing a JL Audio Stealthbox® for your automotive sound system. With proper
installation, your new
We strongly recommend that you have your new Stealthbox® installed by your authorized JL Audio dealer. The installation professionals employed by your dealer have the necessary tools and experience to disassemble and reassemble your vehicle properly. Also, keep in mind that your warranty coverage extends to 2 years if your system is installed or approved by your authorized JL Audio dealer. If you prefer to perform your own installation, please read this installation guide completely
before beginning the process.
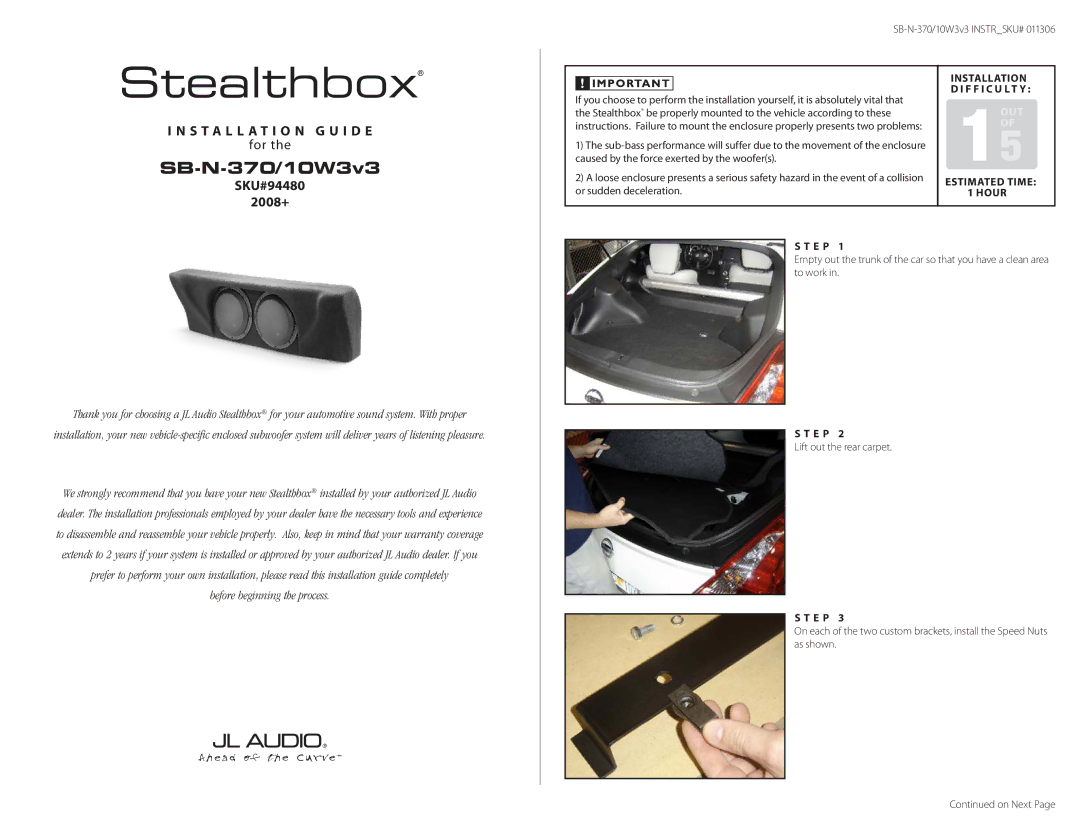
S T E P 1
Empty out the trunk of the car so that you have a clean area to work in.
S T E P 2
Lift out the rear carpet.
S T E P 3
On each of the two custom brackets, install the Speed Nuts as shown.
Continued on Next Page