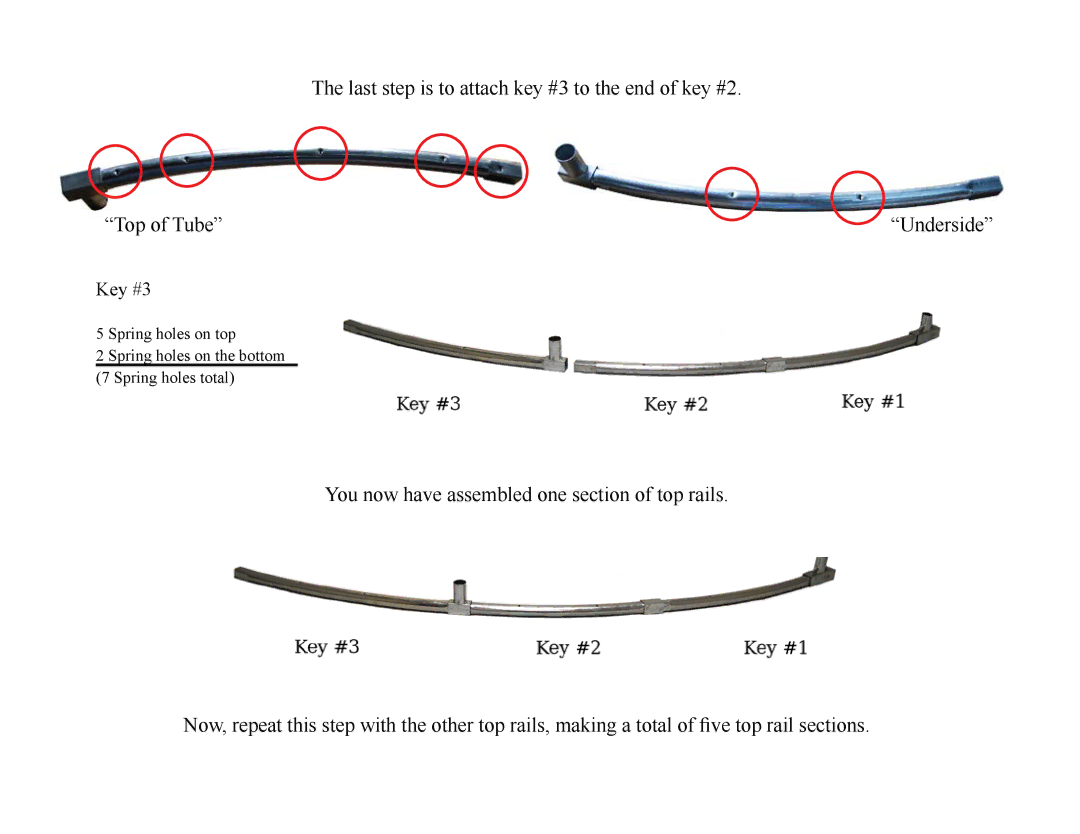
The last step is to attach key #3 to the end of key #2.
“Top of Tube” | “Underside” |
Key #3
5 Spring holes on top
2 Spring holes on the bottom
(7 Spring holes total)
You now have assembled one section of top rails.
Now, repeat this step with the other top rails, making a total of five top rail sections.