
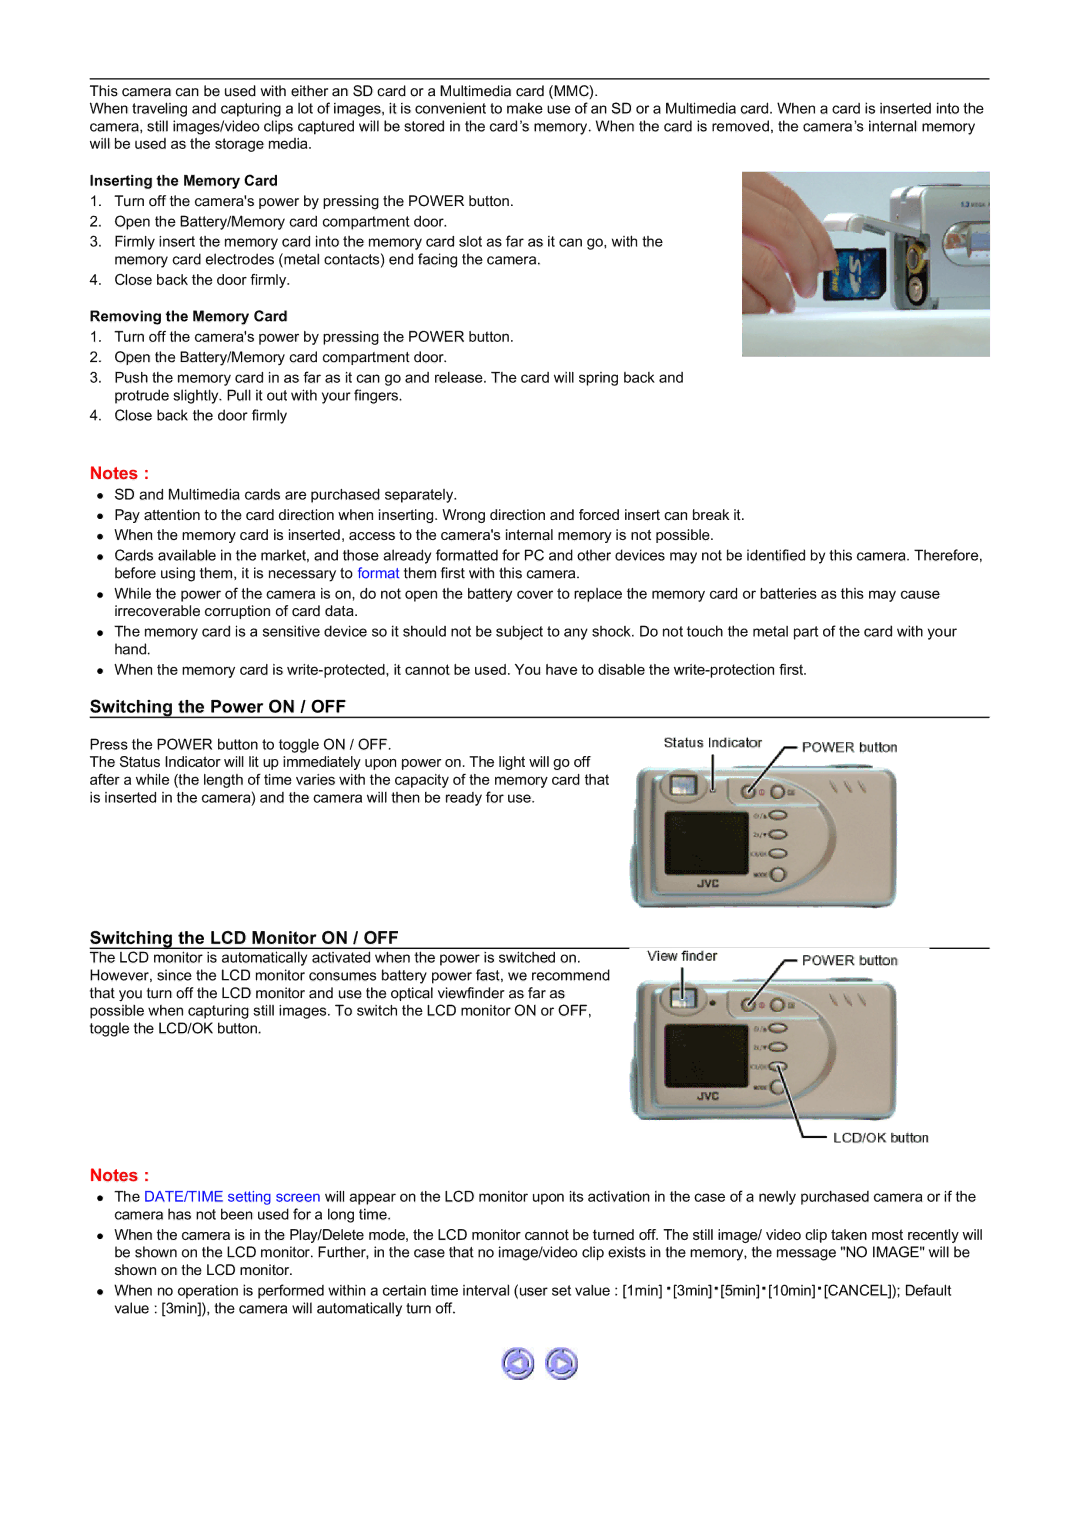
GC-A55 specifications
The JVC GC-A55 is a compact yet powerful camcorder that brings together advanced technologies and user-friendly features, making it an excellent choice for both amateur videographers and seasoned professionals. Compact and lightweight, the GC-A55 offers portability without compromising on performance, ideal for capturing moments on the go.One of the standout features of the JVC GC-A55 is its high-definition video recording capability. With the ability to shoot in Full HD 1080p resolution, the camcorder ensures that every detail is captured with stunning clarity. This makes it perfect for documenting events, creating vlog content, or simply recording everyday moments. The camcorder also supports various frame rates, allowing users to choose between smooth video playback or creative slow-motion effects.
The camera is equipped with a high-quality lens that offers a 10x optical zoom. This powerful zoom function provides the flexibility to get closer to the action without losing image quality. Coupled with the built-in image stabilization technology, users can achieve steady shots even in dynamic shooting scenarios, ensuring that shaky footage becomes a thing of the past.
Additionally, the JVC GC-A55 features a 3-inch LCD touchscreen, providing an intuitive interface for navigating through menus and settings. This responsive display allows users to easily compose their shots and review footage, enhancing the overall shooting experience. The touchscreen also facilitates quick adjustments to important camera settings, such as exposure and focus, directly from the screen.
As for audio quality, the GC-A55 is equipped with a built-in stereo microphone, delivering clear sound to complement the high-quality video. For those looking for improved audio performance, the camcorder also includes a microphone input, which allows users to connect external microphones for even better sound capture.
The JVC GC-A55 is designed with connectivity in mind, offering HDMI output for easy playback on external displays. Furthermore, its ability to connect to Wi-Fi allows users to share their content quickly and efficiently over social media or upload it to cloud services for storage.
In terms of battery life, the GC-A55 provides hours of recording time, making it suitable for extended use on trips or during events. Its combination of portability, advanced features, and excellent video quality makes the JVC GC-A55 a standout option for anyone looking to document their life in style. With its user-friendly controls and versatile functionalities, it is poised to encourage creativity and inspire storytelling through video.