ENGLISH
Connecting the CD changer
Before connecting the CD changer
•To prevent short circuits, it is recommended to disconnect the car battery’s negative terminal and make all electrical connections before connecting the CD changer.
•When mounting the unit removed from your car, be sure to use the screws provided, as instructed. If other screws are used, there is a possibility that parts could become loose or damaged.
•When tightening screws or bolts, be careful not to pinch any connection cord.
•If you are not sure how to connect the CD changer correctly, consult your car dealer or JVC car audio dealer, or have it installed by a qualified technician. Refer also to the instructions supplied for the CD changer.
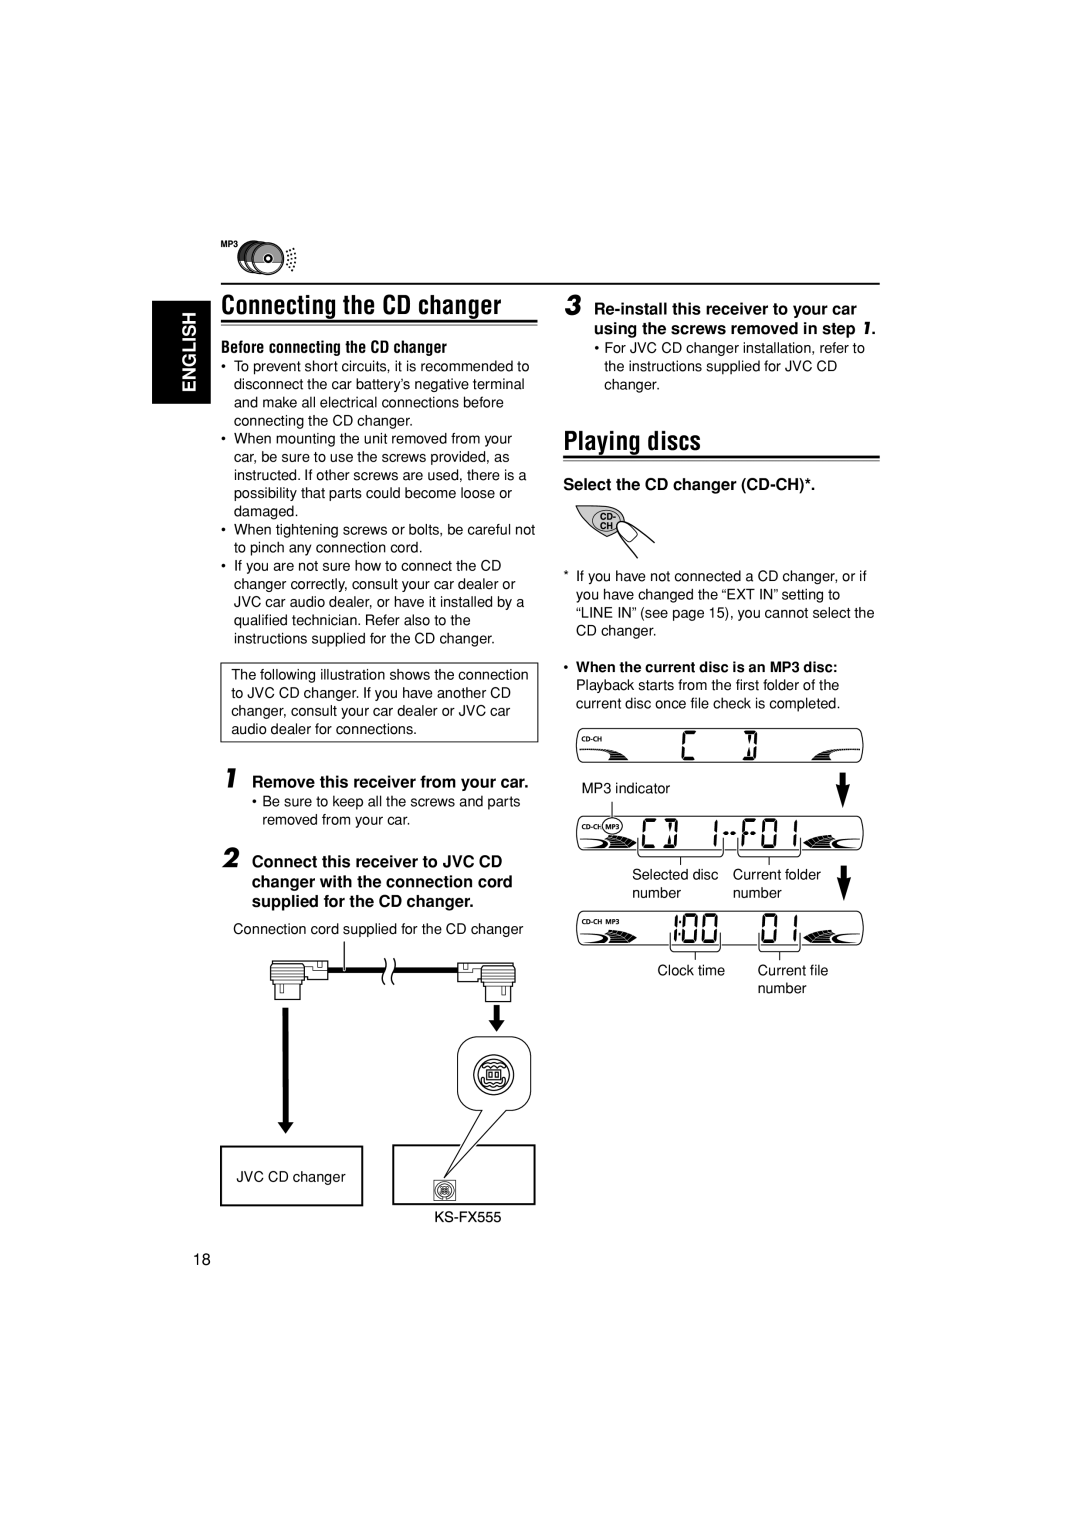
The following illustration shows the connection to JVC CD changer. If you have another CD changer, consult your car dealer or JVC car audio dealer for connections.
1 Remove this receiver from your car.
•Be sure to keep all the screws and parts removed from your car.
2 Connect this receiver to JVC CD changer with the connection cord supplied for the CD changer.
Connection cord supplied for the CD changer
3
•For JVC CD changer installation, refer to the instructions supplied for JVC CD changer.
Playing discs
Select the CD changer (CD-CH)*.
*If you have not connected a CD changer, or if you have changed the “EXT IN” setting to “LINE IN” (see page 15), you cannot select the CD changer.
•When the current disc is an MP3 disc: Playback starts from the first folder of the current disc once file check is completed.
MP3 indicator
Selected disc | Current folder |
number | number |
Clock time | Current file |
| number |
JVC CD changer
18
