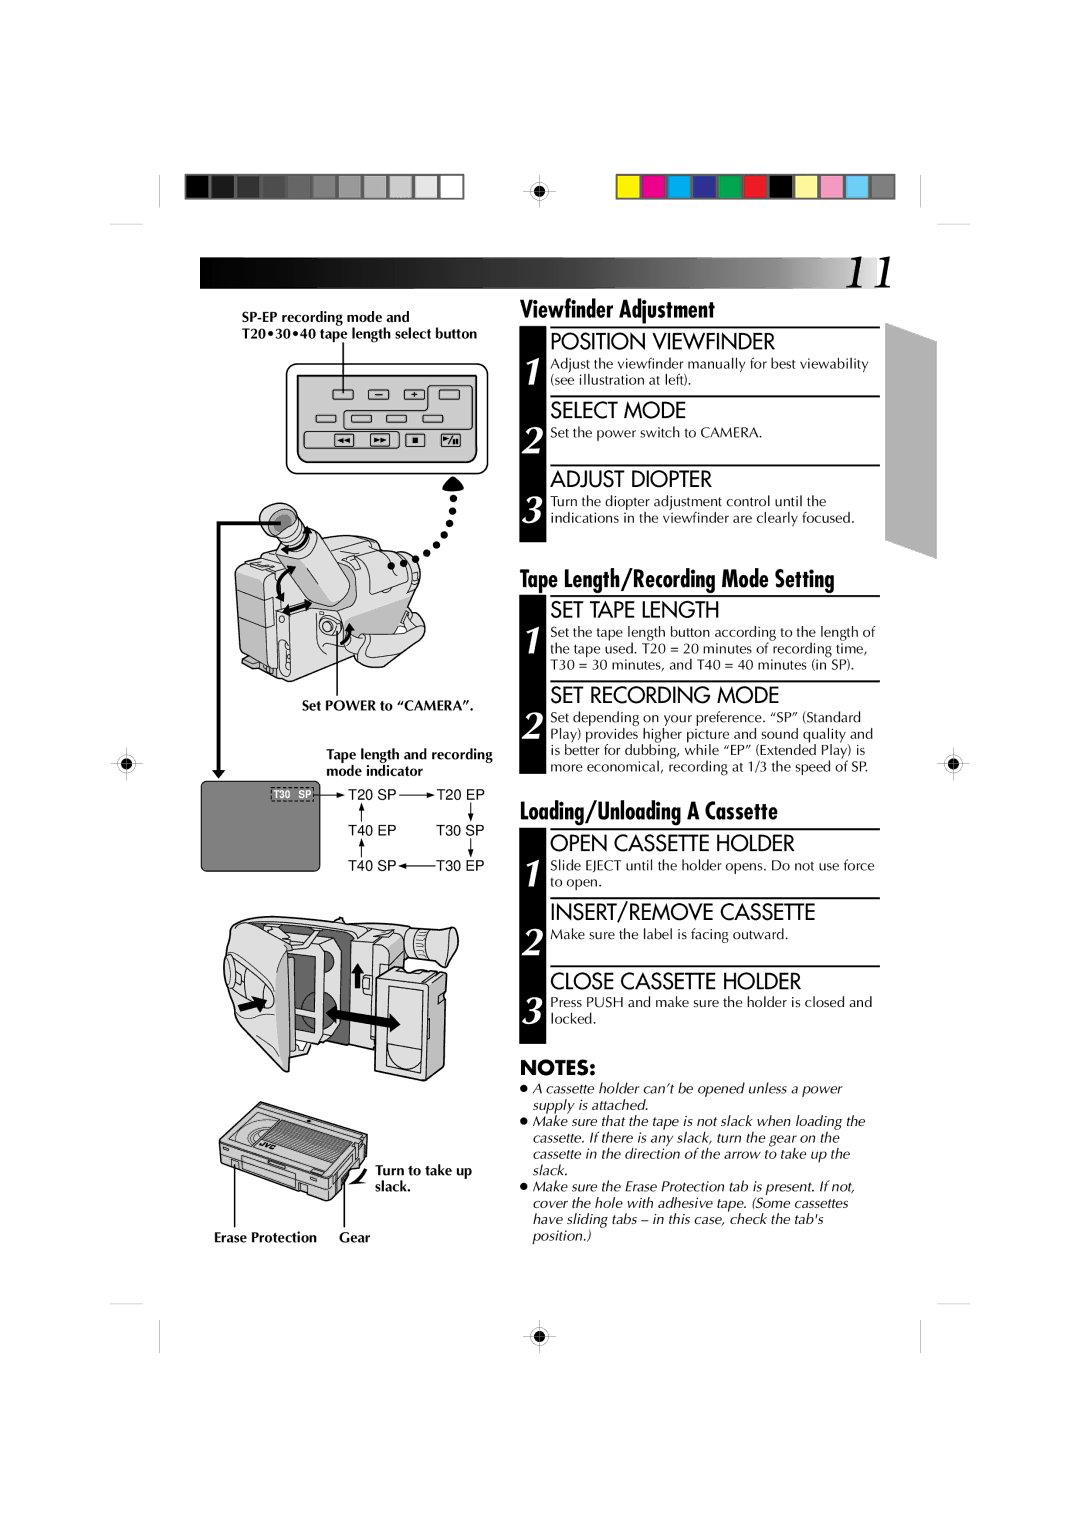
Set POWER to “CAMERA”.
Tape length and recording mode indicator
T30 SP ![]() T20 SP
T20 SP ![]() T20 EP
T20 EP
T40 EP | T30 SP |
T40 SP![]() T30 EP
T30 EP
Turn to take up
![]()
![]() slack.
slack.
Erase Protection Gear
![]() 11
11
Viewfinder Adjustment
POSITION VIEWFINDER
1 Adjust the viewfinder manually for best viewability (see illustration at left).
SELECT MODE
2 Set the power switch to CAMERA.
ADJUST DIOPTER
3 Turn the diopter adjustment control until the indications in the viewfinder are clearly focused.
Tape Length/Recording Mode Setting
SET TAPE LENGTH
1 Set the tape length button according to the length of the tape used. T20 = 20 minutes of recording time, T30 = 30 minutes, and T40 = 40 minutes (in SP).
SET RECORDING MODE
2 Set depending on your preference. “SP” (Standard Play) provides higher picture and sound quality and is better for dubbing, while “EP” (Extended Play) is more economical, recording at 1/3 the speed of SP.
Loading/Unloading A Cassette
OPEN CASSETTE HOLDER
1 Slide EJECT until the holder opens. Do not use force to open.
INSERT/REMOVE CASSETTE
2 Make sure the label is facing outward.
CLOSE CASSETTE HOLDER
3 Press PUSH and make sure the holder is closed and locked.
NOTES:
●A cassette holder can’t be opened unless a power supply is attached.
●Make sure that the tape is not slack when loading the cassette. If there is any slack, turn the gear on the cassette in the direction of the arrow to take up the slack.
●Make sure the Erase Protection tab is present. If not, cover the hole with adhesive tape. (Some cassettes have sliding tabs – in this case, check the tab's position.)