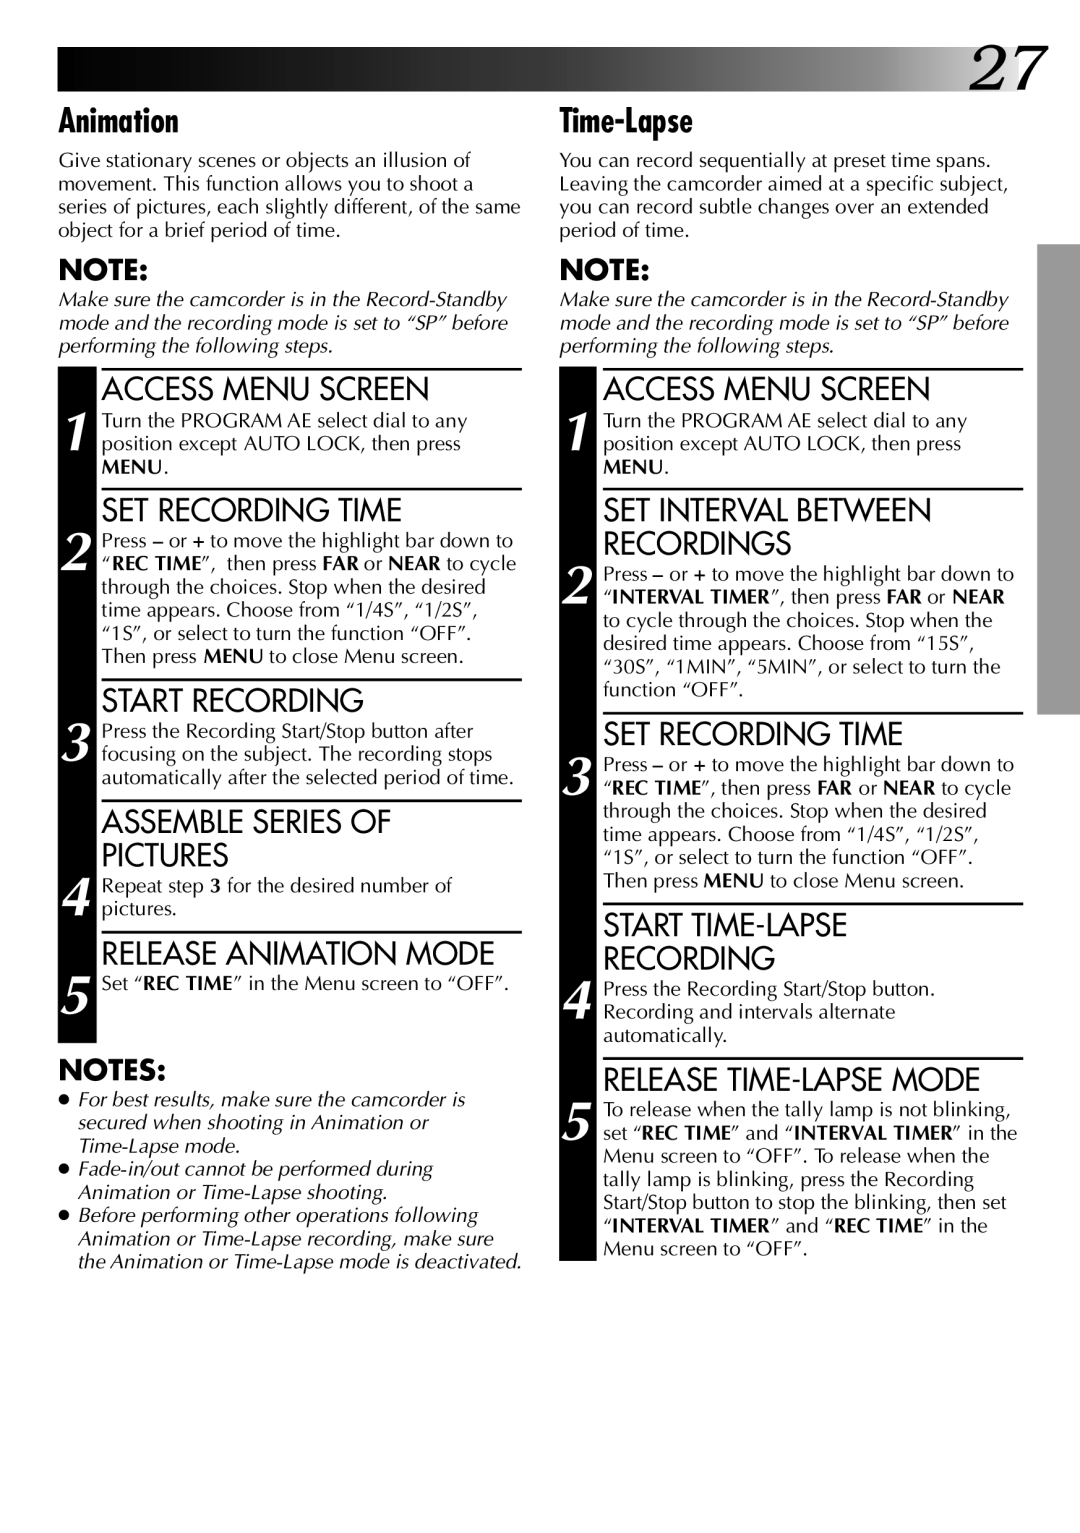
Animation

Give stationary scenes or objects an illusion of movement. This function allows you to shoot a series of pictures, each slightly different, of the same object for a brief period of time.

NOTE:

Make sure the camcorder is in the Record-Standby mode and the recording mode is set to “SP” before performing the following steps.

ACCESS MENU SCREEN

1 Turn the PROGRAM AE select dial to any position except AUTO LOCK, then press MENU.

SET RECORDING TIME

2 Press or + to move the highlight bar down to “REC TIME”, then press FAR or NEAR to cycle through the choices. Stop when the desired time appears. Choose from “1/4S”, “1/2S”, “1S”, or select to turn the function “OFF”. Then press MENU to close Menu screen.

START RECORDING

3 Press the Recording Start/Stop button after focusing on the subject. The recording stops automatically after the selected period of time.

ASSEMBLE SERIES OF

PICTURES

4 Repeat step 3 for the desired number of pictures.

RELEASE ANIMATION MODE

5 Set “REC TIME” in the Menu screen to “OFF”.

NOTES:

For best results, make sure the camcorder is secured when shooting in Animation or Time-Lapse mode.

Fade-in/out cannot be performed during Animation or Time-Lapse shooting.

Before performing other operations following Animation or Time-Lapse recording, make sure the Animation or Time-Lapse mode is deactivated.

27

Time-Lapse

You can record sequentially at preset time spans. Leaving the camcorder aimed at a specific subject, you can record subtle changes over an extended period of time.

NOTE:

Make sure the camcorder is in the Record-Standby mode and the recording mode is set to “SP” before performing the following steps.

ACCESS MENU SCREEN

1 Turn the PROGRAM AE select dial to any position except AUTO LOCK, then press MENU.

SET INTERVAL BETWEEN

RECORDINGS

2 Press or + to move the highlight bar down to “INTERVAL TIMER”, then press FAR or NEAR to cycle through the choices. Stop when the desired time appears. Choose from “15S”, “30S”, “1MIN”, “5MIN”, or select to turn the function “OFF”.

SET RECORDING TIME

3 Press or + to move the highlight bar down to “REC TIME”, then press FAR or NEAR to cycle through the choices. Stop when the desired time appears. Choose from “1/4S”, “1/2S”, “1S”, or select to turn the function “OFF”. Then press MENU to close Menu screen.

START TIME-LAPSE

RECORDING

4 Press the Recording Start/Stop button. Recording and intervals alternate automatically.

RELEASE TIME-LAPSE MODE

5 To release when the tally lamp is not blinking, set “REC TIME” and “INTERVAL TIMER” in the Menu screen to “OFF”. To release when the tally lamp is blinking, press the Recording Start/Stop button to stop the blinking, then set “INTERVAL TIMER” and “REC TIME” in the Menu screen to “OFF”.

Page 27
Image 27
JVC GR-AX270, GR-AX570 specifications Animation, Time-Lapse

GR-AX270, GR-AX570 specifications

The JVC GR-AX270 and GR-AX570 are compact camcorders that were well-regarded in the late 1990s and early 2000s for their user-friendly features and advanced technology for their time. These models were designed to cater to both novice and experienced videographers, making it easier to capture high-quality video footage.

One of the primary features of the JVC GR-AX270 is its lightweight and portable design. Weighing less than 3 pounds, this camcorder can easily be carried around for long shooting sessions without causing fatigue. It boasts a 16x optical zoom lens, allowing users to get closer to their subjects without sacrificing image quality. The GR-AX270 also features a digital zoom that extends the zoom capability up to 100x, making it versatile for various shooting scenarios.

The GR-AX570 model steps up with a few additional features. It includes a larger 3.5-inch color LCD screen that enhances user interaction, making it easier to monitor recordings and navigate through settings. This model also features a more advanced autofocus system, ensuring that subjects remain in focus automatically, which is beneficial for fast-paced shoots.

Both models utilize JVC's proprietary Super High Band (SHB) technology, which enhances video resolution and color reproduction. This technology ensures that the recordings have rich detail and vibrant colors, which was exceptional for consumer camcorders during this era. The camcorders also integrate a built-in image stabilization system, significantly reducing the shake that can occur during handheld shooting.

The GR-AX270 and GR-AX570 are equipped with various recording options, including both SP (Standard Play) and LP (Long Play) modes, allowing users to choose between quality and recording time based on their needs. They are compatible with VHS-C tapes, which were commonly available and relatively inexpensive, making these camcorders accessible to a wide audience.

In terms of audio capabilities, both models come with a built-in microphone that captures clear sound, while an external microphone input is available for those who require higher audio quality. The JVC GR-AX270 and GR-AX570 remain popular in the vintage video community, as they symbolize a significant era in camcorder technology, providing amateurs and enthusiasts alike with the tools to create memorable home videos and other projects.