Tuner Setting
Setting channels automatically
— Auto Channel Set
Perform Auto Channel Set only if channels have not been set correctly by the Plug&Play setting.
Cable Box and/or DBS Receiver Control Setting
The following procedure is required if you receive your TV channels through a cable box (descrambler) and/or if you receive satellite channels through DBS (Direct Broadcast Satellite) receiver. The Controller allows the VCR to automatically switch the cable box or DBS receiver’s channel during timer recording.
A Access Main Menu screen, then Tuner
Set screen
Press MENU on the Remote. Press rt to move the highlight bar (arrow) to “TUNER SET”, then press OK or e.
B Perform Auto Channel Set
Press rt to move the highlight bar (arrow) to “AUTO CHANNEL SET”, then press OK or e. The VCR selects the correct band (TV or CATV) automatically during Auto Channel Set.
● When Auto Channel Set is complete, “SCAN COMPLETED” appears on screen.
●If the scan was unsuccessful, “SCAN
Press MENU to return to normal screen.
Setting channels manually
— Manual Channel Set
You can add the channels you want or delete the channels you do not want manually.
A Access Main Menu screen, then Tuner
Set screen
Press MENU on the Remote. Press rt to move the highlight bar (arrow) to “TUNER SET”, then press OK or e.
B Access Manual Channel Set screen
Press rt to move the highlight bar (arrow) to “MANUAL CHANNEL SET”, then press OK or e.
C Add or skip desired channels
To add channels
A Press the Number keys on the Remote to input a channel number you want to add.
B Press OK or e to set to “ADD”.
CRepeat A to B to add other channels. Press MENU to return to normal screen.
To skip channels
APress rtor the Number keys to select a channel number you want to skip.
BPress OK or e to set to “SKIP”.
CRepeat A and B to skip other channels. Press MENU to return to normal screen.
After a power failure occurs, band selection will be reset to “CATV”.
NOTES:
●The Controller is not supplied with this unit. It can be requested by mailing in the completed JVC Cable Mouse Certificate that is included with the accessory package.
●For the cable box, the Controller is effective for VCR Plus+ or Express timer programing.
●For the DBS receiver, the Controller is effective only for Express timer programing.
●When connecting your cable box or DBS receiver, refer to its instruction manual.
ASituate Controller
If both a cable box and a DBS receiver are used, position the Controller so its signal reaches the remote sensors on both the cable box and DBS receiver.
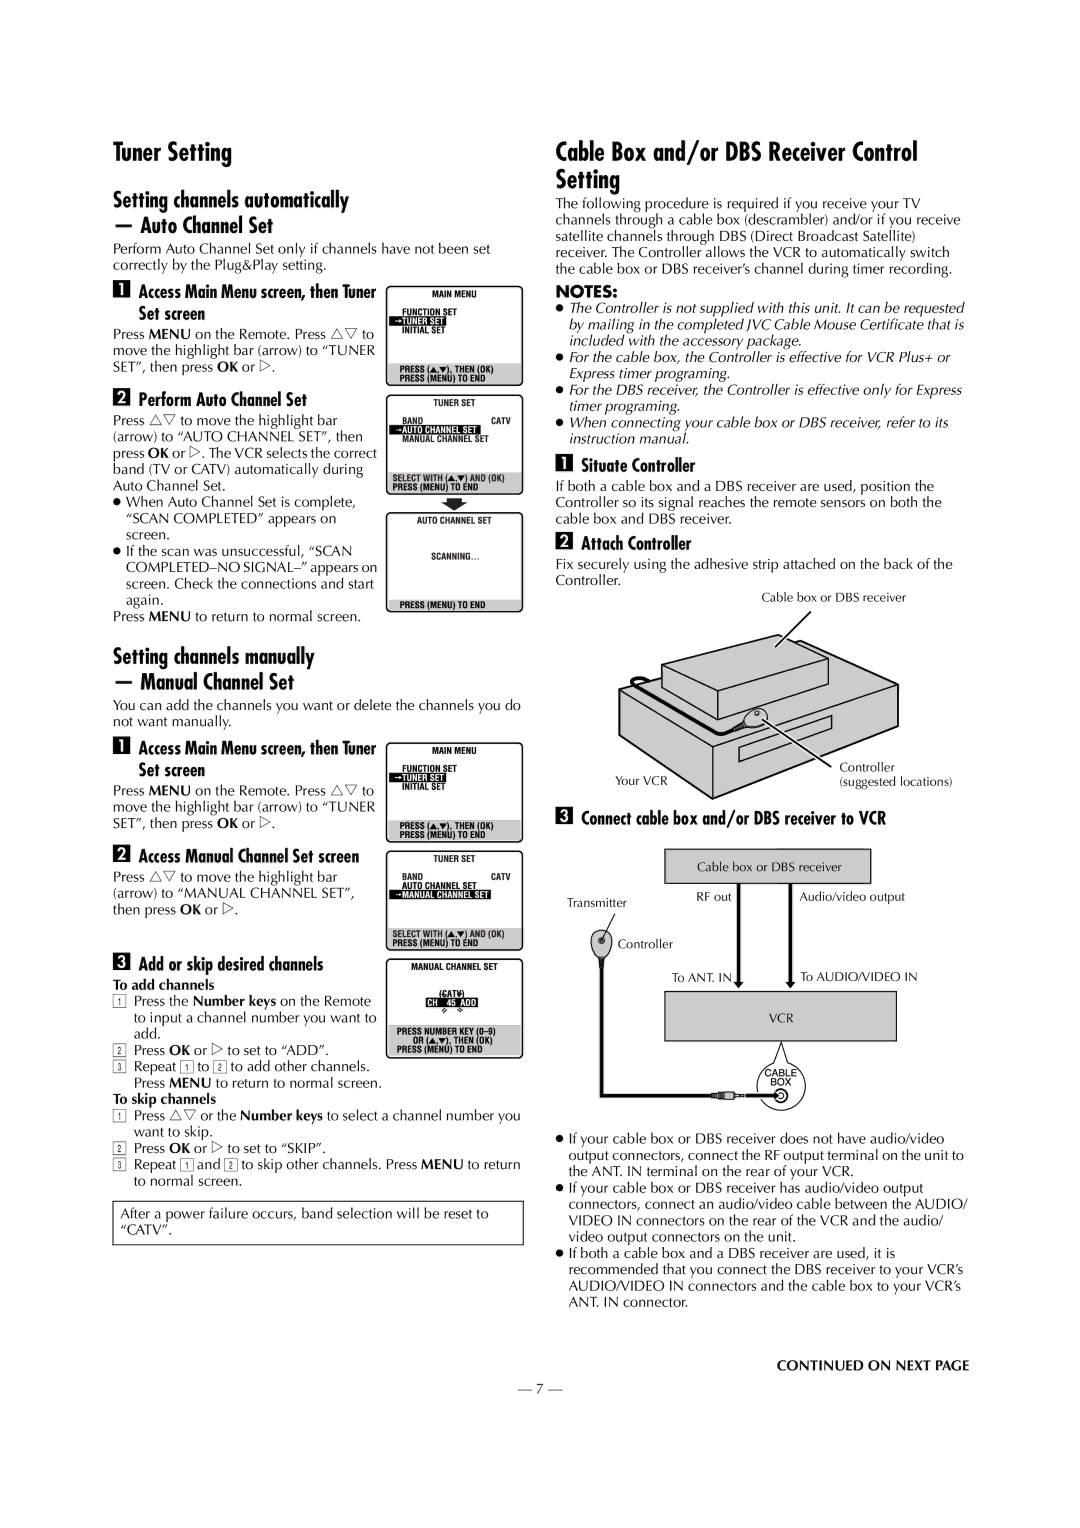
BAttach Controller
Fix securely using the adhesive strip attached on the back of the Controller.
Cable box or DBS receiver
Your VCR | Controller |
(suggested locations) |
CConnect cable box and/or DBS receiver to VCR
| Cable box or DBS receiver | |
Transmitter | RF out | Audio/video output |
|
| |
Controller |
| |
| To ANT. IN | To AUDIO/VIDEO IN |
|
| VCR |
●If your cable box or DBS receiver does not have audio/video output connectors, connect the RF output terminal on the unit to the ANT. IN terminal on the rear of your VCR.
●If your cable box or DBS receiver has audio/video output connectors, connect an audio/video cable between the AUDIO/ VIDEO IN connectors on the rear of the VCR and the audio/ video output connectors on the unit.
●If both a cable box and a DBS receiver are used, it is recommended that you connect the DBS receiver to your VCR’s AUDIO/VIDEO IN connectors and the cable box to your VCR’s ANT. IN connector.
CONTINUED ON NEXT PAGE
— 7 —