CD CONTROL LOCATION OF PARTS
17 | 19 | 18 |
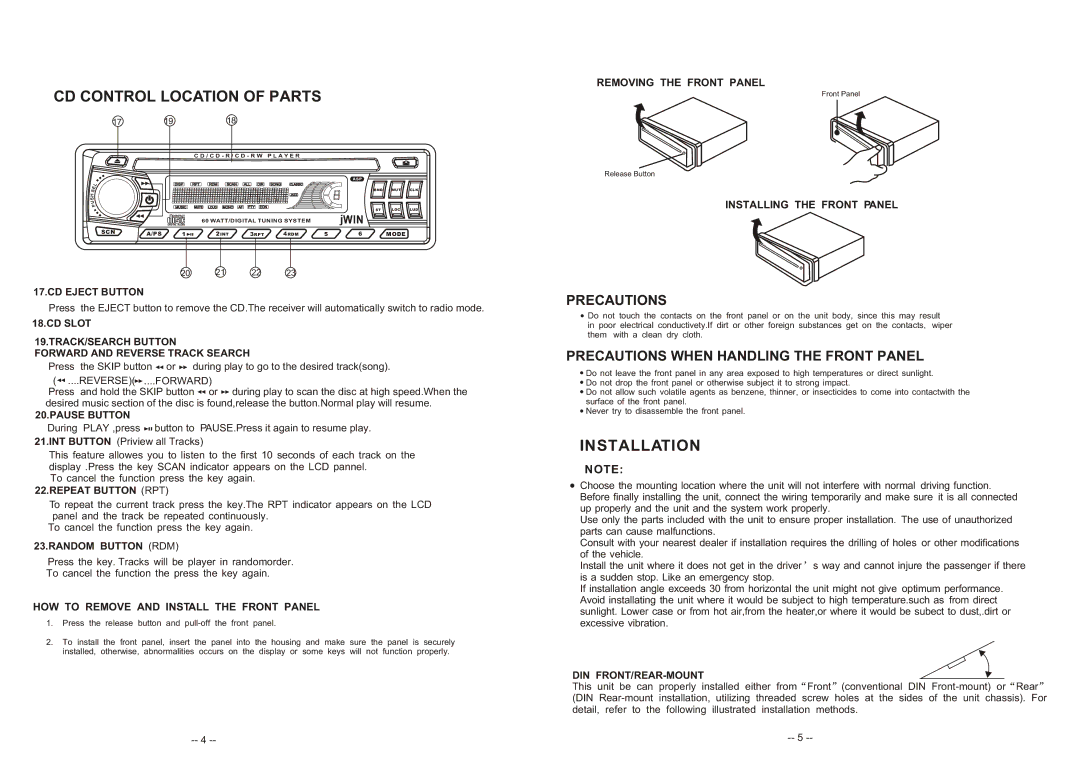
REMOVING THE FRONT PANEL
Front Panel
S | E | L |
| ||
H |
|
|
S |
|
|
U |
| |
P | ||
SCNA/PS
C D / C D - R / C D - R W P L A Y E R
DISP | RPT | RDM | SCAN | ALL | DIR | SONG CLASSIC |
|
|
|
|
|
|
|
|
|
|
|
| BND | MUT | CLK |
|
|
|
|
|
| JAZZ |
|
|
|
|
MUSIC | MUTE | LOUD | MONO | AF PTY | EON |
|
| ST | LOC | LUD |
|
|
|
|
|
|
|
| |||
| 60 WATT/DIGITAL TUNING SYSTEM |
|
|
|
| |||||
1 |
| 2INT | 3RPT | 4RDM | 5 | 6 | MODE |
| ||
Release Button
INSTALLING THE FRONT PANEL
20 21 22 23
17.CD EJECT BUTTON
Press the EJECT button to remove the CD.The receiver will automatically switch to radio mode.
18.CD SLOT
19.TRACK/SEARCH BUTTON
FORWARD AND REVERSE TRACK SEARCH
Press the SKIP button | or during play to go to the desired track(song). | |
( ....REVERSE)( ....FORWARD) | ||
Press and hold the SKIP button | or during play to scan the disc at high speed.When the | |
desired music section of the disc is found,release the button.Normal play will resume. | ||
20.PAUSE BUTTON |
|
|
During PLAY ,press | button to | PAUSE.Press it again to resume play. |
21.INT BUTTON (Priview all Tracks)
This feature allowes you to listen to the first 10 seconds of each track on the display .Press the key SCAN indicator appears on the LCD pannel.
To cancel the function press the key again. 22.REPEAT BUTTON (RPT)
To repeat the current track press the key.The RPT indicator appears on the LCD panel and the track be repeated continuously.
To cancel the function press the key again. 23.RANDOM BUTTON (RDM)
Press the key. Tracks will be player in randomorder.
To cancel the function the press the key again.
HOW TO REMOVE AND INSTALL THE FRONT PANEL
1.Press the release button and
2.To install the front panel, insert the panel into the housing and make sure the panel is securely installed, otherwise, abnormalities occurs on the display or some keys will not function properly.
PRECAUTIONS
![]() Do not touch the contacts on the front panel or on the unit body, since this may result in poor electrical conductivety.If dirt or other foreign substances get on the contacts, wiper them with a clean dry cloth.
Do not touch the contacts on the front panel or on the unit body, since this may result in poor electrical conductivety.If dirt or other foreign substances get on the contacts, wiper them with a clean dry cloth.
PRECAUTIONS WHEN HANDLING THE FRONT PANEL
![]() Do not leave the front panel in any area exposed to high temperatures or direct sunlight.
Do not leave the front panel in any area exposed to high temperatures or direct sunlight.
![]() Do not drop the front panel or otherwise subject it to strong impact.
Do not drop the front panel or otherwise subject it to strong impact.
![]() Do not allow such volatile agents as benzene, thinner, or insecticides to come into contactwith the surface of the front panel.
Do not allow such volatile agents as benzene, thinner, or insecticides to come into contactwith the surface of the front panel.
![]() Never try to disassemble the front panel.
Never try to disassemble the front panel.
INSTALLATION
NOTE:
Choose the mounting location where the unit will not interfere with normal driving function. Before finally installing the unit, connect the wiring temporarily and make sure it is all connected up properly and the unit and the system work properly.
Use only the parts included with the unit to ensure proper installation. The use of unauthorized parts can cause malfunctions.
Consult with your nearest dealer if installation requires the drilling of holes or other modifications of the vehicle.
Install the unit where it does not get in the driver s way and cannot injure the passenger if there is a sudden stop. Like an emergency stop.
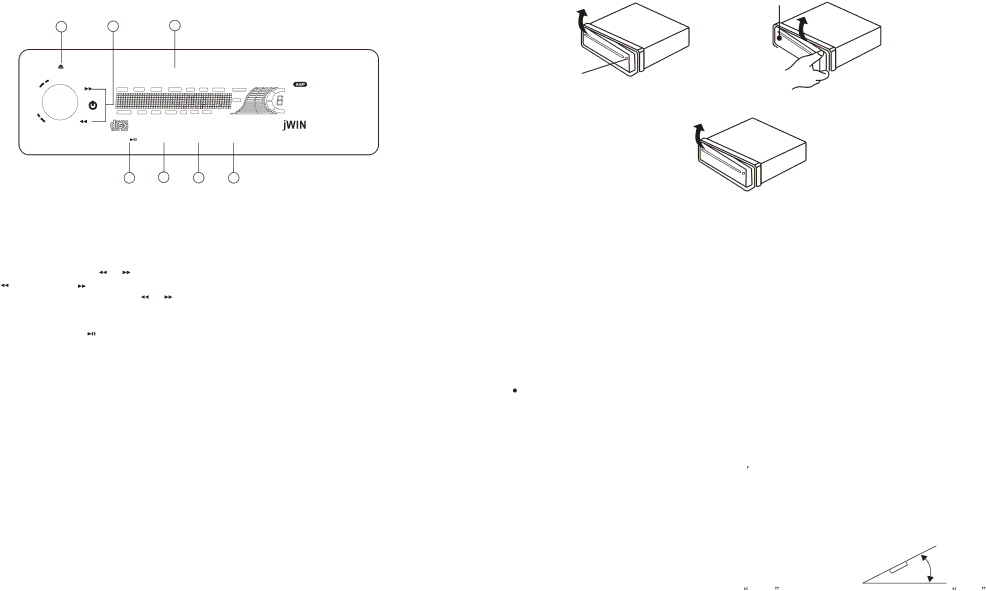
If installation angle exceeds 30 from horizontal the unit might not give optimum performance. Avoid installating the unit where it would be subject to high temperature.such as from direct sunlight. Lower case or from hot air,from the heater,or where it would be subect to dust,.dirt or excessive vibration.
DIN FRONT/REAR-MOUNT
This unit be can properly installed either from Front (conventional DIN