STEP 2: THE SLIGHTLY HARDER PART - FORE-AFT ADJUSTMENT
Put the Captive Camera Knob in the long slot of the Vertical Bracket. This will allow you to slide the camera (along with the Camera Adjustment Shoe) as re- quired. Note: This step is most easily accomplished outside. Find a vertical edge or line, such as a doorway or edge of a building. Position the unit and tripod about four feet away, or as close as possible with the edge still in focus when looking through the view displayed on the LCD screen of the camera.
Looking at the camera’s LCD, find another vertical edge or object that is far away, such as another building or telephone pole. Align the two objects and rotate the Vertical Bracket so they are in the left hand side of the viewfinder.
Rotate the pan head so the two objects move over to the right hand side of the viewfinder. Unless you’ve managed to unwittingly locate the right nodal point position, you should notice the two objects will move with respect to each other as the Vertical Bracket is rotated from left to right. Slide the camera to the front or rear as required to eliminate this relative movement.
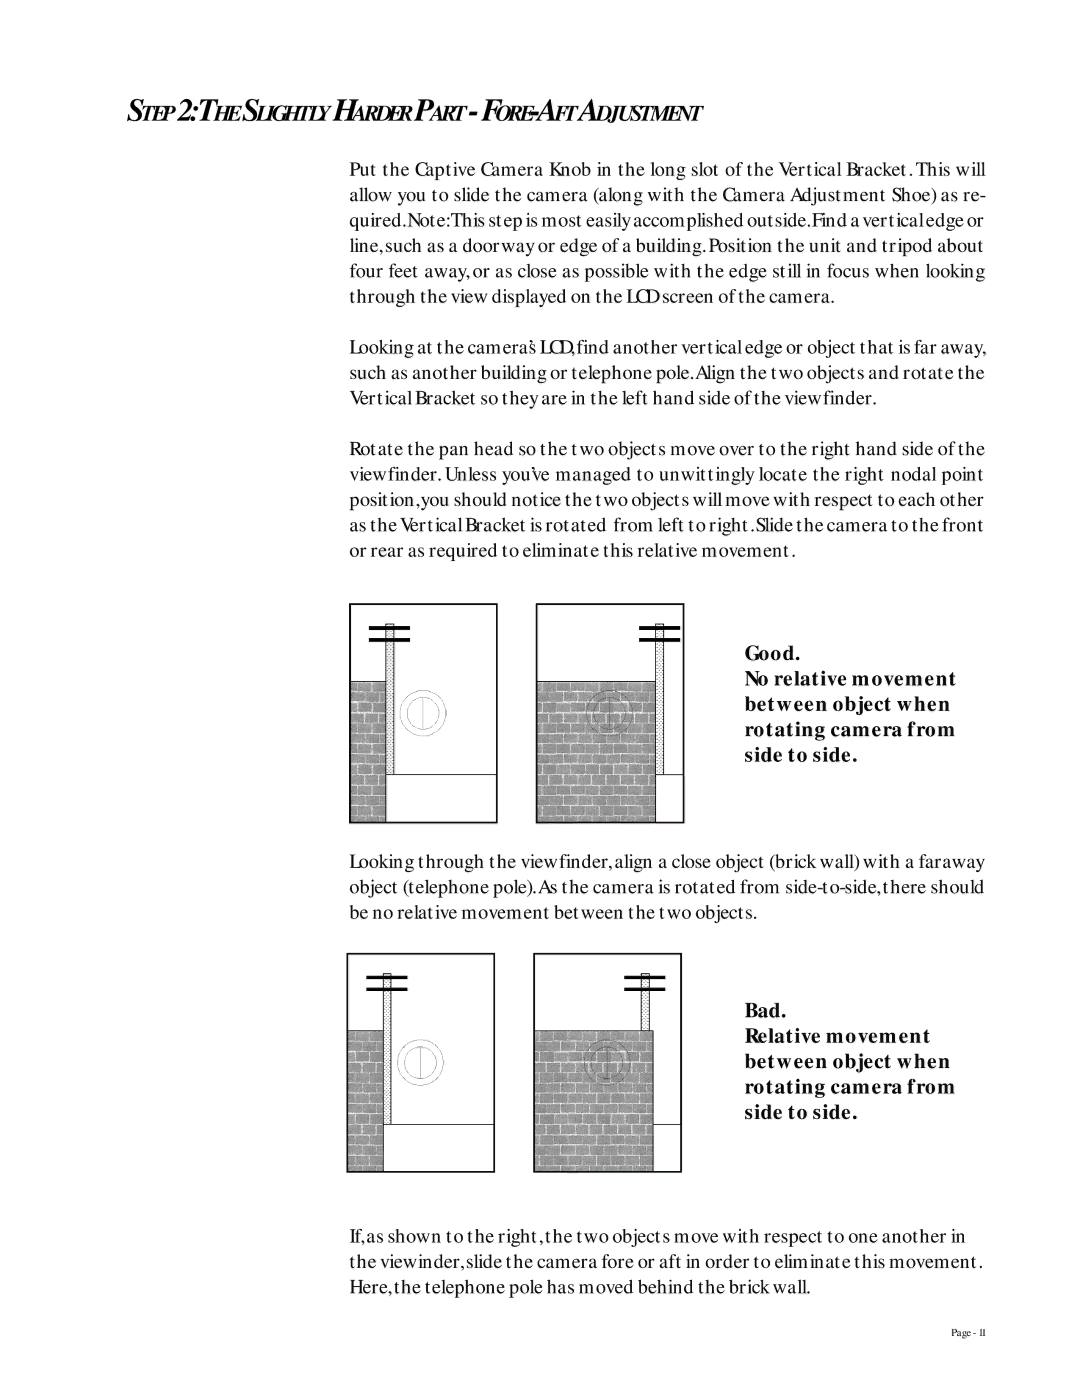
Good.
No relative movement between object when rotating camera from side to side.
Looking through the viewfinder, align a close object (brick wall) with a faraway object (telephone pole). As the camera is rotated from
Bad.
Relative movement between object when rotating camera from side to side.
If, as shown to the right, the two objects move with respect to one another in the viewinder, slide the camera fore or aft in order to eliminate this movement. Here, the telephone pole has moved behind the brick wall.
Page - 11