S E R V I C E I N S T R U C T I O N S
www.keatingofchicago.com |
CONVERTING KEATING MODELS BB & TS FRYERS FROM NATURAL GAS TO PROPANE GAS
NOTE: In replacements and conversions use only new parts.
WARNING: Improper operation could result in death or serious injury.
WARNING: When changing to propane or natural gas always change the burner and pilot orifices.
These instructions apply to BB and TS models only.
1.Disconnect power source.
2.Turn off gas supply.
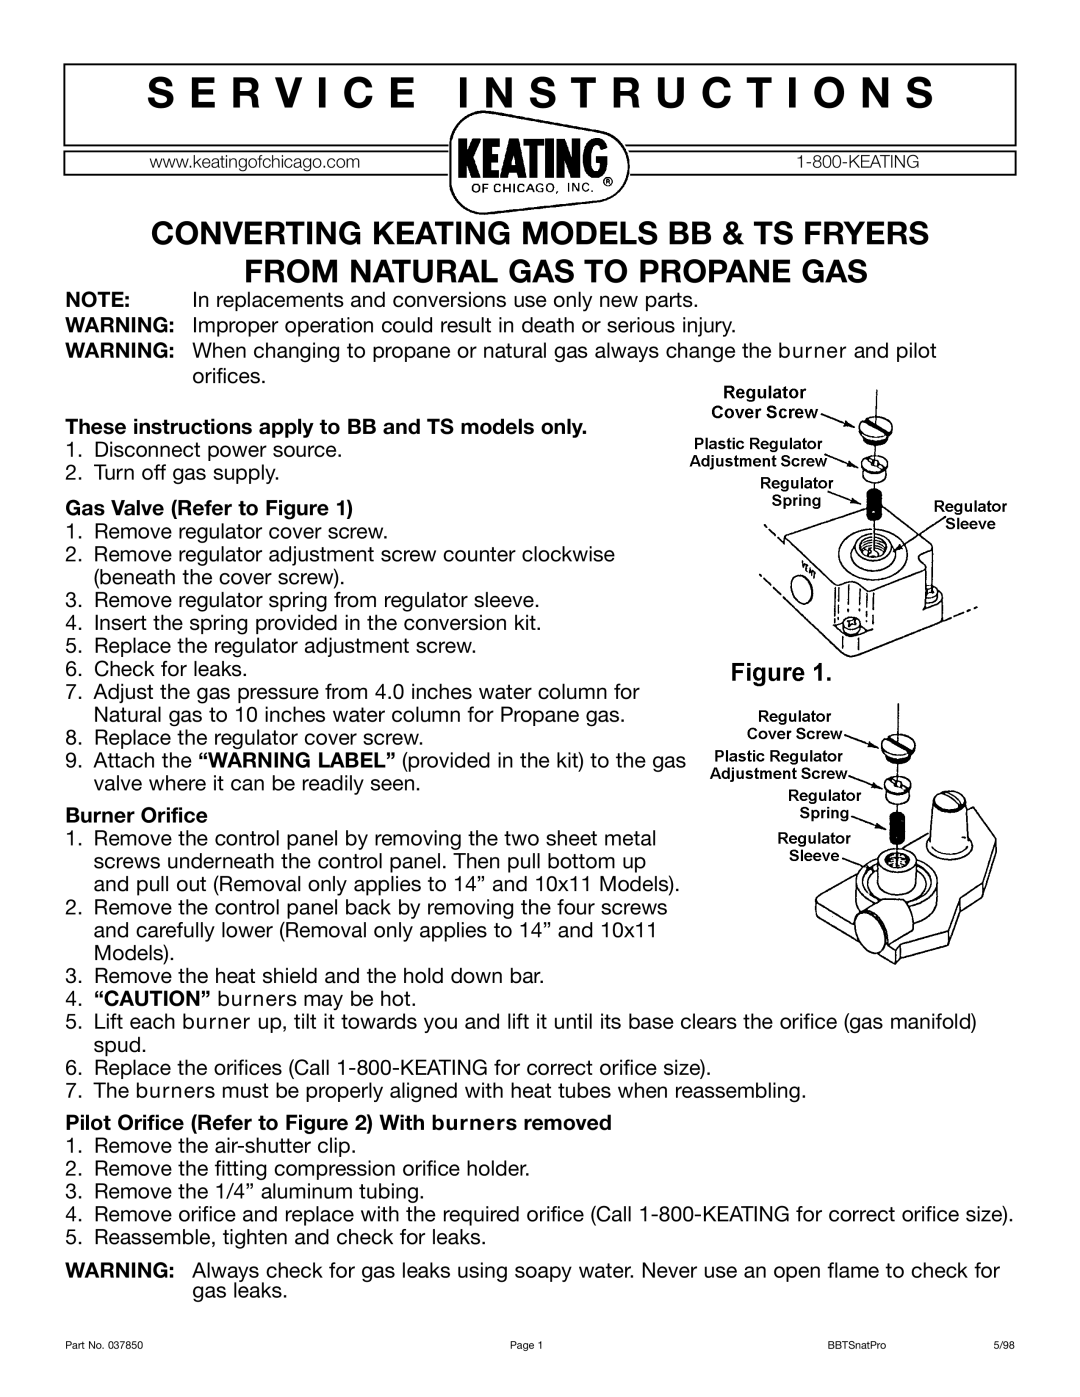
Gas Valve (Refer to Figure 1)
1.Remove regulator cover screw.
2.Remove regulator adjustment screw counter clockwise (beneath the cover screw).
3.Remove regulator spring from regulator sleeve.
4.Insert the spring provided in the conversion kit.
5.Replace the regulator adjustment screw.
6.Check for leaks.
7.Adjust the gas pressure from 4.0 inches water column for Natural gas to 10 inches water column for Propane gas.
8.Replace the regulator cover screw.
9.Attach the “WARNING LABEL” (provided in the kit) to the gas valve where it can be readily seen.
Burner Orifice
1.Remove the control panel by removing the two sheet metal screws underneath the control panel. Then pull bottom up and pull out (Removal only applies to 14” and 10x11 Models).
2.Remove the control panel back by removing the four screws and carefully lower (Removal only applies to 14” and 10x11 Models).
3.Remove the heat shield and the hold down bar.
4.“CAUTION” burners may be hot.
5.Lift each burner up, tilt it towards you and lift it until its base clears the orifice (gas manifold) spud.
6.Replace the orifices (Call
7.The burners must be properly aligned with heat tubes when reassembling.
Pilot Orifice (Refer to Figure 2) With burners removed
1.Remove the
2.Remove the fitting compression orifice holder.
3.Remove the 1/4” aluminum tubing.
4.Remove orifice and replace with the required orifice (Call
5.Reassemble, tighten and check for leaks.
WARNING: Always check for gas leaks using soapy water. Never use an open flame to check for gas leaks.
Part No. 037850 | Page 1 | BBTSnatPro | 5/98 |