CAUTION: Never remove the sump with water
pressure in the filter.
1.Close the nearest shutoff valve on the water supply to
the filter. To relieve pressure in the filter, open the fil- tered water faucet.
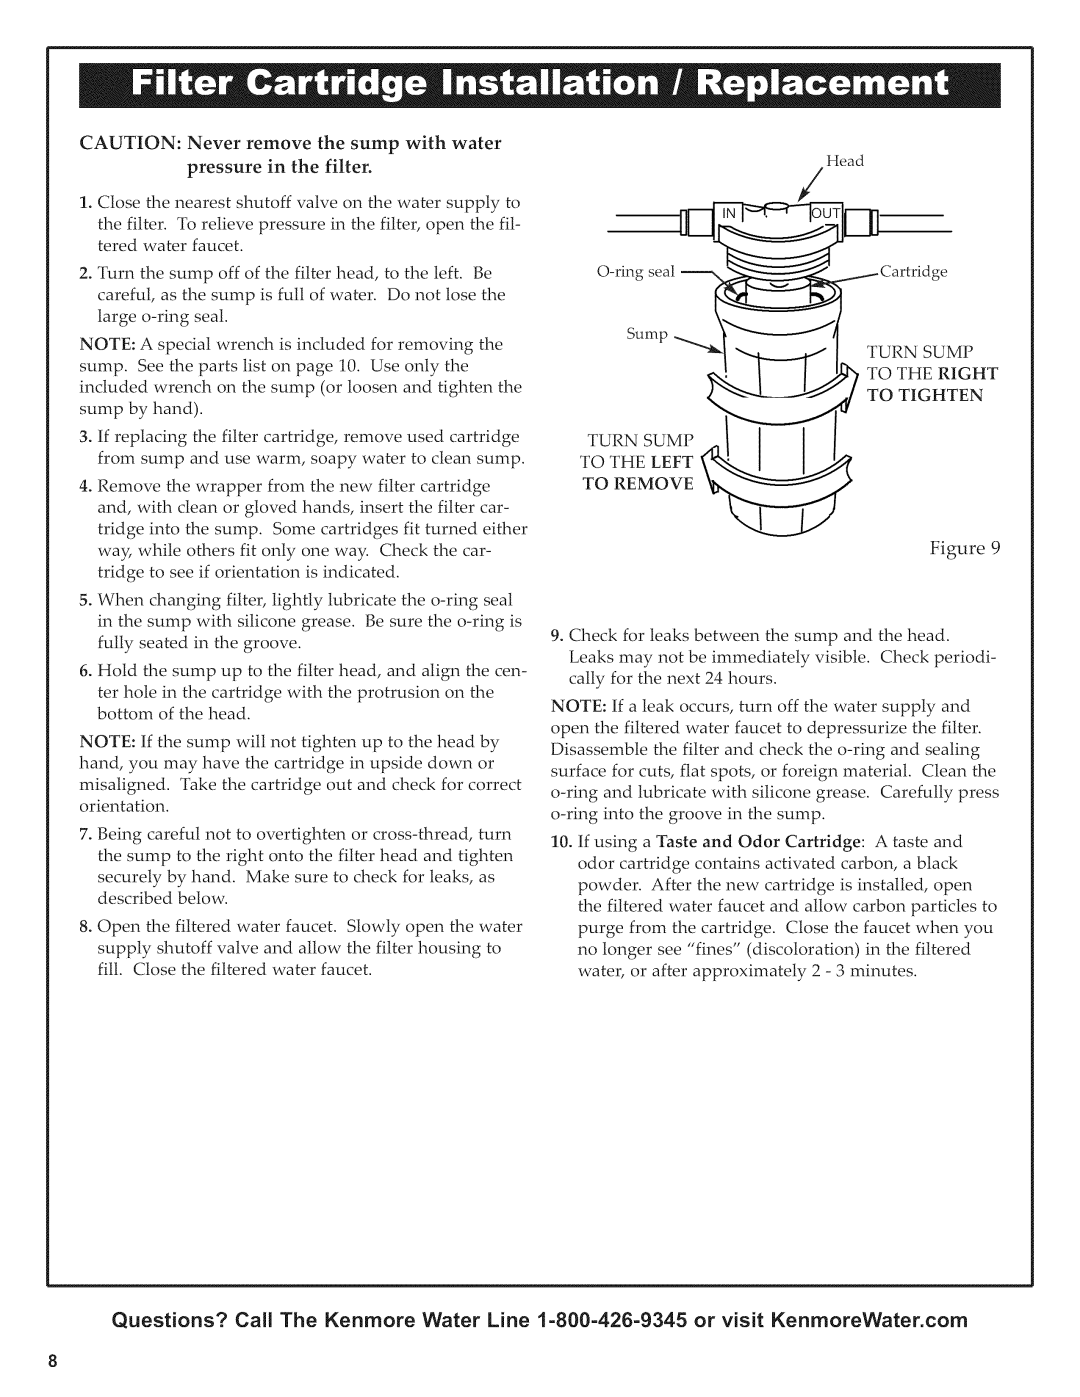
2.Turn the sump off of the filter head, to the left. Be careful, as the sump is full of water. Do not lose the large
NOTE: A special wrench is included for removing the sump. See the parts list on page 10. Use only the included wrench on the sump (or loosen and tighten the sump by hand).
3.if replacing the filter cartridge, remove used cartridge from sump and use warm, soapy water to clean sump.
4.Remove the wrapper from the new filter cartridge and, with clean or gloved hands, insert the filter car- tridge into the sump. Some cartridges fit turned either way, while others fit only one way: Check the car- tridge to see if orientation is indicated.
5.When changing filter, lightly lubricate the
6.Hold the sump up to the filter head, and align the cen- ter hole in the cartridge with the protrusion on the bottom of the head.
NOTE: if the sump will not tighten up to the head by hand, you may have the cartridge in upside down or
misaligned. Take the cartridge out and check for correct orientation.
7.Being careful not to overtighten or
securely by hand. Make sure to check for leaks, as described below.
8.Open the filtered water faucet. Slowly open the water supply shutoff valve and allow the filter housing to fill. Close the filtered water faucet.
Head
Cartridge |
SLllTIP __________--_1 TU[_N SUMP
_ | TO TIGHTEN |
TURNS UMP _1_ | I |
TO REMOVE _
Figure 9
9.Check for leaks between the sump and the head.
Leaks may not be immediately visible. Check periodi- cally for the next 24 hours.
NOTE: If a leak occurs, turn off the water supply and
open the filtered water faucet to depressurize the filter. Disassemble the filter and check the
10.if using a Taste and Odor Cartridge: A taste and odor cartridge contains activated carbon, a black powder. After the new cartridge is installed, open the filtered water faucet and allow carbon particles to purge from the cartridge. Close the faucet when you
no longer see "fines" (discoloration) in the filtered
water, or after approximately 2 - 3 minutes.
Questions? Call The Kenmore Water Line
