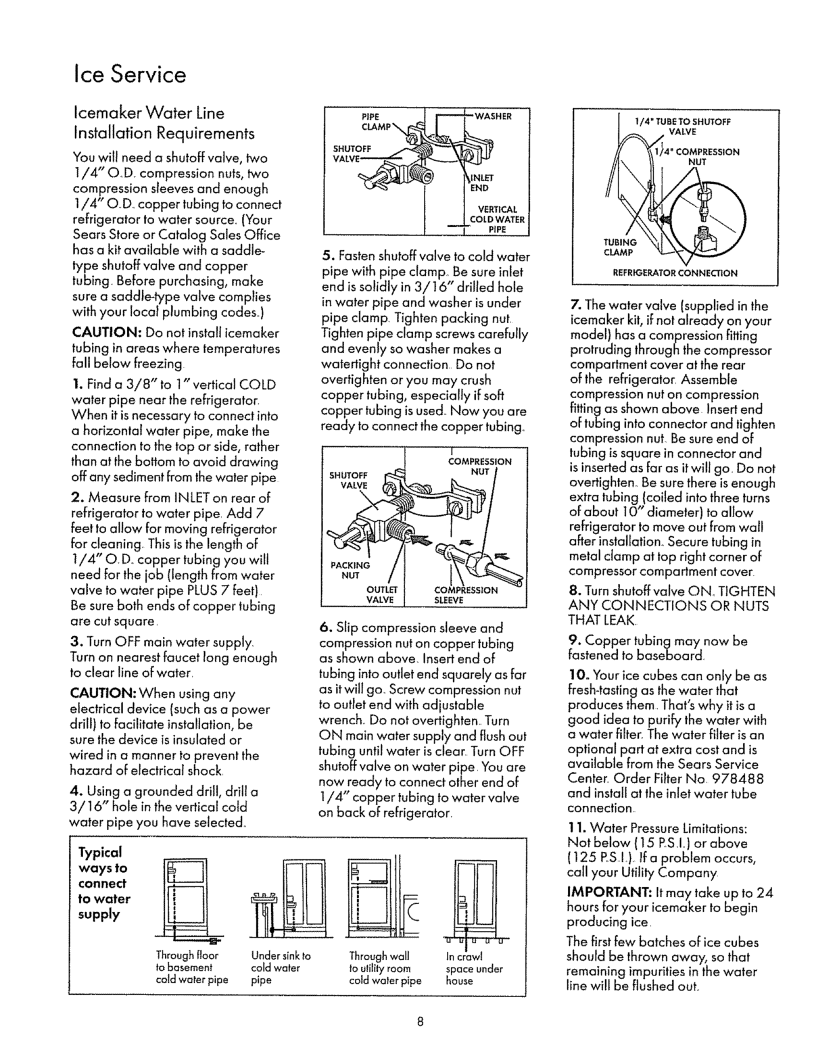
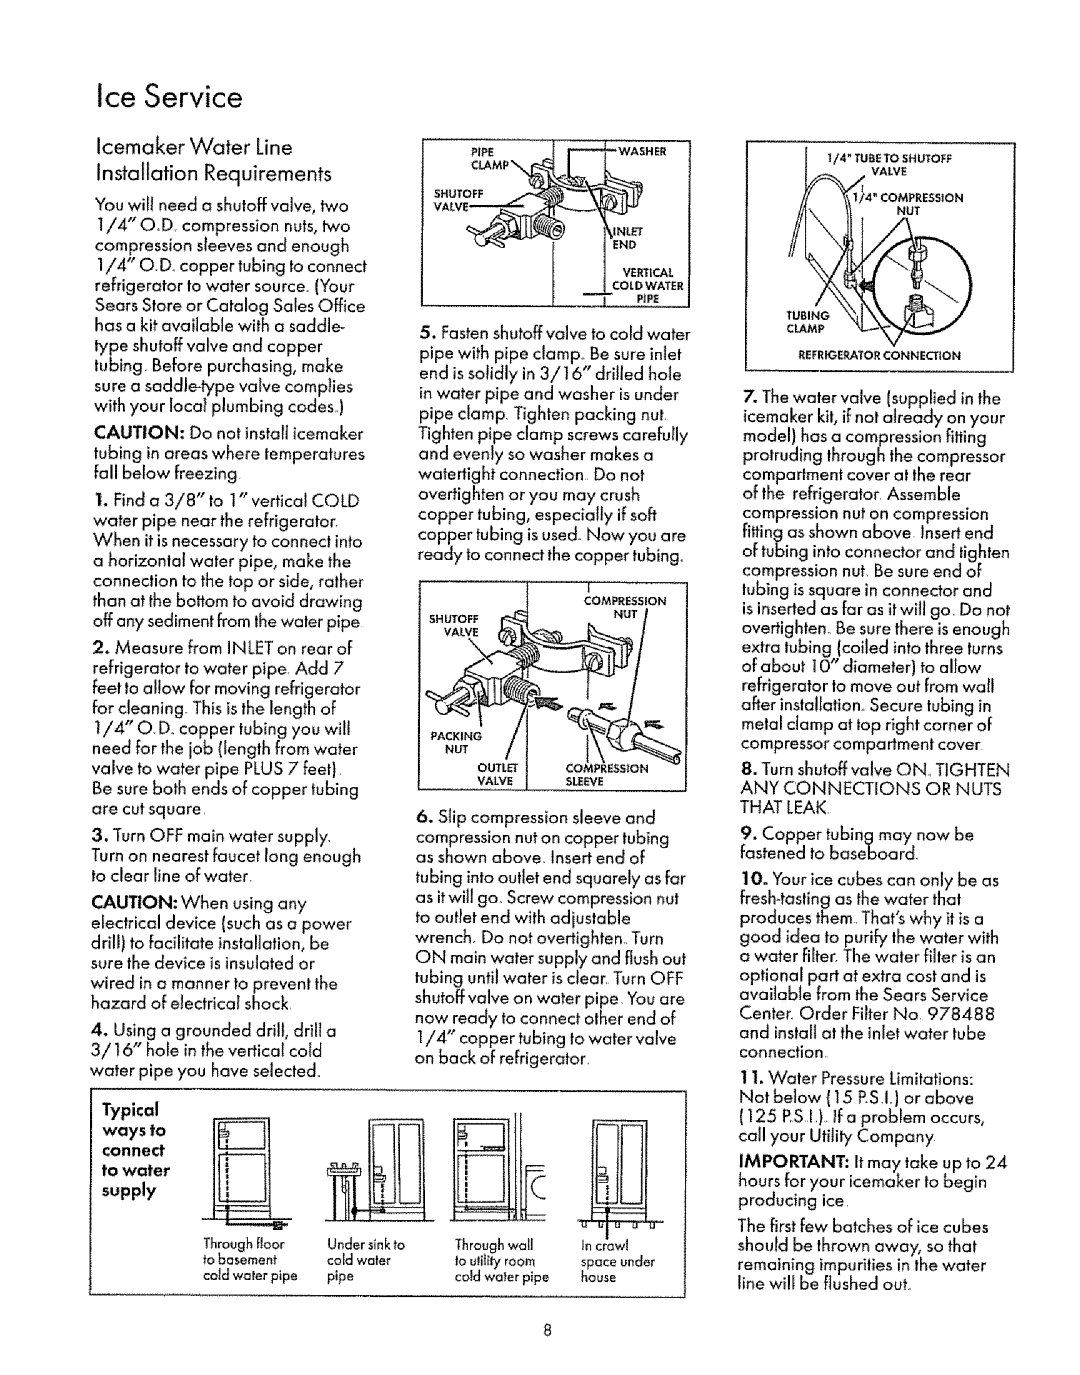
63471, 63171, 63172, 63148, 73471 specifications
The Kenmore brand has long been synonymous with quality and innovation in the home appliance market. Among the multitude of offerings from this reputable brand are five noteworthy models: the Kenmore 77171, 73871, 73478, 63141, and 77878. Each of these vacuums showcases the company’s commitment to delivering efficient cleaning solutions tailored to diverse needs.The Kenmore 77171 is a powerful and versatile upright vacuum designed for deep cleaning carpets and hard floors alike. Its 2-Motor system provides exceptional suction power, ensuring thorough dirt and pet hair removal. Featuring a HEPA filtration system, the 77171 captures 99.97% of dust and allergens, making it an excellent choice for allergy sufferers. Its adjustable height settings cater to different carpet lengths, allowing seamless transitions between surfaces.
The Kenmore 73871 model stands out with its lightweight and compact design, perfect for those who require portability without sacrificing performance. This canister vacuum features a powerful motor that provides strong suction, while its multi-surface capability ensures effective cleaning across different floor types. The 73871 also comes equipped with a Pet Handi-Mate attachment, specifically designed for pet owners to tackle hair and dander efficiently.
For those who prefer an upright vacuum with advanced filtration, the Kenmore 73478 is an appealing option. This model’s innovative design includes a premium allergen filtration system that traps fine particles and allergens. Additionally, its innovative brush roll technology helps remove stubborn dirt and debris, while its ergonomic handle and swivel steering enhance maneuverability.
The Kenmore 63141 model excels in versatility and user-friendly design. It features a detachable canister for ease of use when cleaning stairs, upholstery, or tight spaces. This vacuum also employs an advanced filtration system, ensuring it captures a high percentage of allergens. Its adjustable suction control allows users to tailor cleaning power based on the surface being cleaned.
Lastly, the Kenmore 77878 redefines convenience with its bagless design, eliminating the hassle of changing bags. This model combines powerful suction with a multi-cyclonic filtration system, providing continuous suction and excellent dirt separation. The lightweight design and easy maneuverability make it suitable for a variety of cleaning tasks around the home.
In conclusion, Kenmore's 77171, 73871, 73478, 63141, and 77878 models reflect the brand's dedication to quality, ergonomic design, and state-of-the-art technology. Each model is tailored to meet the needs of homeowners while ensuring maximum cleaning efficiency and convenience. Whether dealing with pet hair, allergens, or multi-surface cleaning, these Kenmore vacuums rise to the occasion, making them worthy additions to any household.