Unfolding
As Easy as 1—2—3!
1. Unfold and lock the frame |
|
|
|
|
|
|
|
|
|
|
| |||||
|
|
|
|
|
|
|
|
|
| |||||||
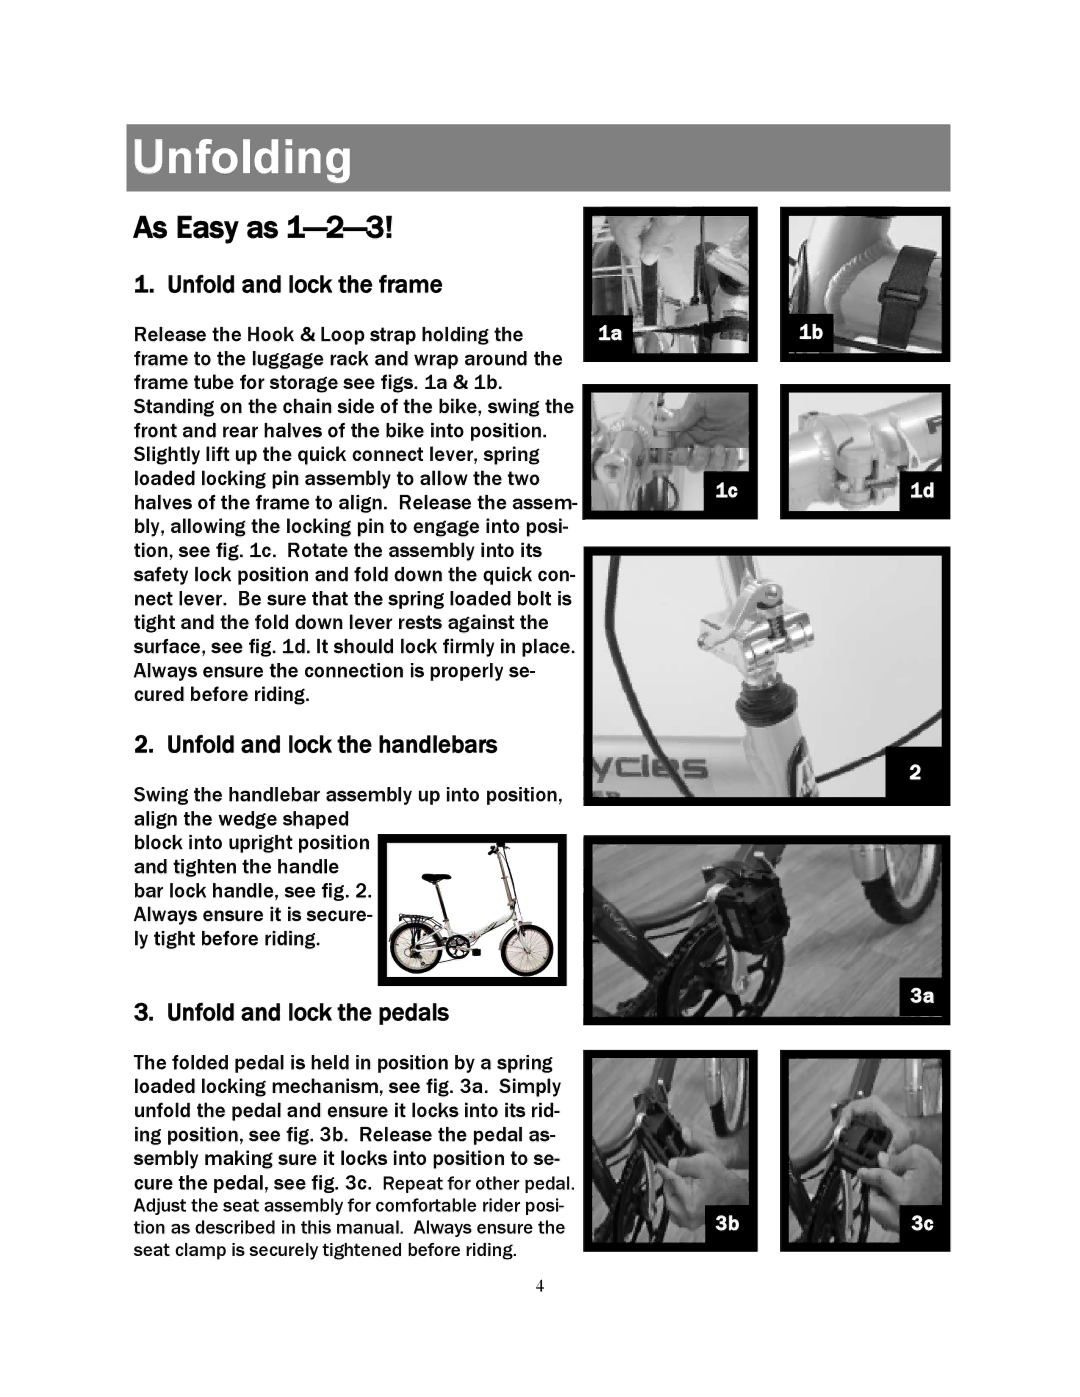
Release the Hook & Loop strap holding the | 1a |
|
|
|
|
| 1b |
|
|
| ||||||
frame to the luggage rack and wrap around the |
|
|
|
|
|
|
|
|
|
|
|
|
|
| ||
|
|
|
|
|
|
|
|
|
|
|
|
|
|
| ||
|
|
|
|
|
|
|
|
|
|
|
|
|
|
| ||
frame tube for storage see figs. 1a & 1b. |
|
|
|
|
|
|
|
|
|
|
|
|
|
|
| |
|
|
|
|
|
|
|
|
|
|
|
|
|
|
|
| |
|
|
|
|
|
|
|
|
|
|
|
|
|
|
|
| |
Standing on the chain side of the bike, swing the |
|
|
|
|
|
|
|
|
|
|
|
|
|
|
|
|
front and rear halves of the bike into position. |
|
|
|
|
|
|
|
|
|
|
|
|
|
| ||
Slightly lift up the quick connect lever, spring |
|
|
|
|
|
|
|
|
|
|
|
|
|
| ||
loaded locking pin assembly to allow the two |
|
|
|
|
|
|
|
|
|
|
|
|
|
| ||
|
|
|
|
|
|
| 1c |
|
|
|
|
| 1d |
|
| |
halves of the frame to align. Release the assem | - |
|
|
|
|
|
|
|
|
|
|
| ||||
|
|
|
|
|
|
|
|
|
|
|
|
| ||||
bly, allowing the locking pin to engage into posi- |
|
|
|
|
|
|
|
|
|
|
|
|
|
|
|
|
|
|
|
|
|
|
|
|
|
|
|
|
|
|
|
| |
|
|
|
|
|
|
|
|
|
|
|
|
|
| |||
tion, see fig. 1c. Rotate the assembly into its |
|
|
|
|
|
|
|
|
|
|
|
|
|
| ||
|
|
|
|
|
|
|
|
|
|
|
|
|
| |||
|
|
|
|
|
|
|
|
|
|
|
|
|
| |||
safety lock position and fold down the quick con- |
|
|
|
|
|
|
|
|
|
|
| |||||
nect lever. Be sure that the spring loaded bolt is |
|
|
|
|
|
|
|
|
|
|
| |||||
tight and the fold down lever rests against the |
|
|
|
|
|
|
|
|
|
|
| |||||
surface, see fig. 1d. It should lock firmly in place. |
|
|
|
|
|
|
|
|
|
|
| |||||
Always ensure the connection is properly se- |
|
|
|
|
|
|
|
|
|
|
| |||||
cured before riding. |
|
|
|
|
|
|
|
|
|
|
| |||||
2. Unfold and lock the handlebars |
|
Swing the handlebar assembly up into position, | 2 |
| |
align the wedge shaped |
|
block into upright position |
|
and tighten the handle |
|
bar lock handle, see fig. 2. |
|
Always ensure it is secure- |
|
ly tight before riding. |
|
3. Unfold and lock the pedals | 3a |
|
The folded pedal is held in position by a spring loaded locking mechanism, see fig. 3a. Simply unfold the pedal and ensure it locks into its rid- ing position, see fig. 3b. Release the pedal as- sembly making sure it locks into position to se- cure the pedal, see fig. 3c. Repeat for other pedal. Adjust the seat assembly for comfortable rider posi- tion as described in this manual. Always ensure the seat clamp is securely tightened before riding.
3b
3c
4
