Kicker RS65.2 Installation, Optional, Door Panel, Push Grill into place and snap onto Speaker

Models: RS65.2

1 12
Download 12 pages 22.72 Kb
Page 6
Image 6
(Optional)

Installation

Installation

If custom door mounting locations for the RS-Series System Components are desired, be careful to avoid interference from the window and door lock mechanisms. The first step is to find a location on the door panel that will accept the dimensions of the speaker. Then remove the door panel from the door, and check for operational clearance of the window. Cycle the window all the way down and up. If metal must be cut to mount the speakers, avoid structural metal and braces. An optional reinforcing panel (thin piece of wood or Medium Density Fiberboard) may be necessary if the door panel cannot support the weight of the speaker. Mount the speaker to the door panel and door body as outlined in Figure 1.

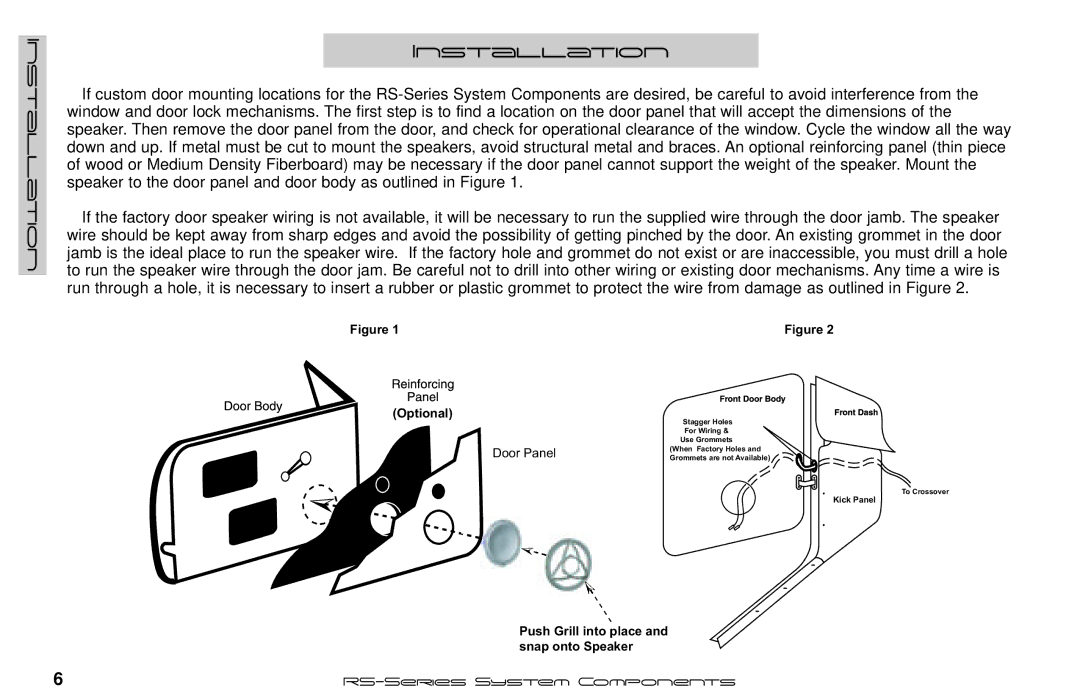
If the factory door speaker wiring is not available, it will be necessary to run the supplied wire through the door jamb. The speaker wire should be kept away from sharp edges and avoid the possibility of getting pinched by the door. An existing grommet in the door jamb is the ideal place to run the speaker wire. If the factory hole and grommet do not exist or are inaccessible, you must drill a hole to run the speaker wire through the door jam. Be careful not to drill into other wiring or existing door mechanisms. Any time a wire is run through a hole, it is necessary to insert a rubber or plastic grommet to protect the wire from damage as outlined in Figure 2.

Figure 1


Figure 2

(Optional)


Stagger Holes


For Wiring &


Use Grommets


Door Panel

(When Factory Holes and


Grommets are not Available)


To Crossover

Kick Panel

Push Grill into place and snap onto Speaker

6

RS-Series System Components

Page 6
Image 6
Kicker RS65.2 Installation, Optional, Door Panel, Push Grill into place and snap onto Speaker, When Factory Holes and