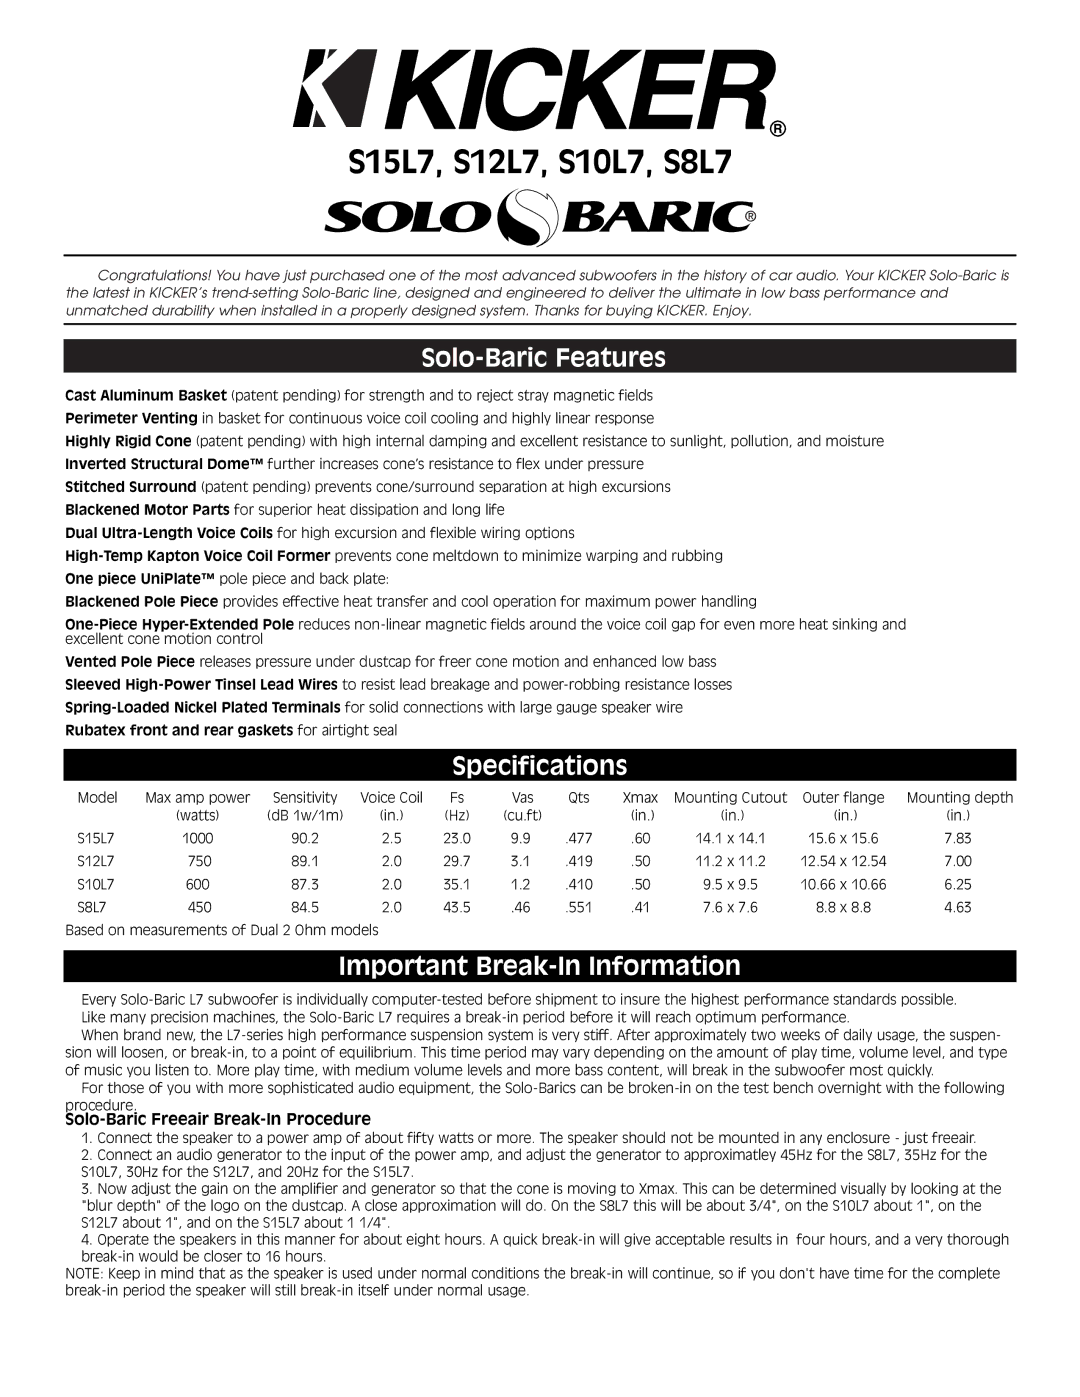
S12L7, S8L7, S10L7, S15L7 specifications
Kicker, a renowned name in the world of car audio, has consistently pushed the boundaries of performance and innovation with its S series subwoofers. Among the standout models are the S10L7, S8L7, and S12L7, each designed to deliver powerful bass and robust sound quality to enhance your listening experience.The Kicker S10L7 is a 10-inch subwoofer that sets the standard for deep, rich bass in a compact size. It features a square design that maximizes cone area, allowing for increased air movement and greater sound output. One of its key technologies is the AIY (Auto Impedance Selector) system, which allows users to select the best power output for their setup, ensuring optimal performance no matter the amplifier configuration. With its reinforced cone and heavy-duty rubber surround, the S10L7 is built to withstand the demands of high-power handling while producing exceptional sound clarity.
Similarly, the Kicker S8L7 is an 8-inch model that delivers impressive sound performance in a smaller package. Its square shape is also a hallmark of this subwoofer, offering up to 20% more cone area than conventional round subwoofers. The S8L7 is designed with a high-temperature voice coil for improved thermal management, allowing it to handle higher power levels without distortion. The sturdy construction, combined with the subwoofer’s added stiffness, allows for accurate bass reproduction that is both powerful and precise.
The Kicker S12L7, on the other hand, is a 12-inch subwoofer that brings an unmistakable presence to any sound system. Known for its ability to produce thunderous bass, the S12L7 incorporates a vented pole piece, which helps manage airflow and enhances cooling efficiency. This subwoofer is also equipped with Kicker’s patented SoloKon technology, designed to create a consistent, downward-firing surface that results in a more uniform sound field and reduced distortion at high volumes. Additionally, the S12L7 features a dual voice coil configuration, giving users the flexibility to optimize impedance for their amplifier setup.
Overall, the Kicker S10L7, S8L7, and S12L7 subwoofers all boast a blend of innovative technologies and high-quality construction, making them excellent choices for audiophiles and car audio enthusiasts alike. Their unique square design, robust materials, and advanced thermal management systems ensure that they not only deliver powerful bass but also maintain excellent audio fidelity across a range of musical genres. Whether for personal use or professional installations, these subwoofers represent Kicker's commitment to quality and performance in the audio industry.