
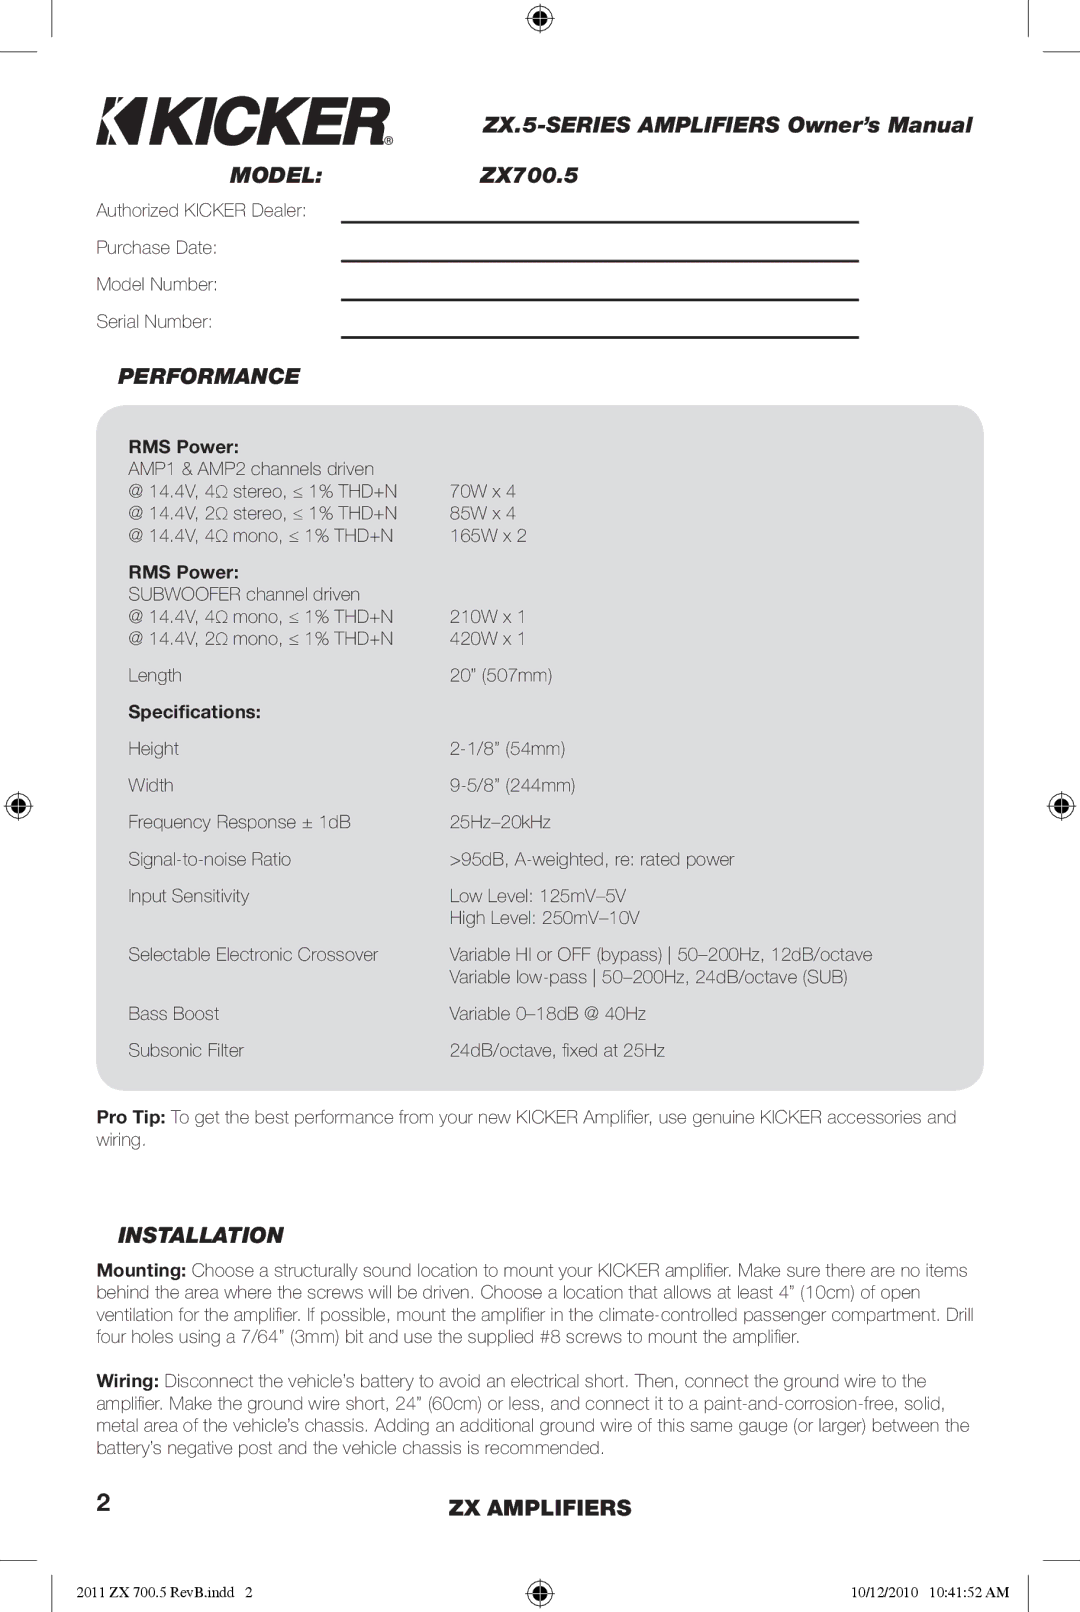
ZX700.5 specifications
The Kicker ZX700.5 and ZX550.3 are exceptional car amplifiers designed for audio enthusiasts seeking powerful sound performance and reliability. Both models are engineered to enhance your in-car audio experience with high-quality components and innovative technologies that ensure crystal-clear sound reproduction and robust power delivery.The Kicker ZX700.5 is a versatile 5-channel amplifier that delivers a maximum power output of 700 watts. This amplifier is perfect for those looking to power multiple speakers and a subwoofer in their vehicle. The unique construction of the ZX700.5 ensures that it can efficiently drive the speakers while providing deep, thunderous bass. It features variable low-pass and high-pass crossovers for tailored frequency response, along with a remote bass boost control that allows you to adjust the bass levels from your driver's seat. The Kicker ZX700.5 is also equipped with short circuit protection, thermal overload protection, and a rugged heatsink design to ensure the amplifier remains cool during extended use.
On the other hand, the Kicker ZX550.3 is a 3-channel amplifier that produces an impressive 550 watts of power. This amplifier is ideal for those who want to drive three channels typically configured for front and rear speakers along with a subwoofer. The ZX550.3 includes an integrated crossover with adjustable low-pass and high-pass filters, which allows for precise control of the audio output. Its compact design makes it easy to fit in tight spaces, while also ensuring high-performance audio delivery. The ZX550.3 also comes with the same protective features that Kicker is known for, ensuring long-lasting reliability.
Both the ZX700.5 and ZX550.3 utilize Kicker's proprietary technology, which includes circuitry designed to minimize distortion and improve sound quality. They are compatible with a wide range of speaker configurations and can be easily integrated into existing audio systems. The amplifiers feature a sleek, durable chassis that not only looks great but also provides excellent cooling for optimal performance.
In conclusion, the Kicker ZX700.5 and ZX550.3 are standout amplifiers that offer high-quality audio performance, advanced technology, and reliable construction. Whether you’re looking to enhance your factory audio system or build a custom setup, these amplifiers deliver the power and clarity needed for an immersive listening experience on the road.