Assembling Your Grain Mill
TO ATTACH:
Before attaching the grain mill, turn off and unplug the stand mixer.
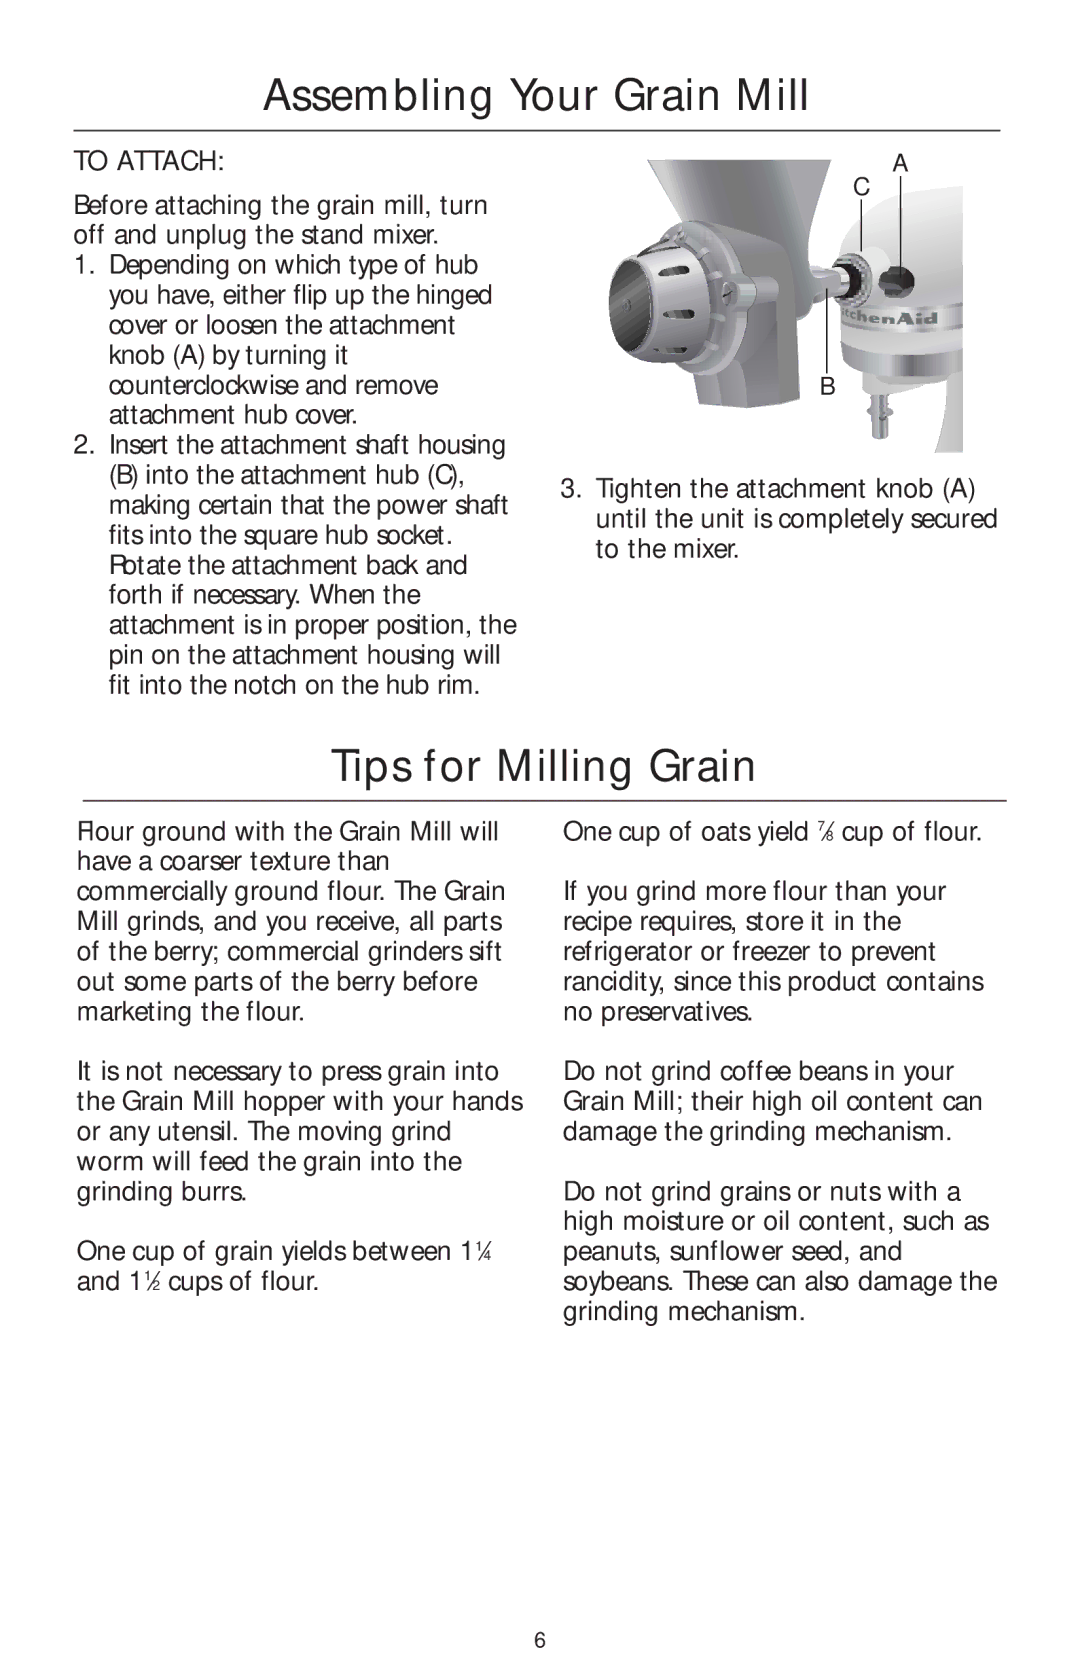
1.Depending on which type of hub you have, either flip up the hinged cover or loosen the attachment knob (A) by turning it counterclockwise and remove attachment hub cover.
2.Insert the attachment shaft housing
(B) into the attachment hub (C), making certain that the power shaft fits into the square hub socket. Rotate the attachment back and forth if necessary. When the attachment is in proper position, the pin on the attachment housing will fit into the notch on the hub rim.
A
C
B
3.Tighten the attachment knob (A) until the unit is completely secured to the mixer.
Tips for Milling Grain
Flour ground with the Grain Mill will have a coarser texture than commercially ground flour. The Grain Mill grinds, and you receive, all parts of the berry; commercial grinders sift out some parts of the berry before marketing the flour.
It is not necessary to press grain into the Grain Mill hopper with your hands or any utensil. The moving grind worm will feed the grain into the grinding burrs.
One cup of grain yields between 11⁄4 and 11⁄2 cups of flour.
One cup of oats yield 7⁄8 cup of flour.
If you grind more flour than your recipe requires, store it in the refrigerator or freezer to prevent rancidity, since this product contains no preservatives.
Do not grind coffee beans in your Grain Mill; their high oil content can damage the grinding mechanism.
Do not grind grains or nuts with a high moisture or oil content, such as peanuts, sunflower seed, and soybeans. These can also damage the grinding mechanism.
6
