Cutout Dimensions -
Warming Drawer Size | Dimension J |
|
|
|
|
24" (61.0 cm) | 22½" (57.2 cm) |
|
|
| |
|
| |
| Cutout Dimensions - | |
|
|
|
| Dimension M | Dimension L* |
|
|
|
| 12¼" (31.1 cm) | 1½" (3.8 cm) |
|
|
|
*Dimension L is the minimum mounting surface area around the opening for mounting the optional door or drawers.
INSTALLATION INSTRUCTIONS
![]() WARNING
WARNING
Excessive Weight Hazard
Use two or more people to move and install access doors.
Failure to do so can result in back or other injury.
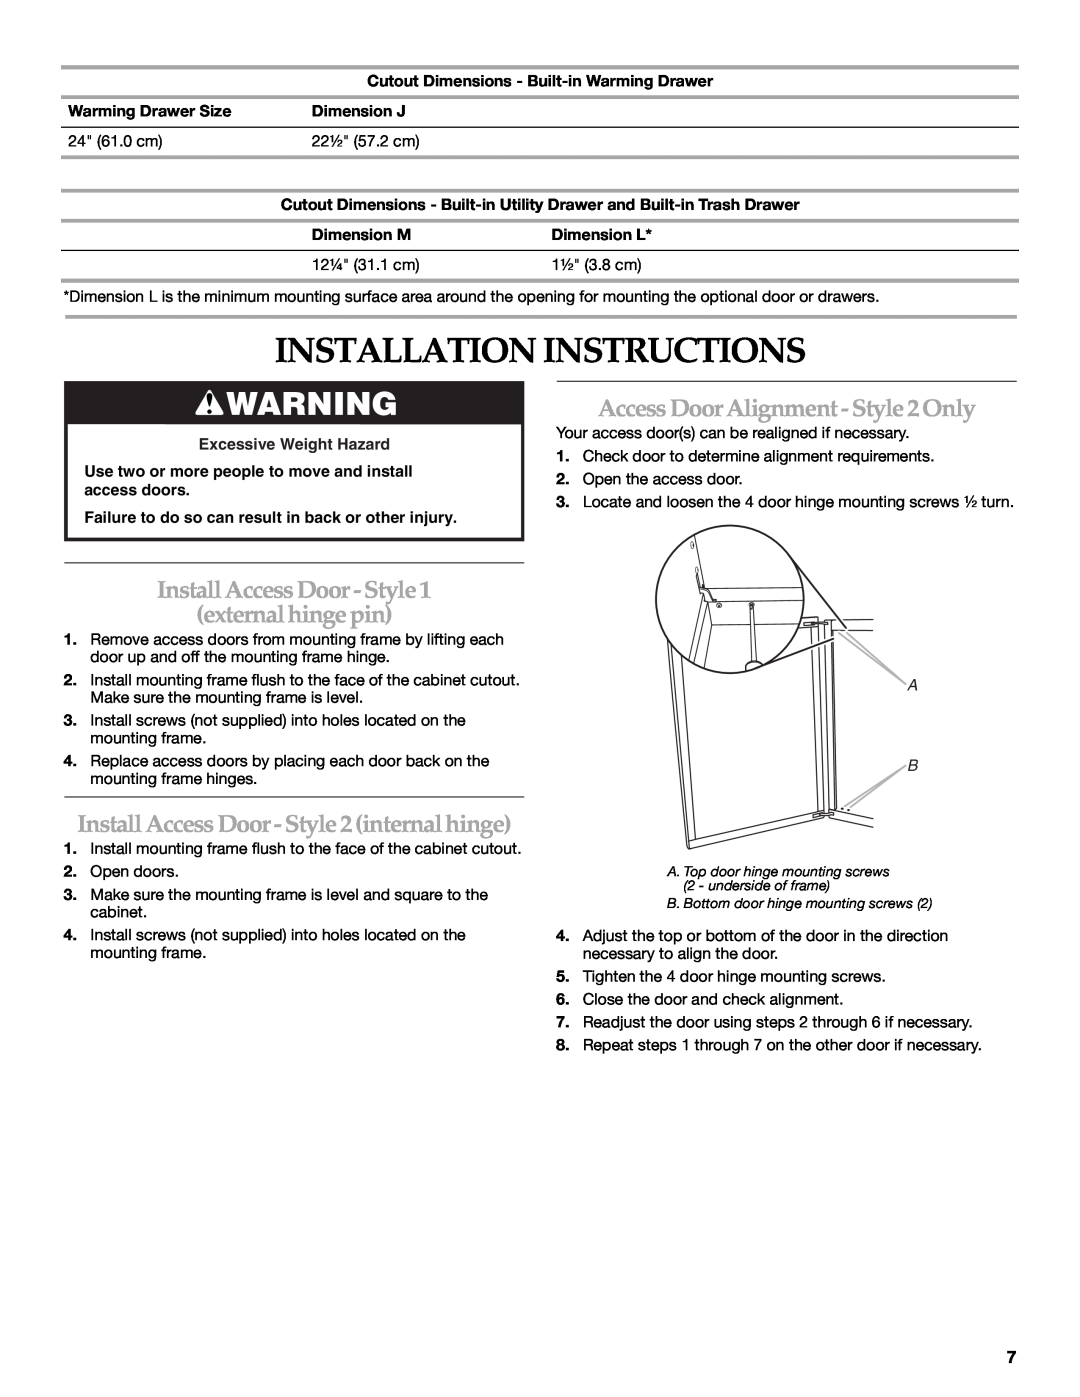
Access DoorAlignment - Style 2Only
Your access door(s) can be realigned if necessary.
1.Check door to determine alignment requirements.
2.Open the access door.
3.Locate and loosen the 4 door hinge mounting screws ½ turn.
InstallAccessDoor -Style 1
(externalhingepin)
1.Remove access doors from mounting frame by lifting each door up and off the mounting frame hinge.
2.Install mounting frame flush to the face of the cabinet cutout. Make sure the mounting frame is level.
3.Install screws (not supplied) into holes located on the mounting frame.
4.Replace access doors by placing each door back on the mounting frame hinges.
Install Access Door- Style2(internalhinge)
1.Install mounting frame flush to the face of the cabinet cutout.
2.Open doors.
3.Make sure the mounting frame is level and square to the cabinet.
4.Install screws (not supplied) into holes located on the mounting frame.
A
B
A. Top door hinge mounting screws (2 - underside of frame)
B. Bottom door hinge mounting screws (2)
4.Adjust the top or bottom of the door in the direction necessary to align the door.
5.Tighten the 4 door hinge mounting screws.
6.Close the door and check alignment.
7.Readjust the door using steps 2 through 6 if necessary.
8.Repeat steps 1 through 7 on the other door if necessary.
7