•Level Control – Play a variety of music recordings containing strong but not overpowering bass. Adjust the RSA-500 level con- trol until the music sounds consistently warm and natural. If you have trouble getting enough low bass without the sound becom- ing boomy, it probably means the Crossover control is set too high. Try turning it down a bit at a time until the problem goes away. If the sound is thin until you turn the subwoofer Level up so much that lower bass is too prominent, start by changing the set- ting of the Phase control. If that does not entirely solve the prob- lem, you probably need to raise the Crossover frequency.
•Phase Control – In some installations the setting of the Phase control may not make much difference, whereas in others it may be necessary to go back and forth between the Phase
and Level controls for a while in order to get the very best blend with the main speakers. Since each control setting (including the one for crossover frequency in the receiver or processor) affects the optimum settings for the others, it often takes a while to get everything dialed in just right. Start with the Phase control at 0° and play a recording with a prominent, repeating bass line in your listening position. Repeat this process with the control in the 180° position. Use the setting that yields the greatest
bass output.
General Comments About Adjustments: Since any change in the setting of one control tends to change the optimum settings for the others to some degree, the adjustment process is very interactive and involves a great deal of trial and error. If after a period of listening and calibration you are still not happy, it may mean that you need to experiment a little with the location of the subwoofer. That, of course, also interacts with everything else. Again, patience is a virtue. The end result will be well worth the effort.
ANALOG SURROUND RECEIVER / PROCESSOR OR TWO-CHANNEL STEREO SYSTEM CONNECTION
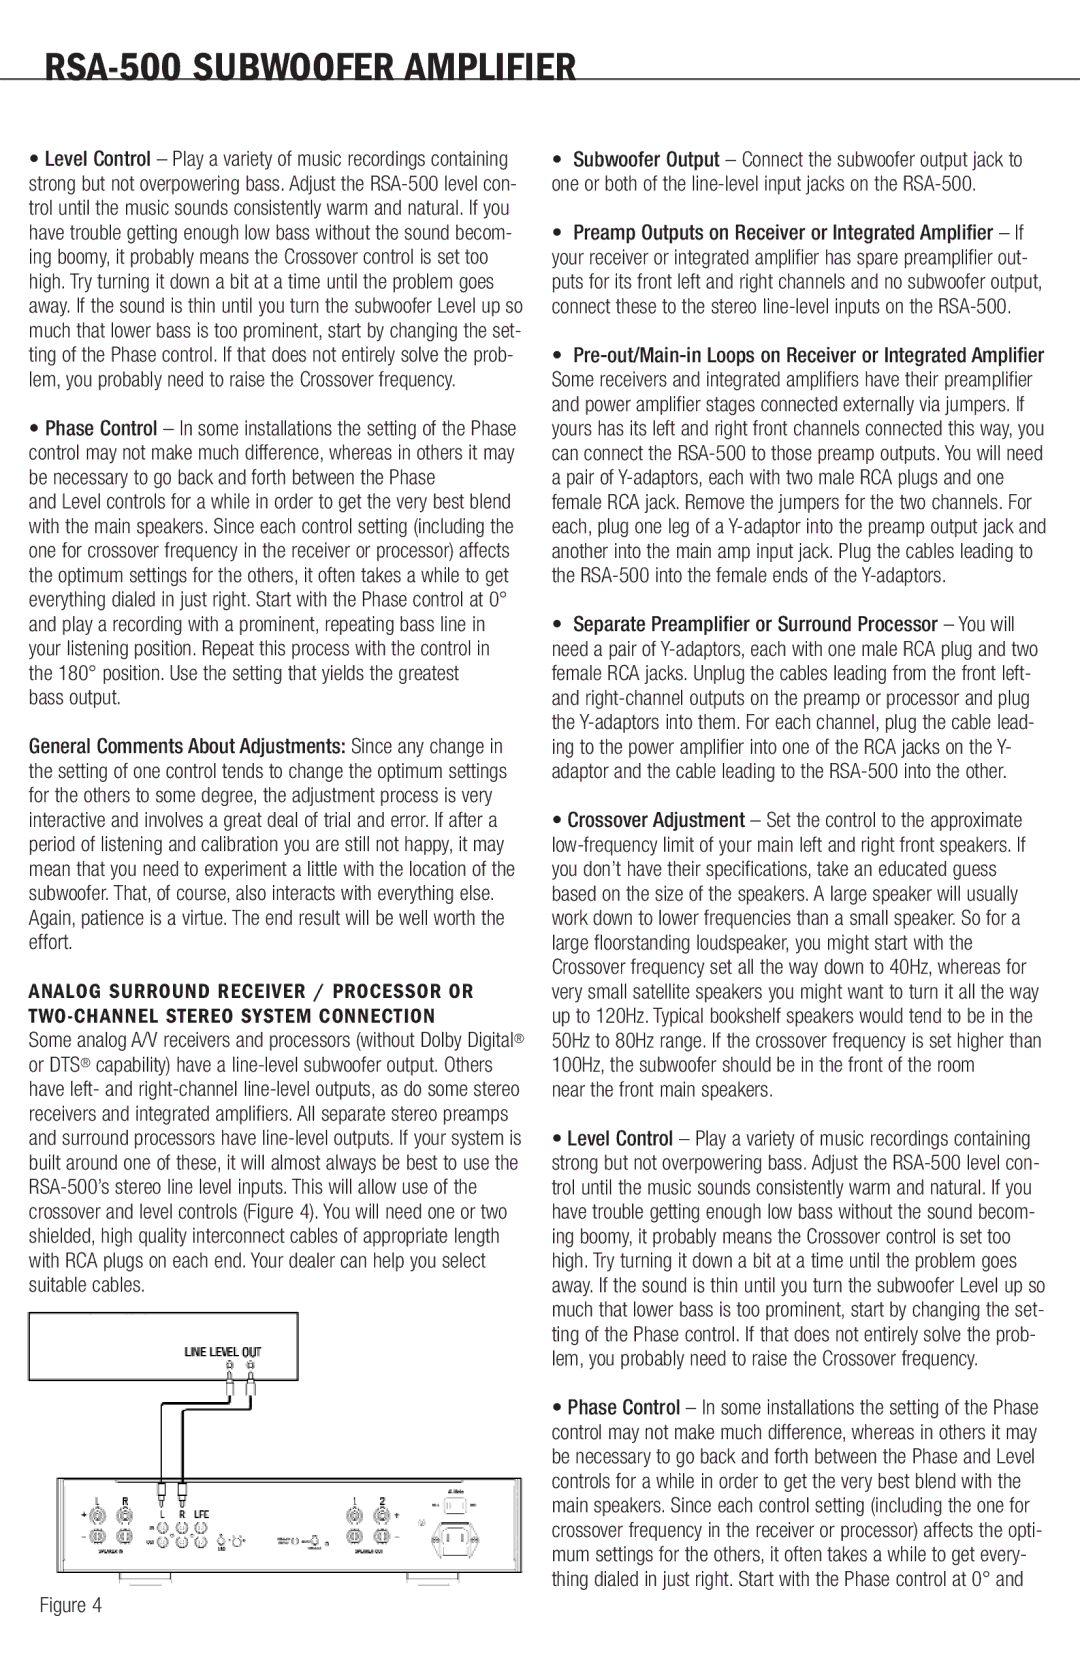
Some analog A/V receivers and processors (without Dolby Digital® or DTS® capability) have a line-level subwoofer output. Others have left- and right-channel line-level outputs, as do some stereo receivers and integrated amplifiers. All separate stereo preamps and surround processors have line-level outputs. If your system is built around one of these, it will almost always be best to use the RSA-500’s stereo line level inputs. This will allow use of the crossover and level controls (Figure 4). You will need one or two shielded, high quality interconnect cables of appropriate length with RCA plugs on each end. Your dealer can help you select suitable cables.
Figure 4
•Subwoofer Output – Connect the subwoofer output jack to one or both of the line-level input jacks on the RSA-500.
•Preamp Outputs on Receiver or Integrated Amplifier – If your receiver or integrated amplifier has spare preamplifier out- puts for its front left and right channels and no subwoofer output, connect these to the stereo line-level inputs on the RSA-500.
•Pre-out/Main-in Loops on Receiver or Integrated Amplifier Some receivers and integrated amplifiers have their preamplifier and power amplifier stages connected externally via jumpers. If yours has its left and right front channels connected this way, you can connect the RSA-500 to those preamp outputs. You will need a pair of Y-adaptors, each with two male RCA plugs and one female RCA jack. Remove the jumpers for the two channels. For each, plug one leg of a Y-adaptor into the preamp output jack and another into the main amp input jack. Plug the cables leading to the RSA-500 into the female ends of the Y-adaptors.
•Separate Preamplifier or Surround Processor – You will need a pair of Y-adaptors, each with one male RCA plug and two female RCA jacks. Unplug the cables leading from the front left- and right-channel outputs on the preamp or processor and plug the Y-adaptors into them. For each channel, plug the cable lead- ing to the power amplifier into one of the RCA jacks on the Y- adaptor and the cable leading to the RSA-500 into the other.
•Crossover Adjustment – Set the control to the approximate low-frequency limit of your main left and right front speakers. If you don’t have their specifications, take an educated guess based on the size of the speakers. A large speaker will usually work down to lower frequencies than a small speaker. So for a large floorstanding loudspeaker, you might start with the Crossover frequency set all the way down to 40Hz, whereas for very small satellite speakers you might want to turn it all the way up to 120Hz. Typical bookshelf speakers would tend to be in the 50Hz to 80Hz range. If the crossover frequency is set higher than 100Hz, the subwoofer should be in the front of the room
near the front main speakers.
•Level Control – Play a variety of music recordings containing strong but not overpowering bass. Adjust the RSA-500 level con- trol until the music sounds consistently warm and natural. If you have trouble getting enough low bass without the sound becom- ing boomy, it probably means the Crossover control is set too high. Try turning it down a bit at a time until the problem goes away. If the sound is thin until you turn the subwoofer Level up so much that lower bass is too prominent, start by changing the set- ting of the Phase control. If that does not entirely solve the prob- lem, you probably need to raise the Crossover frequency.
•Phase Control – In some installations the setting of the Phase control may not make much difference, whereas in others it may be necessary to go back and forth between the Phase and Level controls for a while in order to get the very best blend with the main speakers. Since each control setting (including the one for crossover frequency in the receiver or processor) affects the opti- mum settings for the others, it often takes a while to get every- thing dialed in just right. Start with the Phase control at 0° and