CONNECTING TO A PRINTER
Confirm the
SELECTING PRINT IMAGES
Individual still images can be selected for printing on the PictBridge screen. For other printing options, see the menu navigation section.
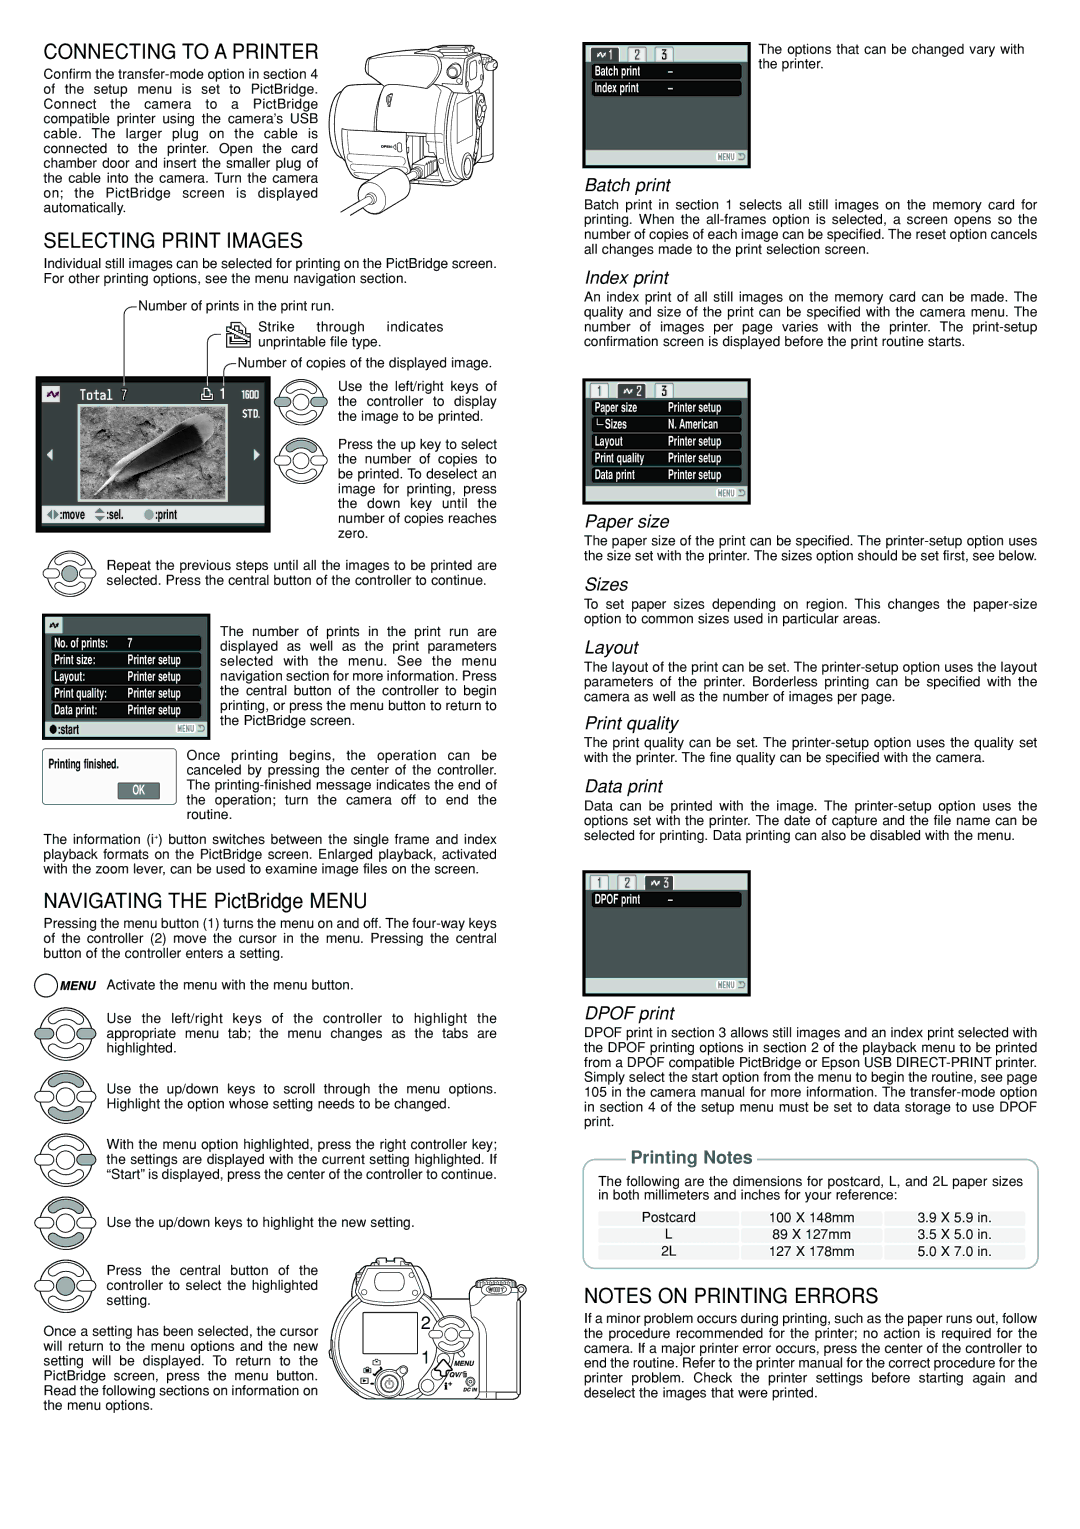
Number of prints in the print run.
| Strike | through | indicates |
| unprintable file type. |
| |
| Number of copies of the displayed image. | ||
|
| Use the left/right keys of | |
|
| the controller to display | |
|
| the image to be printed. | |
|
| Press the up key to select | |
|
| the number of copies to | |
|
| be printed. To deselect an | |
|
| image | for printing, press |
:move :sel. | the down key until the | ||
number of copies reaches | |||
|
| zero. |
|
Repeat the previous steps until all the images to be printed are selected. Press the central button of the controller to continue.
|
| 7 |
| The number of prints in the print run are | |
No. of prints: |
| ||||
| displayed as well as the print parameters | ||||
Print size: | Printer setup |
| selected with the menu. See the menu | ||
Layout: | Printer setup |
| navigation section for more information. Press | ||
Print quality: | Printer setup |
| the central button of the controller to begin | ||
Data print: | Printer setup |
| printing, or press the menu button to return to | ||
| the PictBridge screen. | ||||
:start |
|
| |||
|
|
| |||
Printing finished. | Once | printing begins, the operation can be | |||
canceled by pressing the center of the controller. | |||||
|
| ||||
OK | The | |
the operation; turn the camera off to end the | ||
| ||
| routine. |
The information (i+) button switches between the single frame and index playback formats on the PictBridge screen. Enlarged playback, activated with the zoom lever, can be used to examine image files on the screen.
NAVIGATING THE PictBridge MENU
Pressing the menu button (1) turns the menu on and off. The
Activate the menu with the menu button.
Use the left/right keys of the controller to highlight the appropriate menu tab; the menu changes as the tabs are highlighted.
Use the up/down keys to scroll through the menu options. Highlight the option whose setting needs to be changed.
With the menu option highlighted, press the right controller key; the settings are displayed with the current setting highlighted. If “Start” is displayed, press the center of the controller to continue.
Use the up/down keys to highlight the new setting.
Press the central button of the controller to select the highlighted setting.
Once a setting has been selected, the cursor | 2 |
| |
will return to the menu options and the new | 1 |
setting will be displayed. To return to the |
PictBridge screen, press the menu button. Read the following sections on information on the menu options.
|
| The options that can be changed vary with | |
|
| the printer. | |
Batch print | – | ||
| |||
Index print | – |
| |
|
|
| |
|
|
|
Batch print
Batch print in section 1 selects all still images on the memory card for printing. When the
Index print
An index print of all still images on the memory card can be made. The quality and size of the print can be specified with the camera menu. The number of images per page varies with the printer. The
|
|
Paper size | Printer setup |
Sizes | N. American |
Layout | Printer setup |
Print quality | Printer setup |
Data print | Printer setup |
|
|
Paper size
The paper size of the print can be specified. The
Sizes
To set paper sizes depending on region. This changes the
Layout
The layout of the print can be set. The
Print quality
The print quality can be set. The
Data print
Data can be printed with the image. The
|
|
DPOF print | – |
|
|
|
|
DPOF print
DPOF print in section 3 allows still images and an index print selected with the DPOF printing options in section 2 of the playback menu to be printed from a DPOF compatible PictBridge or Epson USB
Printing Notes
The following are the dimensions for postcard, L, and 2L paper sizes in both millimeters and inches for your reference:
Postcard | 100 X 148mm | 3.9 X 5.9 in. |
L | 89 X 127mm | 3.5 X 5.0 in. |
2L | 127 X 178mm | 5.0 X 7.0 in. |
NOTES ON PRINTING ERRORS
If a minor problem occurs during printing, such as the paper runs out, follow the procedure recommended for the printer; no action is required for the camera. If a major printer error occurs, press the center of the controller to end the routine. Refer to the printer manual for the correct procedure for the printer problem. Check the printer settings before starting again and deselect the images that were printed.