
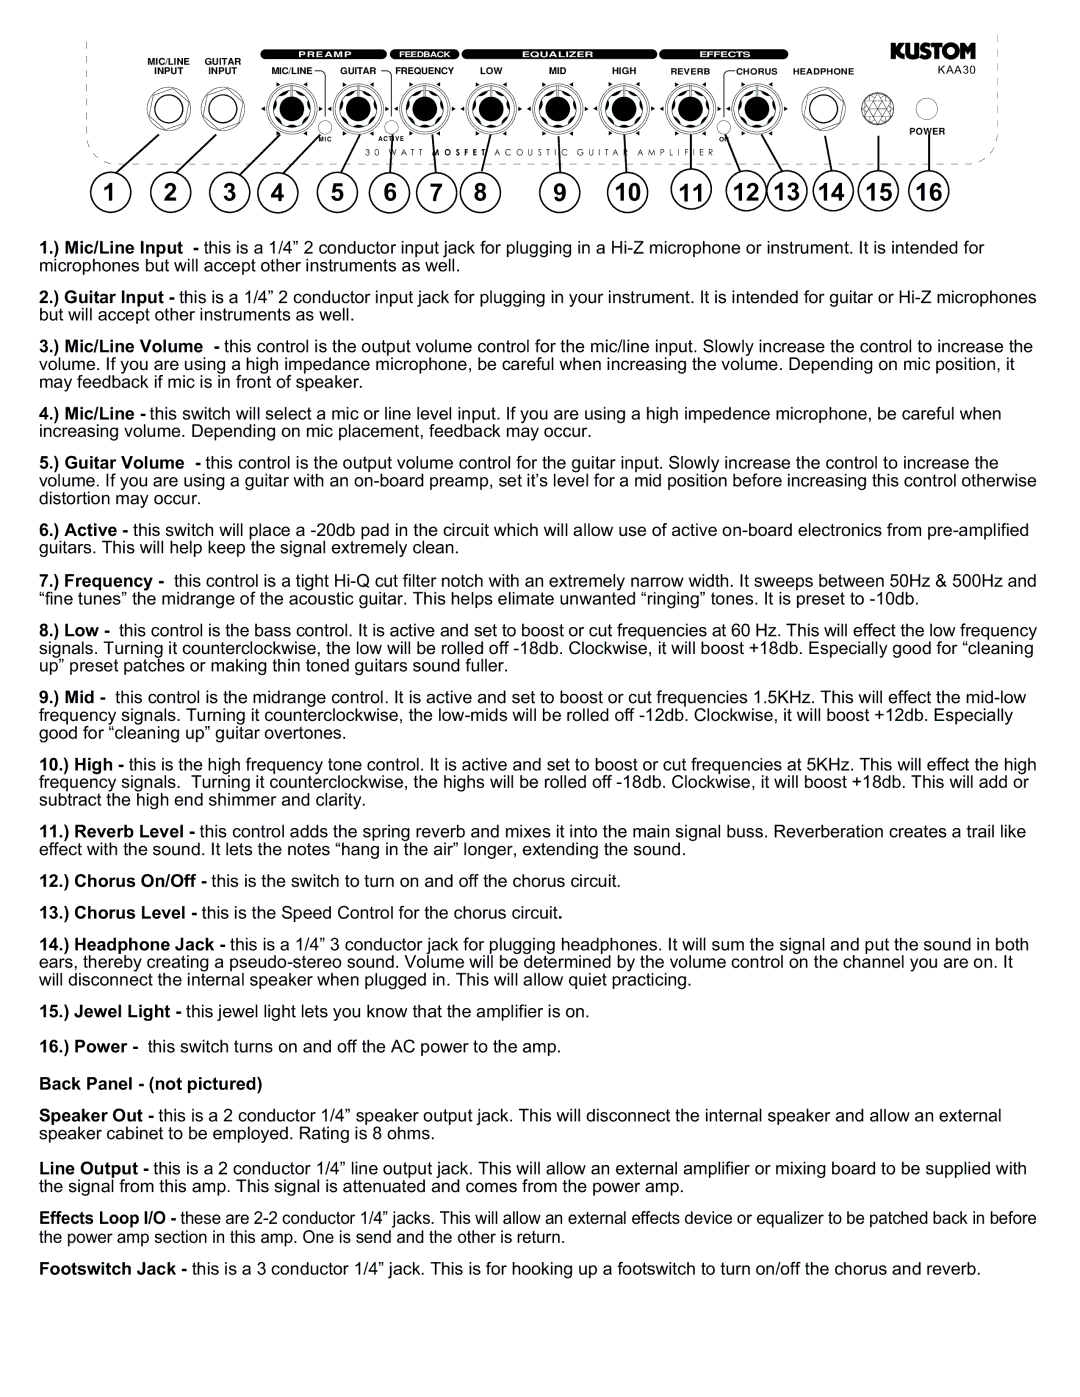
KAA30 specifications
The Kustom KAA30 is a powerful amplifier designed for musicians seeking a reliable and versatile performance tool. This compact and lightweight amplifier packs a punch, making it an ideal choice for practice sessions, small gigs, and recording applications. With its innovative features and robust design, the KAA30 stands out in the crowded amplifier market.One of the main features of the KAA30 is its 30-watt output power, which ensures ample volume for various performance settings without compromising sound quality. It's equipped with a 10-inch speaker that delivers a balanced tone, providing clarity across all frequencies. The amplifier's frequency response ranges from deep lows to bright highs, allowing musicians to capture the full spectrum of their sound.
Technology-wise, the KAA30 incorporates an advanced preamp circuit that enhances tonal richness and responsiveness. The onboard EQ section includes three bands: bass, mid, and treble, allowing players to sculpt their tone to suit their style. This flexibility ensures that whether you're playing clean chords, gritty blues riffs, or soaring solos, the KAA30 can accommodate your needs.
Additionally, the KAA30 boasts a built-in reverb effect, providing depth and dimension to your sound without the need for external pedals. This feature enables musicians to create atmospheric performances, enriching their tonal palette in real-time. The reverb can be adjusted easily to suit different musical contexts, from subtle ambiance to pronounced spaciousness.
Portability is another highlight of the Kustom KAA30. The lightweight design and built-in carrying handle make it easy to transport to rehearsals and gigs. Despite its compact size, this amplifier does not skimp on build quality. It features a rugged cabinet that withstands the rigors of regular use while delivering a professional appearance.
The KAA30 also includes practical connectivity options, such as an auxiliary input for jamming along with backing tracks and a headphone output for silent practice. These features cater to modern musicians who value versatility and convenience in their equipment.
In summary, the Kustom KAA30 amplifies player expression with its powerful features, advanced technology, and rugged design. It is an excellent choice for guitarists and bassists alike, offering a blend of performance, tone-shaping capability, and portability that is hard to beat. Whether on stage or in the studio, the KAA30 is ready to deliver exceptional sound quality and functionality.