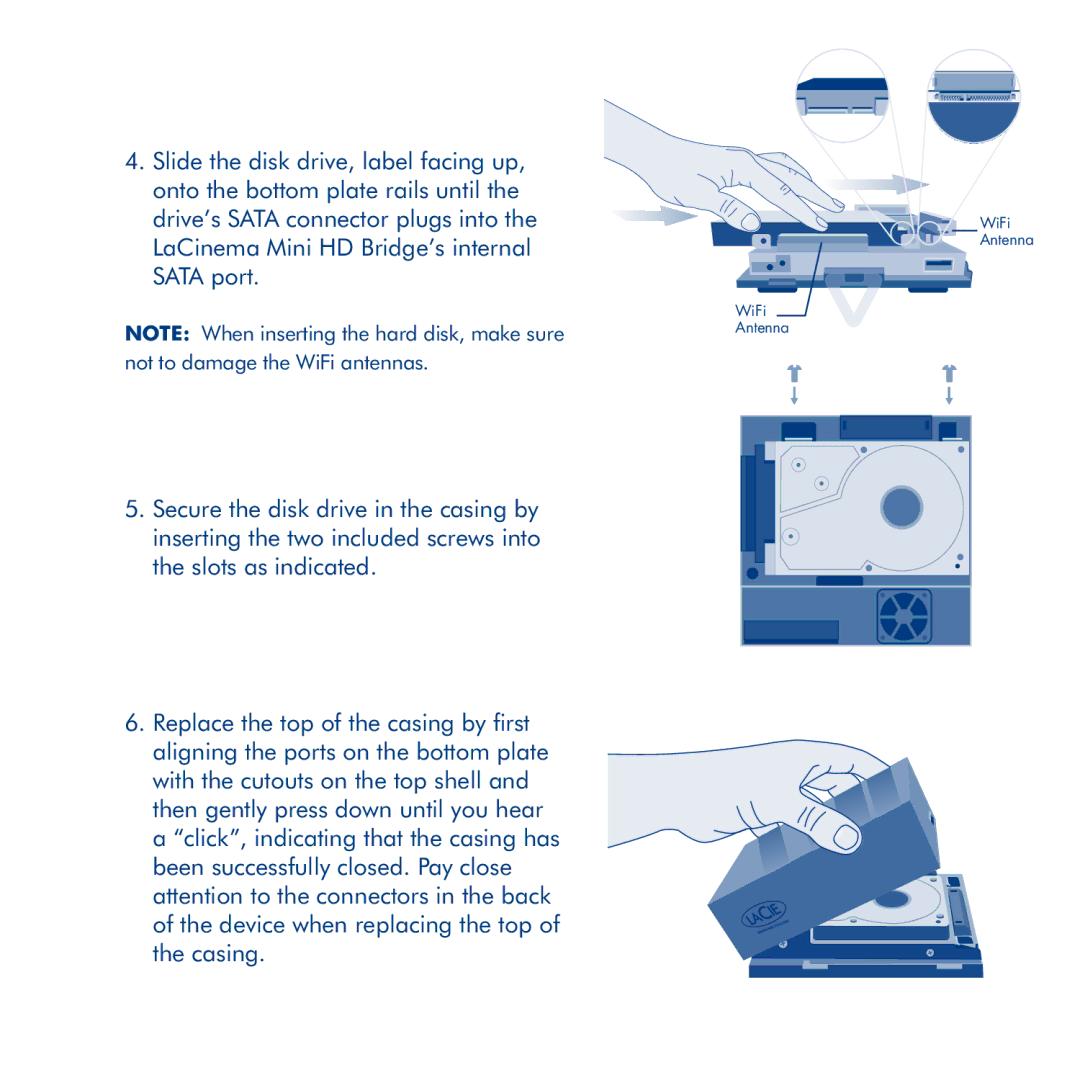
4.Slide the disk drive, label facing up, onto the bottom plate rails until the drive’s SATA connector plugs into the LaCinema Mini HD Bridge’s internal SATA port.
NOTE: When inserting the hard disk, make sure not to damage the WiFi antennas.
5.Secure the disk drive in the casing by inserting the two included screws into the slots as indicated.
6.Replace the top of the casing by first aligning the ports on the bottom plate with the cutouts on the top shell and then gently press down until you hear a “click”, indicating that the casing has been successfully closed. Pay close attention to the connectors in the back of the device when replacing the top of the casing.
WiFi
Antenna
WiFi
Antenna
