
2744 specifications
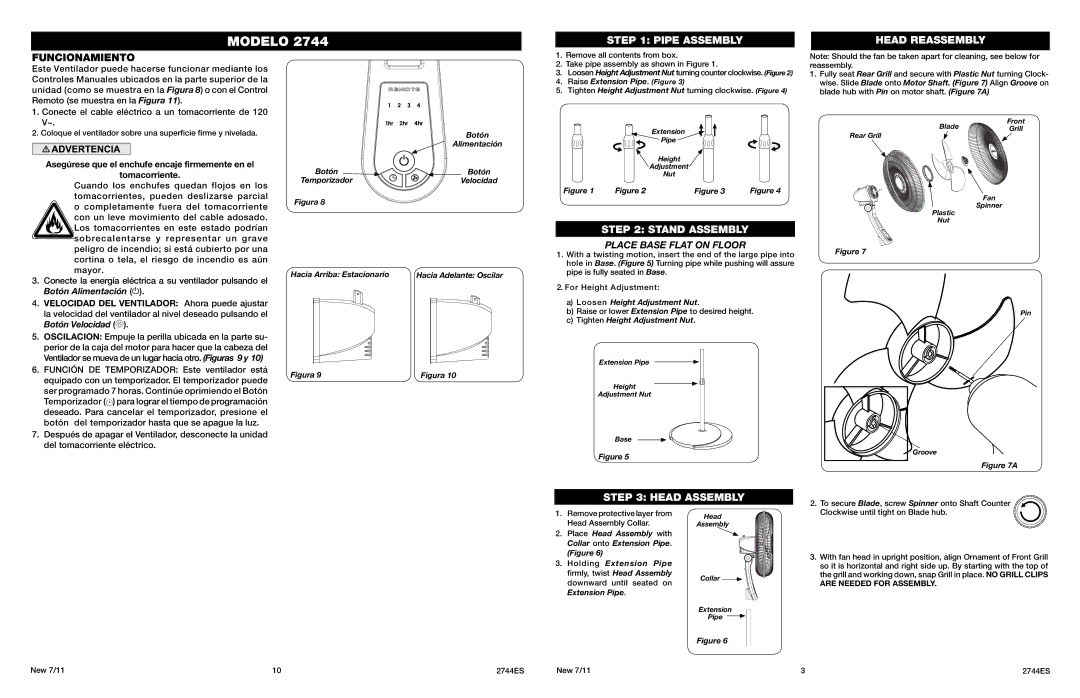
The Lasko 2744 is a versatile and powerful oscillating tower fan designed to provide efficient airflow and a refreshing breeze in various settings. With its sleek and modern design, it seamlessly fits into any room’s decor while delivering exceptional performance.One of the standout features of the Lasko 2744 is its three quiet speed settings. Users can choose between low, medium, and high speeds depending on their cooling needs. Whether you want a gentle airflow for a peaceful night’s sleep or a stronger breeze during a hot summer day, this fan caters to all preferences. The quiet operation is particularly advantageous for bedrooms, offices, or any area where noise levels need to be minimized.
The Lasko 2744 also boasts an oscillation feature that allows for widespread cooling. By oscillating side to side, this fan distributes air more effectively across a larger area, making it an ideal choice for living rooms, kitchens, and other spacious environments. The adjustable height feature adds another layer of versatility, enabling users to direct airflow where it’s needed most.
Safety is a top priority in any household appliance, and the Lasko 2744 does not disappoint. With a built-in safety plug that automatically cuts power in the event of a short circuit, users can have peace of mind knowing that they are using a fan with safety measures in place. The fan's sleek design also incorporates a sturdy base, which helps prevent tipping and enhances stability during operation.
Another appealing characteristic of the Lasko 2744 is its lightweight build, making it easy to move from one room to another. Whether you take it to the living room for family gatherings or use it in the bedroom for nighttime comfort, its portability ensures that you can enjoy cool air wherever you need it most.
In summary, the Lasko 2744 oscillating tower fan is a formidable option for anyone seeking a reliable cooling solution. With its three-speed settings, oscillation for widespread air distribution, safety features, and convenient portability, it stands out as an excellent choice to enhance indoor comfort. Whether battling the summer heat or circulating air in a room, the Lasko 2744 delivers efficiency and style, making it a valuable addition to any home.