Initial Settings

In this menu system, there are several ways to customize the settings provided. Most menus consist of three levels to set up the options, but some require greater depth for the variety of settings.

General Operation

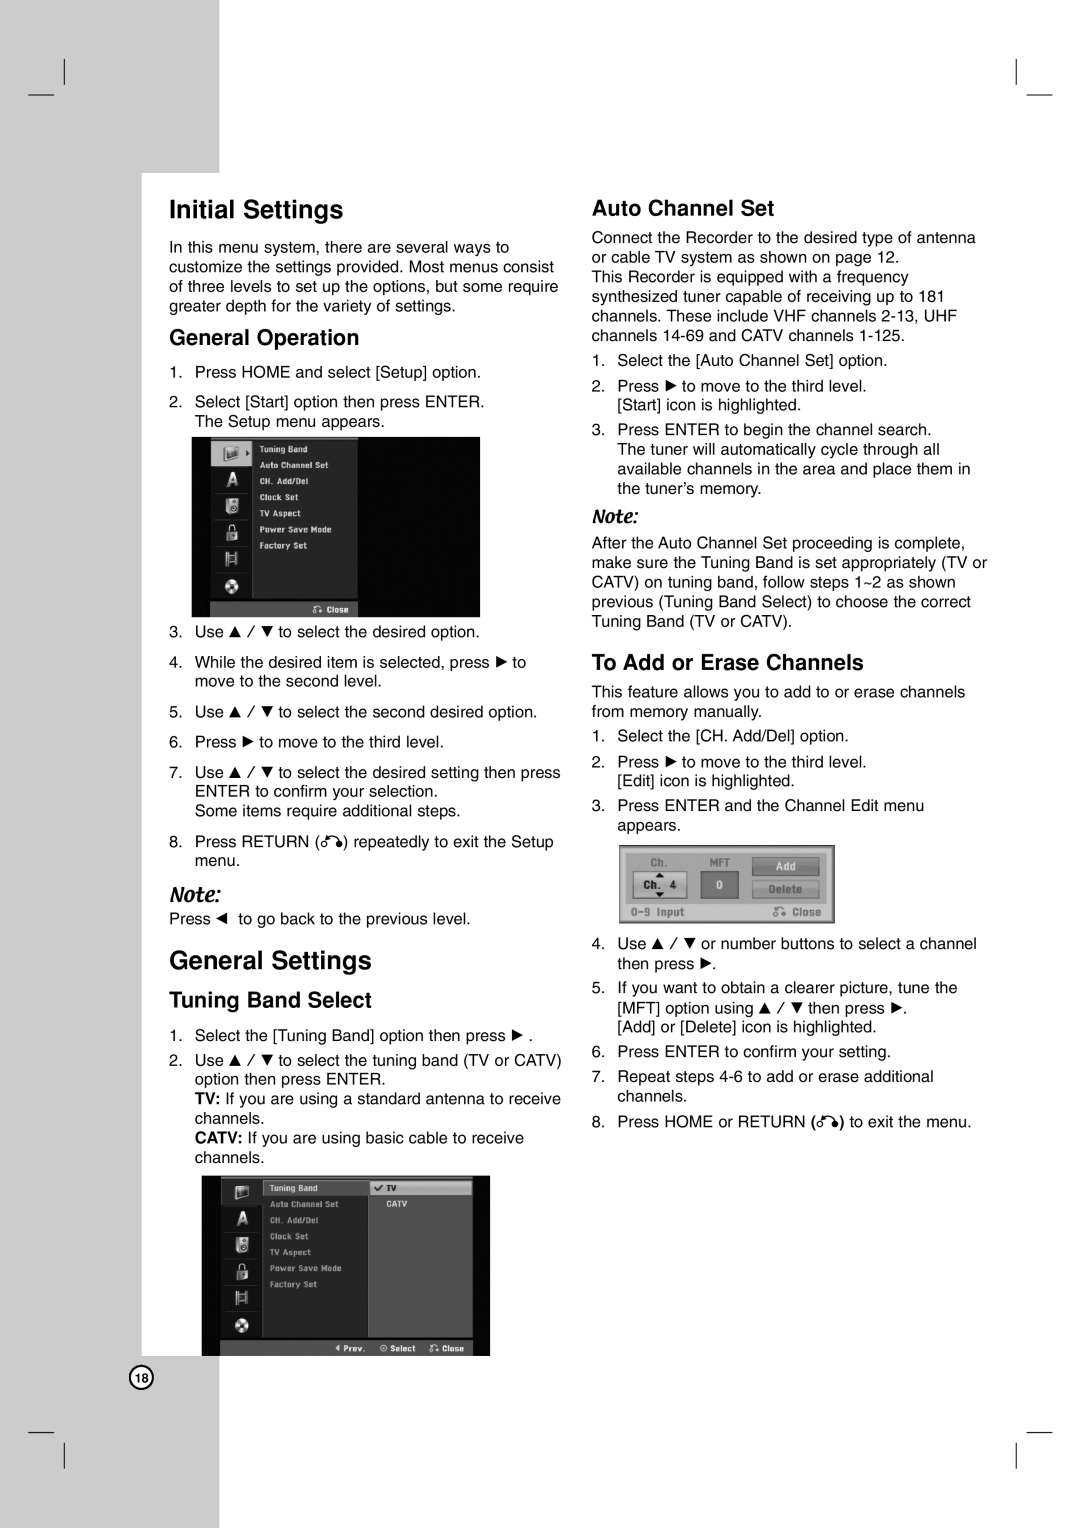
1.Press HOME and select [Setup] option.

2.Select [Start] option then press ENTER. The Setup menu appears.

3.Use v / V to select the desired option.

4.While the desired item is selected, press B to move to the second level.

5.Use v / V to select the second desired option.

6.Press B to move to the third level.

7.Use v / V to select the desired setting then press ENTER to confirm your selection.

Some items require additional steps.

8.Press RETURN (O) repeatedly to exit the Setup menu.

Note:

Press b to go back to the previous level.

General Settings

Tuning Band Select

1.Select the [Tuning Band] option then press B .

2.Use v / V to select the tuning band (TV or CATV) option then press ENTER.

TV: If you are using a standard antenna to receive channels.

CATV: If you are using basic cable to receive channels.

Auto Channel Set

Connect the Recorder to the desired type of antenna or cable TV system as shown on page 12.

This Recorder is equipped with a frequency synthesized tuner capable of receiving up to 181 channels. These include VHF channels 2-13, UHF channels 14-69 and CATV channels 1-125.

1.Select the [Auto Channel Set] option.

2.Press B to move to the third level. [Start] icon is highlighted.

3.Press ENTER to begin the channel search. The tuner will automatically cycle through all available channels in the area and place them in the tuner’s memory.

Note:

After the Auto Channel Set proceeding is complete, make sure the Tuning Band is set appropriately (TV or CATV) on tuning band, follow steps 1~2 as shown previous (Tuning Band Select) to choose the correct Tuning Band (TV or CATV).

To Add or Erase Channels

This feature allows you to add to or erase channels from memory manually.

1.Select the [CH. Add/Del] option.

2.Press B to move to the third level. [Edit] icon is highlighted.

3.Press ENTER and the Channel Edit menu appears.

4.Use v / V or number buttons to select a channel then press B.

5.If you want to obtain a clearer picture, tune the [MFT] option using v / V then press B.

[Add] or [Delete] icon is highlighted.

6.Press ENTER to confirm your setting.

7.Repeat steps 4-6 to add or erase additional channels.

8.Press HOME or RETURN (O) to exit the menu.

18

Page 18
Image 18
LG Electronics DR1F9M owner manual Initial Settings, General Settings

DR1F9M specifications

LG Electronics has long been a prominent player in the home appliance and consumer electronics markets, and the DR1F9M model exemplifies the company's commitment to innovation and quality. This robust appliance not only integrates cutting-edge technology but also emphasizes user-friendliness, making it an attractive option for modern households.

One of the standout features of the LG DR1F9M is its energy efficiency. Designed with advanced inverter technology, this model consumes significantly less power compared to traditional appliances. This not only saves money on energy bills but also reduces the overall carbon footprint, aligning with today’s eco-conscious values. By embracing sustainability without compromising performance, LG has ensured that the DR1F9M meets the needs of the environmentally aware consumer.

The appliance incorporates smart connectivity features, allowing users to control and monitor the unit remotely via a mobile app. This integration with smart home ecosystems makes it easier for users to manage their household tasks, whether it’s adjusting settings or receiving maintenance alerts. This smart feature is particularly beneficial for busy families, as it streamlines everyday chores and enhances convenience.

Another notable characteristic of the DR1F9M is its spacious interior, designed to optimize storage and accommodate various items with ease. Adjustable shelves and specialized compartments ensure flexibility in organization, making it versatile for different needs. Additionally, its innovative cooling system maintains consistent temperatures, preserving the freshness of stored food longer than conventional models.

The design of the LG DR1F9M also deserves mention. Featuring a sleek and modern aesthetic, it easily fits into any kitchen décor, combining style with functionality. Its durable finish is designed to resist smudges and fingerprints, simplifying maintenance and keeping the appliance looking new even after years of use.

In conclusion, the LG Electronics DR1F9M is a prime example of how technology can enhance everyday home experiences. With its energy-efficient performance, smart capabilities, generous storage space, and elegant design, it caters to the needs of today's consumers while promoting sustainable practices. Whether for a large family or a single user, the DR1F9M stands out as a reliable and efficient choice in the competitive landscape of modern appliances.